Posted on

San Diego Wedding Season: Booking Your Mobile Makeup Artist Early

San Diego Wedding Season

Planning a San Diego wedding involves more than choosing a venue and setting a date. Hair and makeup also need a place in the early planning. The getting-ready location, bridal party size and first photo time all affect the morning schedule.

San Diego’s busy wedding periods make early inquiries especially helpful. Popular dates attract couples planning coastal ceremonies, garden weddings and hotel celebrations. Booking hair and makeup early gives you more time to coordinate the details.

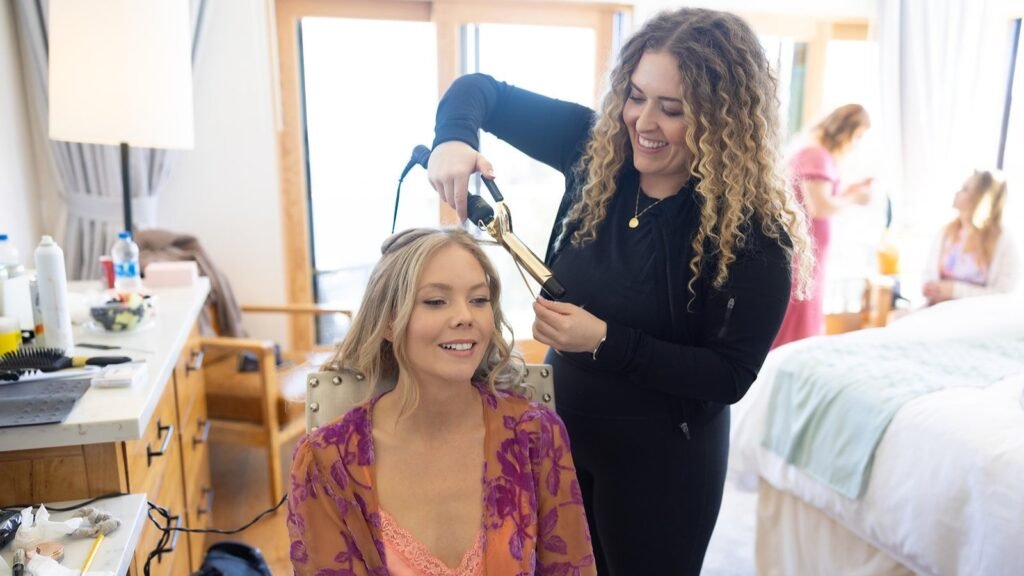
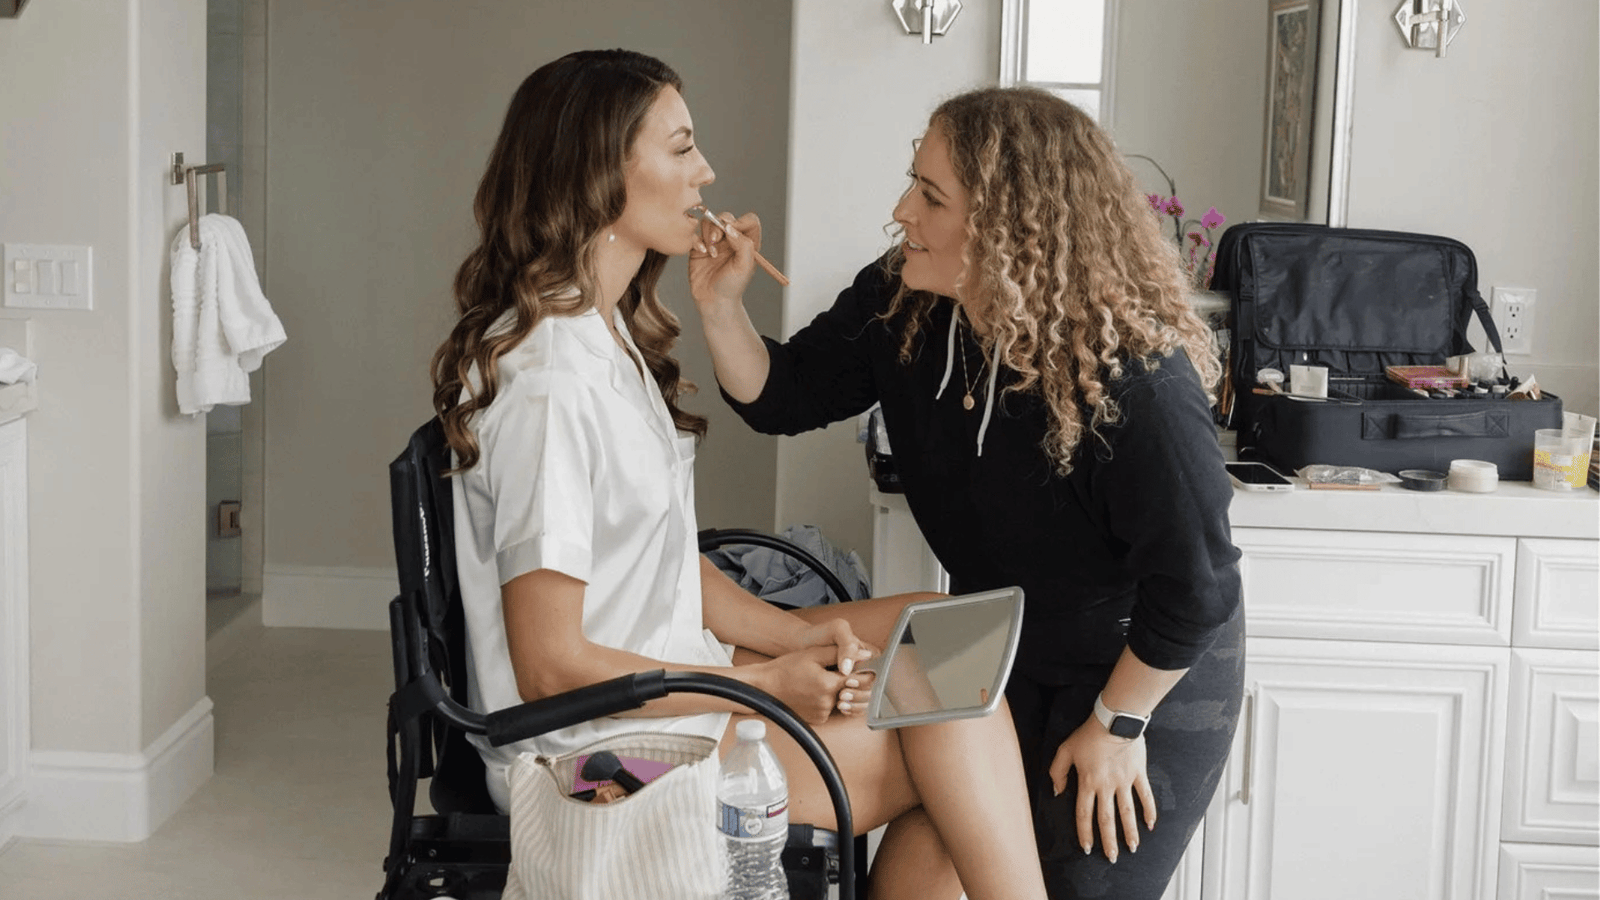
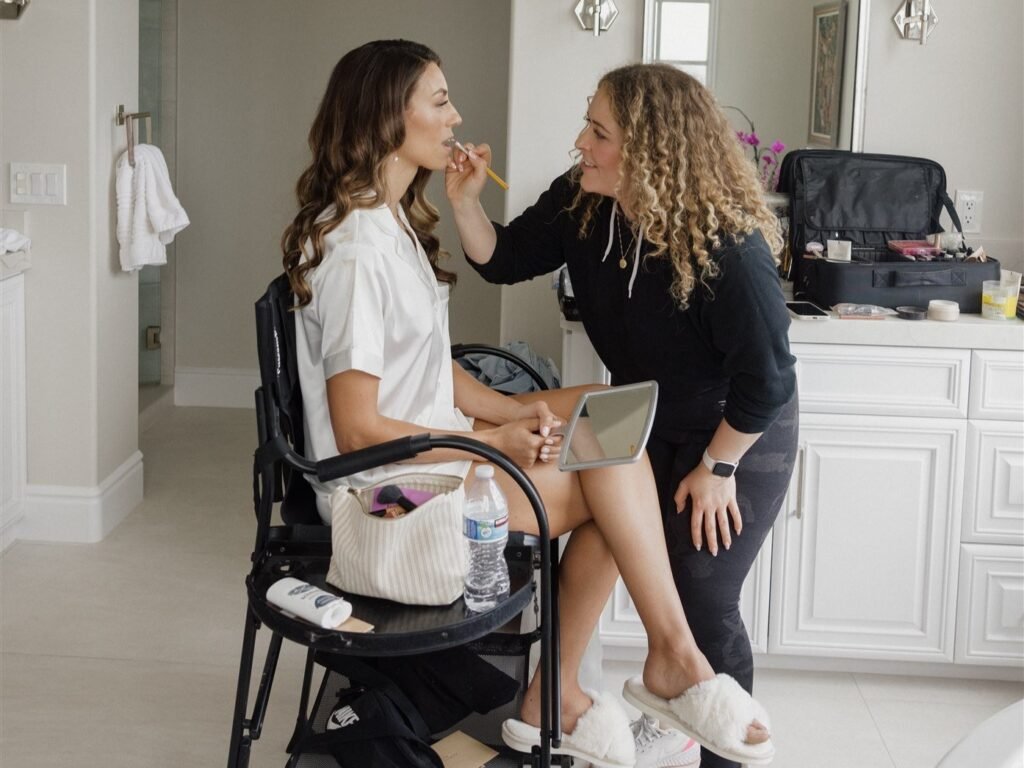
Brittany Brown Beauty provides mobile bridal hair and makeup across Orange County and San Diego. Brittany travels to the getting-ready location and brings suitable lighting for makeup application. The venue, preparation space and wedding schedule all help shape the plan.

Why San Diego’s Peak Season Books Up Fast

Certain dates attract more wedding bookings than others. Coastal weather, guest travel and venue availability all influence these choices.

Coastal Weather and Popular Wedding Dates

San Diego’s coastal climate attracts couples to beaches, bluffs and gardens. However, coastal conditions can change throughout the day. UC San Diego describes a marine stratus layer often called May Gray or June Gloom. It usually occurs from May through June and affects coastal areas. Cloud cover often clears into hazy afternoon sunshine, although conditions vary each year.

Weekends and long weekends also attract couples with traveling guests. These dates make it easier for people coming from other cities to attend. As a result, many couples compete for the same weekends.

Venue Availability and Setting

Each venue can host only a limited number of weddings each weekend. Popular dates can fill quickly, affecting the availability of other wedding vendors. The venue setting also affects the preparation plan.

These San Diego venues offer examples of different wedding settings:

  • Hotel del Coronado: The hotel lists wedding spaces on private sections of Coronado Beach. It also offers a bridal dressing room. Beach weddings bring sea air, wind and strong light into the preparation plan.
  • Scripps Seaside Forum: This oceanfront venue sits steps from La Jolla Shores. Its facilities include a garden plaza. Marine air and changing light can affect hair, makeup and wedding photos.
  • Rancho Valencia in Rancho Santa Fe: The resort offers lawns, a rose garden and a courtyard for ceremonies. These garden settings bring shade, dappled light and changing outdoor conditions.

The preparation plan should also account for the type of venue:

  • Coastal: Wind, sea air and strong sunlight can affect makeup finish and hairstyle hold.
  • Inland: Temperature and available shade are worth checking.
  • Hotel: Shared rooms and suites require coordination around access and preparation times.
  • Private estate or rental: Available space, lighting and access depend on the property. Photos of the preparation area can help the artist plan.
  • Garden: Shade and dappled sunlight can change how makeup looks outdoors. Check the makeup in lighting similar to the ceremony setting.

Each property has its own spaces, rules and schedule. The preparation plan should reflect the actual venue and getting-ready location.

Coordinating With Other Wedding Vendors

Photographers, planners, florists and hair and makeup artists may need the same room. Their schedules can overlap during the morning. A clear preparation schedule helps everyone work around the available space. Hair and makeup timing also affects when photos and other tasks can begin.

Understanding the Booking Timeline

Check hair and makeup availability while the venue and schedule are still taking shape. Confirming the venue date does not secure an artist. Party size, travel and preparation location also affect availability.

Consider a late-afternoon ceremony at a coastal venue. The bridal party may be getting ready at a hotel across town. The schedule needs time for hair, makeup, preparation photos and travel. Each part depends on knowing who is available and when.

When San Diego’s Wedding Season Peaks

San Diego weddings take place throughout the year. Brittany Brown Beauty’s local guidance identifies March through June and September through November as busier periods. These are general patterns, not fixed booking seasons.

Weather also varies by location and date. A coastal ceremony in May may begin under cloud cover. A location just a few miles inland may have brighter skies. Conditions also change from year to year. Avoid basing an outdoor plan on one expected forecast. Ask your stylist how the hairstyle and makeup can suit changing conditions.

How Far in Advance to Secure Your Date

Brittany recommends booking a mobile artist six to twelve months ahead. This is especially helpful during San Diego’s busier wedding periods. Treat this timeframe as general guidance, not a deadline. Availability depends on the date and other booking details.

Earlier inquiries can help in several situations:

  • Popular weekends and holiday dates: More couples may want the same wedding dates.
  • Large bridal parties: More people need preparation time. The schedule also has less room for delays.
  • Well-known venues: Popular venues may book early. Vendors working those dates may also receive more inquiries.
  • A separate getting-ready location: The schedule needs to include travel between the preparation space and ceremony venue.
  • Travel between Orange County and San Diego: Longer journeys require additional planning. Discuss the locations early.

Contact the artist once your date and location are confirmed. You do not need a complete wedding schedule before making an inquiry. The article on how far in advance to book hair and makeup in Orange County offers more booking advice.

What Happens If You Book Late

Waiting too long can limit your choices. Your preferred artist may already have another booking. Larger bridal parties can also be harder to accommodate. Travel, preparation time and ceremony schedules need to fit together. A shorter planning window leaves less room for changes.

However, a late inquiry does not always mean no artist is available. Some dates may still be open. Smaller parties may also fit more easily into an artist’s schedule. Ask about your date before ruling out your preferred artist. Brides traveling from elsewhere can read about booking a bridal trial as an out-of-town bride.

Why Mobile Artists Are in Especially High Demand This Season

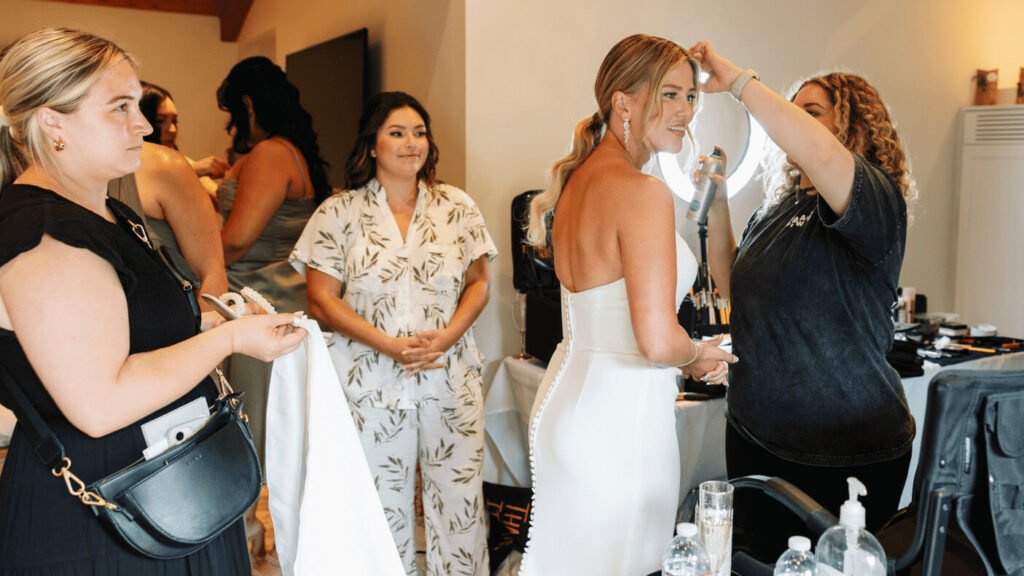
San Diego weddings often involve several locations throughout the day. The bridal party may get ready at a hotel or private rental before traveling to the venue. A mobile artist can provide hair and makeup at the preparation location.

  • Getting ready where the bridal party stays: Brittany travels to hotels, venue suites, private homes and rental properties. The bridal party can prepare at its chosen location.
  • No salon trip before the ceremony: The group can stay together instead of making another journey before photos and the ceremony.
  • Suitable lighting for makeup: Brittany brings lighting for makeup application. This reduces reliance on the room’s existing lights. Some hotel rooms and venue suites have limited or uneven lighting. A single window or overhead fixture can create unwanted shadows. Other rooms may already have suitable lighting. Bringing additional lighting gives the artist another option. The article on how wedding lighting affects bridal makeup explains the difference.
  • A schedule built around the wedding day: Arrival, preparation, styling and finishing times can account for photos and the ceremony.
  • Planning for coastal conditions: Humidity, sea air and wind can affect makeup and hairstyle hold. The article on bridal makeup for windy coastal ceremonies offers related advice.
  • A suitable preparation location: The schedule should account for travel time, access and parking. These details matter when the preparation space differs from the ceremony venue.

Mobile service removes the need for a separate salon visit. However, travel times, room conditions and weather can still affect the schedule. Leave enough time for these details when planning the morning.

You can view examples of Brittany’s work in the Bridal Hair and Makeup Portfolio. Brittany has worked in the makeup industry for more than 11 years. Her About Brittany page shares more about her background.

Planning a San Diego Wedding?

Share your wedding date, venue, getting-ready location and approximate bridal party size with Brittany. These details help her discuss the arrangements and check availability. Brittany provides mobile bridal hair and makeup across San Diego, Orange County and surrounding areas. Click the button below to schedule a consultation online.

Frequently Asked Questions

1. What makes San Diego wedding season different from other Orange County venues?

Neither area is one uniform market. Both offer beaches, gardens, hotels and estates, so the differences come from specific venues more than county lines. San Diego examples include beach ceremonies on Coronado and oceanfront spaces in La Jolla. Orange County wedding venues include resorts such as Pelican Hill. They also include garden settings such as Sherman Library and Gardens in Corona del Mar. Travel and preparation logistics differ by venue. Read about bridal makeup at the Resort at Pelican Hill for an Orange County example.

2. How far in advance should I book for San Diego wedding season?

Brittany’s guidance is 6 to 12 months ahead for busier periods. Think of it as guidance, not a cutoff. Popular dates, large parties and well-known venues call for earlier inquiries. Dates fill at different rates, so ask about yours.

3. Does the venue affect my makeup or hair plan?

Yes. Lighting in the getting-ready space, the room itself, coastal exposure, ceremony timing and travel between locations all shape the plan. A beachfront ceremony may call for different hold and finish choices than an indoor ballroom. Read how your wedding venue influences your bridal hairstyle for hair examples.

4. Can a mobile makeup artist get ready with the bridal party at a hotel or private home?

Yes. Mobile service means the artist comes to you. That might be a hotel room, a venue suite, a home or a rental. Access, space and parking vary by location, so confirm them with the hotel or host. Share the location in your inquiry so the arrangements can be discussed.

5. Should I book my bridal makeup artist before finalizing the wedding-day timeline?

Yes. Availability depends on your date and location, not on a final timeline. Early contact lets the schedule form around the artist’s calendar, the party size and the ceremony start. The plan can adjust as details settle. The wedding day beauty timeline shows how the morning typically fits together.
Posted on

Side-Swept Bridal Hairstyles for Asymmetrical Necklines

Side-Swept Bridal Hairstyles

An asymmetrical neckline draws the eye along a diagonal line. A one-shoulder gown leaves one shoulder bare and covers the other. A diagonal neckline cuts across the chest. The hairstyle can follow that line rather than compete with it.

Side-swept bridal hairstyles can work particularly well with these gowns. Hair swept to one side frames the face and keeps more of the neckline visible. The style also adds balance without hiding the dress. The best option depends on the gown, hair length, venue and formality of the wedding.

Brittany Brown Beauty provides mobile bridal hair and makeup across Orange County, San Diego and surrounding areas. Brittany styles hair at the getting-ready location. This allows her to consider the dress and setting when planning the hairstyle.

Why Asymmetrical Necklines Pair Well With Side-Swept Hair

An asymmetrical neckline creates movement across the upper body. A single strap, sloping line or one sleeve draws attention across the dress. The hairstyle should complement that detail without hiding it.

Sweeping hair to one side can follow the neckline’s direction. It also frames the face and leaves more of the neckline visible. The bare shoulder, collarbone and strap details remain easier to see.

However, a side-swept style does not suit every asymmetrical gown. Some dresses need a different arrangement:

  • Detail on the shoulder or strap: Beading, draping or lace can disappear behind swept hair. Moving the hair to the opposite side may keep these details visible.
  • A sculptural dress: A structured sleeve or dramatic neckline already creates visual interest. A large sweep can make the overall look feel too heavy.
  • Hair that resists a sweep: Some lengths and textures struggle to hold a one-sided style comfortably. Another hairstyle may work better.

A consultation or trial can help determine which arrangement suits the gown. The guide to choosing the right bridal hairstyle for your wedding day offers more advice.

Building the Look

Volume, hold and accessories all affect the finished hairstyle. Each choice should work with the gown rather than hide its details.

Balancing Hair Volume With Neckline Shape

The amount of volume on one side can change the overall balance. Too much hair may crowd the neckline. Too little may make the style look unfinished. Consider these details when choosing the hairstyle:

  • Soft waves or a structured updo: Soft side-swept waves suit relaxed fabrics and informal settings. A low twisted bun gathered to one side may suit a sleek or formal gown.
  • Neckline details: Keep hair away from beading, draping and embellished straps. A lighter arrangement can leave these details visible.
  • Length, thickness and texture: Longer hair offers more length for sweeping. Fine hair may need extra support to hold volume. Thick or curly hair behaves differently from straight hair.
  • Which side the hair falls on: Hair over the bare shoulder adds coverage and softness. Sweeping it to the opposite side leaves the shoulder and collarbone exposed.

Consider a one-shoulder gown with a simple neckline. Waves over the bare shoulder can soften the exposed area. A gown with a beaded strap may need hair swept away from that detail.

The wedding’s formality also affects the choice. A formal evening wedding may suit a polished, structured sweep. A garden or beach ceremony may call for looser waves. Your preferred style should also guide the decision.

Hair texture can affect the amount of volume a style needs. The guide to bridal hairstyles for fine or thin hair explains how different techniques support volume. The finished style should suit your natural hair and the gown.

Securing Side-Swept Styles for the Day

A side-swept hairstyle carries more weight on one side. The foundation needs to support that weight throughout the wedding day.

Brittany prepares and styles the hair at the getting-ready location. Hair length, texture and the bride’s preferred finish all affect the process. Pin placement and the wedding schedule also matter.

  • Hair assessment: The stylist checks the hair’s length, texture and natural movement. Hair that holds curls easily needs different preparation from hair that loses them quickly.
  • Foundation and pin placement: A secure base supports the heavier side. Pins placed around the gathered section help maintain the sweep’s direction.
  • Ceremony and reception: Hugging, dancing, travel and veil removal can disturb the hairstyle. The style needs enough support for the planned schedule.
  • Finishing and setting: Suitable finishing products help the hair hold its shape. However, they cannot prevent every change throughout the day.

Coastal weddings in Southern California can bring humidity and wind. Humidity may loosen curls or cause frizz. Wind can also disturb loose waves swept over one shoulder. A partly pinned or more structured style may work better at exposed venues.

The guide to updo vs. down hairstyles for windy coastal venues compares these options. Share your venue and wedding schedule during the consultation. This helps the stylist plan for the conditions and activities. You can also learn more about Brittany’s work on the About Brittany page.

Choosing Hair Accessories

Hair accessories can complement both the hairstyle and the neckline. Their placement matters as much as their design.

  • A comb or decorative pin: Place a comb near the gathered hair to secure the sweep. A pin on the opposite side can balance the overall look.
  • Small floral details: Small flowers along the sweep can suit softer gowns and informal weddings. Keep them subtle around lace or beading.
  • Delicate pins: Fine pins add detail without much bulk. They work well with dresses that already have embellishments.
  • Veils: Position the veil below or behind the gathered hair. This keeps the side-swept shape visible. The veil placement guide for every bridal hairstyle explains different options.

A large comb beside an embellished shoulder may create too much detail in one area. Placing it on the opposite side can balance the look. The accessory does not need to sit where the hair gathers. The guide to bridal hair accessories covers combs, pins and tiaras.

Pairing the Hairstyle With Your Dress Silhouette

The dress silhouette also affects how much volume the hairstyle needs. A side-swept style can look different with each gown shape. These suggestions offer a starting point:

  • Fitted gowns: Sleek waves or a low side-swept bun can suit a close-fitting dress. Too much volume may make the overall look feel heavy.
  • A-line dresses: This balanced silhouette works with moderate volume. Relaxed waves or a soft side-swept bun can complement the skirt.
  • Fuller skirts: A full skirt creates more volume below the waist. Fuller waves or a structured hairstyle can balance the proportions.

A fitted one-shoulder gown with minimal embellishment may suit a low side-swept bun. One small comb can add detail without distracting from the neckline. A ball gown with a diagonal neckline may suit fuller waves and a longer veil. The choice still depends on the bride’s preferences.

Consider how the hairstyle looks from behind too. Guests will see the back of the dress during the ceremony. A gathered side style can leave the nape and back neckline visible. Loose waves may cover some of those details. Both options can work, depending on the dress.

Bring dress photos to your bridal hair consultation. Include front and back views, plus a close-up of the neckline. Strap placement, seams and beading can affect where the hair sits. These details help the stylist plan around the actual gown. You can find more wedding hair ideas in the Bridal Hair and Makeup Portfolio.

Planning Your Wedding-Day Hairstyle?

Share your wedding date, venue, dress neckline and preferred hairstyle with Brittany. These details help her discuss your look and check availability. Brittany provides mobile bridal hair and makeup across Orange County, San Diego and surrounding areas. Click the button below to schedule a consultation online.

Frequently Asked Questions

1. How long do side-swept bridal hairstyles for asymmetrical necklines typically take on wedding morning?

No standard duration applies. Timing depends on hair length, thickness, texture, the complexity of the style and the overall bridal styling schedule. A structured updo with accessories takes different time than loose waves. Share your hair details and the style you want, and Brittany can fit the time into the morning’s plan.

2. Will side-swept bridal hairstyles for asymmetrical necklines hold up in Southern California humidity?

It depends on the hair and the day. Humidity, sea air and wind affect hair types differently. Loose waves tend to need more attention than structured styles. Preparation, a secure foundation and suitable hold all help. No style can promise a fixed result in every condition. Read about bridal hairstyles that hold up in Southern California humidity for more.

3. What accessories pair well with side-swept bridal hairstyles for asymmetrical necklines?

Combs, decorative pins, small florals and veils all work. Place a comb or pin where the hair is gathered, or on the opposite side to balance it. Simpler pieces suit heavily embellished necklines. Choose placement based on the dress, not on matching the hair’s side.

4. Do side-swept hairstyles work with shorter hair?

They can, depending on length and texture. Shorter hair may be styled into a side part with swept waves, pinned on one side with a comb. Very short hair may sweep less. The article on bridal hairstyles for short hair brides shows more options.

5. Can a veil be worn with a side-swept style?


Usually, yes, as long as its position is planned carefully. For example, a shorter veil may sit at the back. A longer veil, however, may need an anchor point that keeps the gathered area clear. The right placement depends on the veil length, hairstyle and neckline. Bring the veil to your consultation so Brittany can plan its position with the hairstyle.

Posted on

Hydration and Your Wedding Day Skin: What Actually Helps

Hydration and Your Wedding Day Skin

Dry areas around the nose, mouth, and cheeks can affect how foundation sits. Makeup may cling to flaky patches or look uneven when skin feels tight. Preparing the skin beforehand can help create a more comfortable surface for makeup. Hydration is one part of that preparation.

Wedding skin preparation does not require an entirely new routine. Familiar products and consistent habits are usually more helpful than last-minute changes. The aim is to keep skin comfortable without introducing unnecessary products. Skincare can support makeup application, but it cannot guarantee a particular complexion.

Brittany Brown Beauty provides mobile bridal hair and makeup in Orange County, San Diego, and surrounding areas. As an Orange County bridal makeup artist, Brittany considers each bride’s skin condition when planning her makeup. Hydration, moisturizer, and everyday skincare habits can all affect how foundation applies and wears.

Why Internal and Topical Hydration Both Matter

Drinking fluids and applying moisturizer serve different purposes. Regular fluid intake supports normal hydration, while moisturizer helps address surface dryness. Neither replaces the other.

  • Regular fluid intake: Drinking fluids throughout the day supports normal hydration. Consistent habits are more useful than suddenly drinking extra water before the wedding.
  • Topical moisturizer: Moisturizer helps reduce surface dryness and the feeling of tightness. It also affects how foundation sits on the skin.
  • Skin preparation: A familiar skincare routine helps maintain the skin’s usual condition. This gives the makeup artist a better starting point when choosing products and techniques.

Drinking extra water immediately before the wedding does not guarantee a particular makeup result. A sudden increase in water intake cannot promise smoother skin by the following morning. Individual needs also vary. Your existing routine offers a better indication of how your skin responds.

Skin preparation can affect the finished makeup. A comfortable surface can help foundation apply more evenly. Dry patches may require extra blending, while heavily moisturized areas may need less product. The artist can adjust the application, but preparation helps establish a suitable base.

Skin type also influences these decisions. Dry cheeks and an oily T-zone may need different preparation. Products that work well on one area may not suit another. The article on bridal makeup for oily, dry and acne-prone skin explains how skin condition affects makeup choices.

What Actually Helps Before the Wedding

Regular hydration, familiar skincare, and avoiding unnecessary product changes are three useful habits. None requires an elaborate routine.

Starting early gives you more time to maintain these habits. A bride with 12 months before her wedding can establish a routine well ahead of the event. Someone with three months can still follow the four-week preparation routine and the 10-day guideline. The important part is avoiding sudden changes close to the wedding.

Water Intake in the Final Week

The aim is to maintain normal hydration habits rather than suddenly drinking more water. Brittany recommends staying hydrated during the week before the wedding, particularly during summer.

  • Drink fluids regularly. Spread your usual fluid intake throughout the day. Drinking large amounts the night before does not replace consistent habits.
  • Keep familiar routines. Travel, family visits, and wedding events can disrupt everyday schedules. Try to maintain your usual habits during this busy period.
  • Avoid sudden changes. Extreme adjustments to your routine offer no guaranteed makeup benefit. Stick with habits that already work for you.
  • Keep expectations realistic. Drinking water alone cannot resolve every skin concern. Dry patches, redness, and texture may still need consideration during makeup application.

Wedding week can involve travel, rehearsals, family gatherings, and long days. Maintaining familiar hydration and skincare habits helps keep preparation consistent. It also makes trial results easier to compare with your skin’s usual condition.

There is no single daily water intake that suits everyone. Individual needs vary, so consult a healthcare professional if you need guidance.

Layering Hydrating Skincare

A familiar skincare routine is usually enough. The goal is skin that feels comfortable before makeup, not several layers of products.

  • Cleanse gently. Use a cleanser your skin already tolerates. Harsh cleansing can leave the skin feeling tight or dry.
  • Apply a familiar moisturizer. Choose a product you have used without problems. Regular use can help reduce the feeling of surface dryness.
  • Keep your routine consistent. Familiar products make it easier to notice how your skin responds. See how to prepare your skin 30 days before your wedding for more preparation advice.
  • Allow skincare to settle. Give moisturizer time to absorb before makeup application. Products that remain wet or tacky may affect how foundation blends.
  • Avoid excessive layering. Applying several serums, oils, and creams can leave the skin too slick. More products do not automatically improve hydration.
  • Pay attention to your skin’s response. If your skin feels tight, review your usual moisturizer routine. If it feels greasy or heavy, avoid adding unnecessary layers.

Different skincare habits can affect the makeup application:

  • Dry areas: Patches around the nose and cheeks can cause foundation to cling or look uneven. Consistent use of a familiar moisturizer may help the skin feel more comfortable. Read about skin prep for dry or flaky patches before your wedding.
  • Excess product: Too many skincare layers can cause pilling. This happens when products roll into small flakes as makeup is applied.
  • Heavy moisturizer: Applying a rich cream immediately before makeup may leave a slick surface. Foundation can slide, and powder may not sit evenly.

No specific moisturizer works for everyone. Skin needs and product preferences differ. A familiar product that your skin already tolerates is often a sensible choice before the wedding.

Avoiding Dehydrating Habits Before the Day

Some habits can leave skin feeling dry or uncomfortable. Their effects vary from person to person, but last-minute changes can make skin harder to prepare for makeup. Keep your routine familiar in the weeks before the wedding.

  • Avoid unfamiliar or aggressive skincare treatments close to the wedding. They can change how skin looks and feels. Those changes may not settle before the event.
  • Do not over-cleanse or repeatedly exfoliate. Frequent washing and exfoliation can leave skin feeling dry or rough. These areas may also be harder to cover evenly.
  • Keep your usual routine. A skincare routine that works does not need a wedding-week upgrade.
  • Avoid trying several new products at once. If your skin changes, it becomes difficult to identify which product caused the difference.
  • Follow the 10-day guideline. Brittany recommends avoiding new skincare products during the final 10 days before the wedding.

Not every product change causes a reaction or visible problem. The aim is to avoid unnecessary uncertainty before the wedding. If you want to change your routine, make those decisions well in advance. Keep your products and habits consistent during the final four weeks.

What Hydration Can’t Fix Last-Minute

Hydration supports general skin comfort, but it cannot resolve every skin concern overnight. A few limitations are worth keeping in mind:

  • Drinking extra water the night before will not change your skin overnight. Consistent habits matter more than a sudden increase in fluid intake.
  • New products can create uncertainty close to the wedding. Changes in skin appearance or comfort may be difficult to trace back to one product.
  • Heavy moisturizer cannot correct every dry or textured area. Too much product can leave skin slick and affect how foundation applies.
  • Natural skin texture will still be visible. Makeup can soften its appearance, but heavy coverage may make texture more noticeable.

Brittany’s approach is to enhance natural features rather than mask them. That includes working with the skin’s natural texture instead of covering it with unnecessary product. Her background and experience of more than 11 years are available on the About page.

A bridal makeup trial gives you time to see how products sit on your skin. It also allows you to discuss preparation, comfort, and your preferred finish. Keep these points in mind before your appointment:

  • Maintain familiar skincare habits. Keep your usual routine during the four weeks before the wedding.
  • Disclose known sensitivities and previous product reactions. Mention any recent skincare treatments as well.
  • Avoid new skincare products. Follow Brittany’s recommendation during the final 10 days before the wedding.
  • Discuss your preferences during the trial. Talk about product comfort, skin preparation, coverage, and the finish you want.

Brittal makeup trials are typically booked two to four months before the wedding. A trial is strongly recommended, although it is not required. It helps assess product comfort and makeup appearance, but it cannot guarantee that a reaction will not occur later. These preparation steps cannot guarantee that either.

Read what happens during a bridal makeup trial for more details about the appointment.

Your preferred finish also affects makeup preparation. Some brides like a dewy appearance, while others prefer a matte finish. Skin condition and product choice influence both results. The comparison of dewy vs matte bridal makeup can help you decide what to discuss at your trial.

Planning Your Bridal Makeup Trial?

Your wedding date, venue, and current skincare routine are useful starting points when discussing bridal makeup. Mention any known sensitivities or previous product reactions too. These details help Brittany understand your preferences and plan the makeup consultation.

Brittany provides mobile bridal hair and makeup across Orange County, San Diego, and surrounding areas. You can view examples of her work in the portfolio or click the button below to schedule a consultation online.

Frequently Asked Questions

1. When should I start prepping for hydration and your wedding day skin?

Follow a consistent routine for at least the four weeks before the wedding. If you have several months, settle on your routine early and keep it. Maintain normal hydration habits through the final week. Leave new products out of the last 10 days. The 90-day skin prep countdown lays out a longer timeline.

2. What should I avoid in the days leading up to my wedding?

Avoid new skincare products in the final 10 days. Skip unfamiliar or aggressive treatments, over-cleansing and repeated exfoliating. Do not stack many products or change a routine that works. Do not rely on a burst of extra water the night before.

3. What should I bring up with my artist about hydration and your wedding day skin?

Mention known sensitivities, previous product reactions and any recent treatments. Describe your current routine and how your skin usually feels, such as dry, oily or tight. Share the finish you prefer too. The list of what to bring to your bridal makeup trial covers the practical items.

4. Can drinking more water improve how foundation looks?

Normal hydration supports general comfort, but extra water does not guarantee a particular result. Foundation depends on skin preparation, natural texture, product choice and application. Drink water regularly, as you usually do. Water cannot resolve every skin concern.

5. Should brides change their skincare routine before a makeup trial?

Generally no. Use your usual routine so the artist sees how makeup sits on your skin as it normally is. If you want to change something, mention it to your artist first. The trial is the time to discuss skin preparation, product comfort and finish.

Posted on

Sustained Durability: Makeup That Holds Up Through Long Shoot Days

sustained durability makeup

The first makeup check looks good. The skin looks even, shine is controlled, and the creative director approves the frame. Five hours later, the conditions have changed. The talent has completed several takes, changed outfits, and spent hours on location. Foundation has started separating around the nose. The forehead reflects more light, and a close-up reveals texture that went unnoticed in wider shots.

A good application at call time does not guarantee the same result later. Makeup for long production days needs to account for lighting, movement, heat, and repeated camera checks. It also needs careful touch-ups as the day progresses.

Brittany Brown Beauty provides commercial and editorial makeup services across Orange County, San Diego, and surrounding areas. As a commercial makeup artist in Orange County, Brittany works on lifestyle campaigns, editorial shoots, and commercial productions. Her work includes both studio and outdoor settings. The following tips cover skin preparation, product layering, pigment control, shine, texture, and touch-ups. A sample production day also shows how these techniques work in practice.

You can learn more about Brittany’s approach to commercial makeup for photoshoots and her experience on the About page. She has more than 11 years of experience in the makeup industry.

Why Durability Is a Different Challenge On-Set Than at a Wedding

Weddings and production days both require makeup to last. However, the demands of a commercial shoot are different. The camera captures the same face repeatedly, often under changing lights and camera angles. Six factors affect how the makeup performs:

  • Repeated filming and photography: Stills and video capture the same face throughout the day. Small changes become noticeable when frames from different hours appear together.
  • Close-up shots: Tight framing reveals uneven blending, product buildup, and visible texture. Makeup that looks smooth from a distance may appear heavy on camera.
  • Changing light and camera angles: Soft window light can hide shine that becomes obvious under a hard key light. Closer camera shots also reveal details that wider frames miss.
  • Wardrobe and scene changes: Outfit changes can cause fabric to rub against the face or neck. New setups may also require different lighting and camera positions.
  • Heat, movement, and long hours: Studio lights, direct sunlight, and physical activity can affect makeup throughout the day. Longer gaps between touch-ups give shine and product separation more time to develop.
  • Consistency between scenes: Morning footage and late-day pickup shots may appear in the same final edit. Makeup needs to look consistent across takes, scenes, and camera angles.

Makeup needs to suit the actual shooting conditions, not just the mirror check. A mirror shows the face from one distance and under one type of light. A camera can reveal much more. Where possible, Brittany reviews the lighting setup and shot requirements with the creative director. This helps her prepare makeup for the planned frames.

For more context, read about how commercial makeup differs from bridal and fashion makeup. Each setting has different requirements, so the application needs to reflect the work involved.

Building Makeup That Lasts Throughout the Shoot

Four areas guide makeup application for long production days. Each affects how the finished look appears on camera:

  • Wear time: Thin, controlled layers help makeup wear more evenly during long sessions. They can slow visible breakdown, although no application stays unchanged all day.
  • Shine control: Managing excess shine helps prevent reflections from distracting from the face. The right approach depends on the skin and lighting conditions.
  • Pigment consistency: Foundation, blush, and lip color should remain true to their intended shades. Changes in lighting can affect how these colors appear on camera.
  • Texture control: Careful product selection and blending help reduce the appearance of uneven texture. This matters particularly in close-ups and high-resolution video.

Layering Technique for All-Day Wear

Long-wearing makeup does not require a thick foundation layer. Heavy application can separate, settle into lines, and look obvious in close-up shots. Thin layers give the artist more control over coverage and later adjustments.

The application usually involves several steps:

  • Prepare the skin for the intended finish. Skin condition affects product choice and preparation. Dry and oily areas may need different approaches. Matte and natural satin finishes also require different preparation.
  • Apply complexion products sparingly. Start with a small amount of foundation or complexion product. Add coverage only where the skin needs it.
  • Build coverage gradually. Use additional product for specific concerns, such as redness around the nose or darkness under the eyes. Avoid applying extra coverage across the entire face.
  • Blend the edges carefully. Check the jawline, hairline, and eye area for visible product boundaries. Side lighting and close-up shots can make these areas more noticeable.
  • Set areas that need it. The T-zone and under-eye area may need targeted powder application. Powdering the entire face can remove natural dimension and create a flat finish.
  • Check the makeup under production lighting. Review the application under the planned lights and through the camera when possible. A mirror check alone may not reveal every issue.

When makeup starts fading or separating, adding more product can make the problem worse. Fresh foundation over oil or displaced makeup may sit unevenly. It can also create visible buildup. The artist should first address the affected area, then replace only the coverage that has worn away.

A lighter first application also leaves more room for adjustments. Consider a production with a close-up scheduled after lunch. If the original base is light, the artist can add coverage where needed. A heavy base may require removal and reapplication instead. That takes more time and can interrupt the shoot.

The same approach helps during outdoor productions. Moderate coverage allows the artist to correct specific areas if direct sunlight reveals redness or unevenness. For more application advice, read about long-wear techniques used in commercial makeup.

Strategic Touch-Ups Between Setups

Each touch-up should address a specific change in the makeup. Reapplying products across the entire face can create buildup. It can also make the finish look different between takes. These checks help keep adjustments focused:

  • Check shine and oil buildup. Examine the forehead, nose, and chin under the production lights. Shine that looks minor in person may appear stronger on camera.
  • Blot before applying powder. When oil has collected on the skin, remove it first. Adding powder directly over excess oil can leave the finish uneven.
  • Correct areas where makeup has moved. Heat, friction, and talking can affect makeup around the nose, mouth, and jawline. Correct those areas and blend the edges into the surrounding skin.
  • Refresh lip and eye makeup. Talking and drinking can wear away lip color. Eye makeup may also smudge during a long day. Restore both to match the earlier takes.
  • Check after wardrobe and lighting changes. Clothing, hair, and fabric can disturb makeup or transfer product. Changes to the lighting setup may also reveal areas that need attention.
  • Compare makeup between takes. Check earlier frames or playback before making adjustments. This helps keep the appearance consistent across different shots and angles.

The right touch-up depends on the original application, the subject’s skin, and the production schedule. A short break between takes may allow only a quick correction. A longer lighting change gives the artist more time to check the full application.

Even well-applied makeup changes during a long shoot. The aim is not to prevent every change. It is to keep the appearance consistent with the creative direction.

Product Choices for Long-Duration Shoots

The best products depend on the shoot’s requirements. Before selecting formulas, consider the desired finish, the subject’s skin, the lighting, and the expected shooting time. These factors guide several decisions:

  • Pigment strength and coverage: Highly pigmented products can provide coverage without requiring thick layers. However, they need careful application to avoid harsh edges or uneven color.
  • Finish and lighting: Matte, satin, and dewy finishes respond differently to light. A reflective finish may appear shiny under hard studio lights or direct sunlight. Softer lighting can make a luminous finish easier to manage.
  • Wear and touch-up compatibility: Products should hold up during filming and remain easy to correct. Formulas that become heavy when reapplied can create problems later in the day.
  • Targeted setting products: Use powder and other setting products where they are needed. Leaving some areas with less product can help preserve a natural skin finish.
  • Suitability for the production: A popular product may not suit every subject or shooting environment. Skin condition, lighting, camera distance, and shooting time should guide the choice.

Shine control and texture management also affect how makeup appears on camera. Excess oil can create bright reflections, particularly on the forehead and nose. Dry patches and uneven skin texture can also become more noticeable under direct lighting. Product choice and careful application help manage these effects without covering the skin in heavy layers.

For more detail, read about managing shine and light absorption for studio photography.

Texture management starts with skin preparation and continues through application. Adding more foundation over dry patches or uneven areas rarely makes them less noticeable. It can create a thicker layer that stands out in close-ups. Careful blending and suitable product amounts help keep the finish natural. The article on preparing makeup for 4K video and close-up content covers this in more detail.

Color accuracy also needs attention when a shoot moves between lighting conditions. Foundation, blush, and lip colors can appear warmer or cooler under different light sources. Checking the makeup under the intended lighting helps prevent noticeable color changes between scenes. Read the guide to pigment control under studio lighting for more information.

What a Full Production Day Actually Looks Like

Every production has its own schedule and shooting conditions. The makeup approach may change with the location, lighting, number of subjects, and camera requirements. The following example shows how makeup checks can fit into a typical shoot day.

  1. Before the first setup. Review the creative direction, lighting plan, camera requirements, and desired finish. Brittany can coordinate with the creative director before filming. Her article on working with creative directors on set covers this part of production. Skin preparation and the initial makeup application follow.
  2. During the first shots. Check the makeup through the camera or monitor when possible. Look for excess shine, visible texture, uneven coverage, and color changes under the lights. Early test shots help identify adjustments before filming progresses.
  3. Between setups. Focus on areas where makeup has moved or worn away. The nose, forehead, lips, and eye area may need attention after repeated takes, movement, or heat.
  4. During close-ups. Check blending, texture, color placement, and product buildup. Tight framing makes small application issues easier to see.
  5. After wardrobe or lighting changes. Review the makeup again under the new conditions. Garment colors, exposure settings, and light positions can affect how the finished look appears.
  6. Toward the end of the day. Compare the makeup with earlier footage and maintain the original direction. Correct only what needs attention, especially when later scenes will appear alongside morning footage.

Production clients can view examples of Brittany’s work in her commercial and editorial makeup portfolio. Her article on what happens behind the scenes of a commercial beauty shoot offers more context about the production process.

Planning a Commercial or Editorial Shoot?

A few production details help determine the makeup requirements. Share the shoot date, location, creative direction, number of subjects, and expected schedule. Brittany can then discuss the project, makeup requirements, and availability.

For productions in Orange County, San Diego, and surrounding areas, the schedule and lighting plan help guide makeup preparation. Click the button below to schedule a consultation and discuss your project.

Frequently Asked Questions

1. How does sustained durability makeup that holds up through long differ from bridal makeup application?

Both aim for makeup that looks natural and wears well. Production work adds the camera. The makeup is checked against lighting, lens distance and close-up exposure, and touch-ups happen between setups with continuity in mind. A wedding follows its own timeline and photography. A shoot follows a shot list and repeated takes. The techniques overlap, but the requirements differ.

2. What should a brand or photographer expect when booking sustained durability makeup that holds up through long?

Expect a conversation about the project’s basics: date, location, creative direction, subjects and schedule. Brittany reviews the lighting plan and shot list with the creative team when possible. On set, she brings a professional station with lighting and seating. She provides touch-ups while monitoring playback. At wrap, she handles talent cleanup and kit teardown. Specific details depend on the project.

3. How is makeup adjusted for lighting during sustained durability makeup that holds up through long?

Adjustments follow the light. Studio lighting, window light and direct sun each change how finish, color and shine read. The artist checks the makeup under the intended lights and, if available, on the monitor. Finish, setting and color can then be adjusted. Recheck after lighting changes, since new positions and exposure levels change what shows.

4. How often will touch-ups be needed during a long shoot?

No set interval fits every shoot. Frequency depends on the original application, the subject’s skin, heat from lights or sun, movement, wardrobe changes and the schedule. Touch-ups are targeted and based on checks between setups, not on the clock. Tell the artist about planned breaks, setups and close-ups so the plan fits.

5. How should subjects prepare for a long shoot?

Subjects should keep to their usual skincare routine and avoid new products or treatments right before the shoot. They should tell the artist about any skin sensitivities, reactions or recent treatments. Sharing the call time, wardrobe plan and shot list helps the artist plan preparation time and finish. Staying hydrated in the days beforehand is also sensible.

Posted on

Makeup for Bridesmaids: Keeping Everyone’s Look Cohesive

makeup for bridesmaids

Bridesmaids often have different ideas about wedding makeup. Some prefer light coverage and neutral shades, while others feel more comfortable with defined eyes or stronger lip color. Their skin tones, features, and usual makeup preferences can also vary.

The challenge is bringing these looks together without making everyone wear the same makeup. A shared color palette and overall style can keep the bridal party coordinated. Each person can still have makeup that suits her.

Brittany Brown Beauty provides mobile bridal hair and makeup across Orange County, San Diego, and surrounding areas. Brittany works with the bride to agree on the overall look, then adjusts the makeup for each bridesmaid. This helps the group look coordinated while allowing each person to feel comfortable with her makeup.

Why Cohesion Matters More Than Identical Makeup

Group photos can make differences in makeup intensity more noticeable. A bold lip beside a completely bare lip may look disconnected. Giving everyone identical makeup creates another problem. The same shades and techniques rarely suit every face.

A shared style gives the party a consistent appearance while leaving room for individual choices. Three elements help bring the looks together:

  • Color family: Choose warm peach and coral tones or cooler rose and berry shades. Repeat these colors across the cheeks, lips, and eyes.
  • Finish: Keep the overall finish consistent, such as satin skin or a softly matte look.
  • Intensity: Give everyone a similar level of definition. One bridesmaid can wear more eye makeup without looking completely different from the others.

Using identical products and techniques is unnecessary. Foundation must match each person’s skin tone and undertone. Blush placement also depends on cheekbones and face shape. The shared style should come from the overall appearance, not identical product choices.

The wedding setting also affects the makeup plan. Bright daylight reveals more detail than warm indoor lighting. Dresses and flowers help determine which colors will work together. Blush-pink dresses with white flowers create a different palette from deep green dresses with burgundy blooms. Read about how wedding lighting affects bridal makeup. The guide to matching bridal makeup to your bouquet and color palette offers more color ideas.

Small adjustments help each bridesmaid look balanced. A blush that looks soft on one complexion may appear strong on another. Pale pink lipstick may also look washed out against deeper skin. Adjusting the shade or amount keeps the overall look connected.

Building a Cohesive Look Across Different Features

Three decisions help shape the bridal party’s makeup: the color palette, the level of definition, and the bride’s own look. Each gives the artist room to make individual adjustments.

One Palette, Multiple Skin Tones

A shared palette provides a color direction, not one shade for everyone. The artist can choose different tones within that palette to suit each complexion.

For example, a warm, rosy palette could include:

  • Blush: Fair skin may suit a soft rose. Medium skin may suit a warm rose-peach. Deeper skin may look beautiful in a richer rose or berry shade.
  • Lips: Choose lip colors with similar warmth rather than identical shades. A rosy nude and a deeper rose can still complement each other.
  • Bronzer and complexion products: Match these products to each person’s skin. Some bridesmaids may need only a little warmth, while others may prefer a deeper bronzer. Foundation and concealer should match individual undertones.
  • Eyes: Repeat similar colors or finishes across the party. Soft taupe or champagne shades can connect the looks. The artist can adjust their depth to suit each person’s features.

No single shade works equally well on every bridesmaid. The artist should consider each person’s complexion and undertone before choosing products. Read more about matching bridal makeup to your skin undertone.

Adjusting Intensity, Not Concept

The color palette can stay consistent while the makeup intensity changes. Each bridesmaid can choose how much definition she wants within the agreed style.

For example:

  • Eyes: One bridesmaid may prefer a light wash of eyeshadow. Another may want more definition along the lash line. Both can use the same color family.
  • Lips: Some bridesmaids feel comfortable with a natural lip. Others may prefer a deeper shade from the same palette.
  • Lashes and eyeliner: One person may choose natural lashes and softly blended liner. Another may prefer fuller lashes and a more defined line.

Individual features also affect these choices. A bridesmaid with hooded eyes may need different eyeshadow placement. Someone with prominent eyelids may suit another approach. Fuller lips may also need less color to achieve the desired balance.

The artist can adjust the amount of makeup without changing the overall direction. For soft rose tones and satin skin, everyone can follow that style. A bridesmaid who wants more definition can receive additional eye makeup. Someone who prefers less can wear lighter layers.

Looking at the bridal party together helps maintain balance. A makeup style that looks subtle on its own may appear stronger beside another person’s look. The artist should consider how the finished makeup will appear in group photos.

Coordinating With the Bride’s Look

The bride’s makeup provides the starting point for the bridal party. Bridesmaid looks should complement hers without competing for attention. Group photos should feel connected while keeping the bride as the focus.

Start by discussing the bride’s preferred makeup style. Then decide whether the bridesmaids should wear softer makeup or similar levels of definition. The dress colors, bouquets, venue, and photography style can help guide that decision.

Consider a bride who prefers natural makeup, soft eyeshadow, and a sheer lip. Her bridesmaids could wear softly defined eyes and similar lip tones. This keeps the group polished without making their makeup more noticeable than hers.

A bride who prefers defined eyes and a deeper lip creates a different starting point. Her bridesmaids can use the same colors with lighter application. Very understated makeup may look disconnected beside a much bolder bridal look.

Ask the bride whether she wants matching intensity or slightly softer bridesmaid makeup. The wedding setting can help settle the choice. Deep jewel-tone dresses at an evening venue may suit stronger definition. Pastel dresses at a morning garden ceremony may call for softer makeup. This guide to bold bridal makeup vs. soft glam can help the bride choose her preferred style.

Handling Bridesmaid Requests for Something Different

Bridesmaids rarely have identical makeup preferences. Discussing those preferences before the wedding helps avoid last-minute disagreements. It also gives the artist time to plan each look.

Ask each bridesmaid a few simple questions:

  • What makeup do you usually wear?
  • How much foundation coverage do you prefer?
  • Do you feel comfortable wearing false lashes?
  • Would you rather have a natural lip, rosy tint, or deeper color?
  • Do you prefer no eyeliner, a soft line, or more definition?
  • Are there any textures or finishes you dislike?

A bridesmaid who rarely wears makeup may prefer light coverage and a natural finish. Someone who enjoys defined eyes may want stronger liner or fuller lashes. Both preferences can work within the same color palette.

Reference photos can make these conversations easier. Ask the bride to share examples of the overall style she likes. Each bridesmaid can also bring one or two makeup references. Photos show the desired finish and intensity more clearly than words like “natural” or “glam.”

Browse the Brittany Brown Beauty portfolio for examples of finished bridal looks. You can also read about explaining your vision to your makeup artist during a trial.

Give the artist enough time to review everyone’s preferences. A rushed appointment leaves less room for adjustments. Discussing the details beforehand helps the morning run according to plan.

Brittany’s approach focuses on enhancing natural features rather than masking them. She brings that approach to every bridesmaid, regardless of makeup preference. Brittany has more than 11 years of experience in the makeup industry. Read more about her background and approach on the About page.

Preparing for Wedding-Day Makeup

A little preparation helps the bridal party arrive ready for makeup. Share these tips with everyone before the wedding:

  • Stick to a familiar skincare routine. Use products your skin already tolerates in the weeks before the wedding. See how to prep your skin 30 days before your wedding for a suggested timeline.
  • Avoid new products close to the wedding. A new serum, mask, or treatment can cause unexpected redness or affect how makeup sits. Avoid introducing unfamiliar products during the final 10 days.
  • Mention sensitivities and past reactions. Tell the artist about any known sensitivities or previous product reactions. This gives you time to discuss suitable options. Ask your dermatologist about concerns that go beyond makeup.
  • Discuss your usual routine and preferences. Let the artist know which skincare products you use and what makeup feels comfortable to wear.

Each person also needs enough time for makeup application. The bride typically needs around 90 minutes. Each bridesmaid usually needs 45 to 60 minutes. For five bridesmaids, one artist may need four to five hours for the bridal party alone. Brittany can arrange additional artists for larger parties. This helps everyone get ready without rushing the bride’s application. She discusses the timing during booking.

A makeup trial can also help, especially when someone has concerns about product comfort or appearance. Brittany strongly recommends a trial for the bride, but it is not required. Bridesmaids can also arrange trials when they want to test a look or discuss specific concerns. The artist can assess the makeup and make adjustments during the appointment. However, a trial cannot guarantee that a reaction will not occur later. Always disclose known sensitivities, even if you have completed a trial.

Brides typically book their wedding date 6 to 12 months in advance. The bridal trial usually takes place 2 to 4 months before the wedding. Read how many bridal trials you actually need for more guidance.

Planning Makeup for Your Bridal Party?

Give Brittany the details of your wedding day, including the date, venue, and number of people needing makeup. Share your preferred bridal party style and any individual preferences too. Brittany Brown Beauty can discuss your makeup plans and check availability. Click the button below to schedule a consultation online.

Frequently Asked Questions

1. What’s the best way to prep my skin for makeup for bridesmaids?

Keep to the routine your skin already knows. Avoid trying unfamiliar products or treatments in the days before the wedding. Share any sensitivities or past product reactions with the artist ahead of time. If you have skin concerns beyond makeup, ask your dermatologist.

2. How long will makeup for bridesmaids last through the ceremony and reception?

No fixed wear time applies to everyone. Wear depends on skin preparation, products, application, skin condition, weather and the day’s schedule. A humid outdoor ceremony asks more of makeup than a cool indoor one. Tell the artist about the venue and schedule so the plan fits. You can also ask what, if anything, to carry for touch-ups.

3. Can makeup for bridesmaids be adjusted for my specific skin tone or type?

Yes. The artist chooses shades and formulas for your skin tone, undertone and skin type. The amount and definition adjust to your preferences too. The shared palette stays, and the details change from person to person. No single product suits everyone, so tell the artist if your skin runs dry, oily or sensitive.

4. How can a bridal party coordinate different makeup preferences?

Start with one shared direction, such as a color family, a finish and an overall level of definition. Collect each bridesmaid’s preferences on coverage, lashes, lip color and eyeliner before the wedding. Photos of looks each person likes make the plan clearer. The artist then adjusts the amount of product while keeping the direction consistent.

5. Should bridesmaids have a makeup trial?

Not every bridesmaid needs one. The bride’s trial usually sets the overall direction. A bridesmaid with concerns about comfort, appearance or wear may benefit from one. A trial lets the artist and client assess the makeup and adjust it. Ask about options when you schedule your consultation.

Posted on

Choosing Blush and Bronzer for Mature Skin Tones

blush and bronzer for mature skin tones

Blush and bronzer go on near the end of makeup, but they affect the whole look. A soft flush can make skin look warm and rested. Too much color or the wrong texture can look patchy, heavy, or shiny. Shade, formula, amount, and placement all affect the finish.

These choices matter when applying blush and bronzer to mature skin. Fine lines and dry areas can make some products more noticeable. The answer is not always to use less color. Choosing products that suit the skin often makes a bigger difference.

Brittany Brown Beauty provides mobile bridal hair and makeup across Orange County, San Diego, and surrounding areas. This article covers shade selection, formulas, placement, and finish. It is written for mature brides, mothers of the bride or groom, and anyone interested in corrective makeup.

Mature makeup is one of Brittany’s specialties. In a published interview, she said, “I also love to do mature makeup.” She also said corrective beauty makeup “comes naturally to me.” Brittany brings these skills to her bridal work as a corrective makeup artist in Orange County. She has more than 11 years of experience in the makeup industry. Read more about her background on the About page. For more advice, see the guide to mature skin bridal makeup.

Why Formula Matters as Much as Shade

Shade often gets the most attention, but formula affects how color sits on the skin. Two blushes in the same pink can look quite different. One might be a cream, while the other is a powder.

Here is how three common formulas compare:

  • Powder: Fine particles sit on the skin’s surface. Powder is easy to control and build. However, too much can look dry or flat.
  • Cream: Cream blends into the skin and can create a natural-looking flush. It may move or slip on oily areas.
  • Liquid: Liquid blush is often sheer and stain-like. It sets quickly, so blend it promptly to avoid patches.

Skin preparation also affects the finish. Moisturized skin helps cream and liquid products blend smoothly. Dry patches can make powder look uneven. Give skincare a few minutes to settle before makeup application. Stick with your usual routine if it already works for your skin.

Some formulas can settle into fine lines or draw attention to dry areas. A rich cream near the eyes may collect in fine lines. Dry, heavily pigmented powder can cling to rough patches. The article on avoiding makeup that settles into fine lines explains this in more detail.

Consider your skin, preferred finish, and existing makeup when choosing a formula. Matching textures can help the products work well together. A dewy, creamy base often pairs well with cream blush. A base set with powder may work better with powder blush.

For example, a bride might have dry cheeks and a shiny center of the face. Her artist could apply cream blush to the cheeks and light powder bronzer around the edges. The best combination depends on her skin and the finish she wants.

What to Look For

Cream vs. Powder for Mature Skin

Both cream and powder formulas can work well on mature skin. The better choice depends on your skin and preferred finish.

How they apply. Apply cream with your fingertips, a sponge, or a dense brush. Work in small amounts because cream blends quickly. Use a soft brush for powder. It builds gradually, giving you more control over the color.

The finish they create. Cream often gives skin a satin or softly dewy finish. Powder can look matte or softly satin. The result depends on the formula, so test it on your skin.

When cream may help. Cream can suit dry or textured cheeks because it blends without a powdery finish. It also works well for a natural flush. Start with a thin layer.

When finely milled powder offers control. Finely milled powder has small, smooth particles. It can suit oilier skin and anyone who wants precise control over color. It can also sit well over a base that the artist has already set.

How to layer without a thick finish. Start with a thin layer and press it gently into the skin. Check the color before adding more. If needed, apply another thin layer from the same formula family. Some artists lightly dust powder over cream to help set it. Keep each layer sheer so your skin remains visible.

Placement for a Natural Lift

Blush and bronzer placement can change how your features look. Even small adjustments can affect the balance of your face.

  • Blush: Find the fullest part of your cheek and tap color there. Blend outward to avoid a concentrated patch.
  • Face shape and preference: A slightly upward blush placement can suit rounder faces. A more horizontal sweep may suit longer faces. Treat these as starting points, not fixed rules.
  • Bronzer: Apply bronzer around the temples and hairline. This adds warmth without creating a hollowed-out look.
  • Blending: Use a clean, fluffy brush along the cheekbones. Blend the edges until the blush, bronzer, and skin look connected.

Check your makeup from several angles. Look straight ahead, from both sides, and at a three-quarter angle. Check the finish near a window too. Natural light can reveal edges that indoor lighting hides.

No single placement technique works for everyone. A style that suits one face may not suit another. Your artist can adjust the placement to your features and preferences.

For example, someone with prominent cheekbones may prefer blush placed slightly lower. This can create a softer look. Someone with less pronounced cheekbones may prefer higher placement for more definition. Neither approach is a correction. It comes down to the look you prefer.

Avoiding Shimmer That Emphasizes Texture

A soft sheen and visible shimmer create different effects. Sheen reflects light evenly across the skin. Shimmer contains particles that catch the light.

Large shimmer particles can draw attention to fine lines and uneven texture. Flash photography may also create bright spots where those particles reflect light. A satin or softly luminous finish usually gives a more even reflection.

You can still add glow without covering your cheeks in shimmer. Apply a small amount of highlighting product to areas such as:

  • The high points of your cheekbones.
  • The brow bone, using a light touch.
  • Other areas where you want a subtle glow.

Matte products need careful application too. A dry, heavily applied matte blush can look flat on dry skin. A thin layer over well-prepared skin often gives a softer finish. Choose the finish that suits your skin rather than avoiding shine or matte altogether.

Building Warmth Without Looking Overdone

Blush adds color to the cheeks, while bronzer brings warmth to the face. Both should complement your other makeup rather than compete with it.

  • Match your complexion and undertone. Soft pinks and roses often suit cooler undertones. Peaches and warm corals often suit warmer undertones. Deeper skin tones can work well with berry or terracotta shades. See the guide to choosing the right blush shade.
  • Use bronzer for warmth, not contour. Choose a shade slightly deeper than your skin tone. Blend it softly for a sun-kissed finish rather than a sculpted effect.
  • Choose blush that complements your lip color. A coral lip can pair well with warm blush. A deeper berry lip may work better with rosy tones.
  • Apply color gradually. Start with a small amount and add more only when needed.
  • Check the complete makeup look. Assess blush and bronzer with foundation, eye makeup, and lip color in place. Lip color can change how blush looks against your complexion.
  • Consider the lighting. Daylight reveals more detail, while indoor lighting often looks warmer and softer. Photography can also change how makeup appears. Your artist may check test photos before settling on the finish. Read more about how wedding lighting affects bridal makeup.

A softer bridal look might use sheer peach cream blush and a little bronzer around the temples. A satin finish and subtle highlight keep the makeup understated. This combination can suit a daytime garden ceremony.

A more defined look might use a thin cream base with powder blush layered on top. Slightly deeper bronzer along the cheekbones and jawline adds definition. A soft highlight finishes the look. This approach can suit an evening or formal wedding.

Brittany has said, “Little subtle changes on the skin can be very powerful.” A small adjustment to blush shade or bronzer placement can change the overall look. Browse the bridal makeup portfolio for examples of finished looks.

Planning Your Bridal Makeup?

Choosing the right blush and bronzer can make a real difference to your bridal makeup, especially when you want a finish that suits mature skin. Share your wedding date, venue, and preferred look with Brittany Brown Beauty. Click the button below to schedule a consultation online.

Frequently Asked Questions

1. How is blush and bronzer for mature skin tones different from standard bridal makeup?

The goals are the same: a natural flush and warmth that look good in person and in photos. The technique adjusts. Formula choice, thin layers and careful blending matter more. The look still follows your taste and features.

2. What products work best for blush and bronzer for mature skin tones?

It depends on your skin and the finish you want. Some clients do well with cream blush. Others do better with a finely milled powder. A satin finish often looks smooth, and a shade close to your undertone usually looks natural. No product suits everyone, so the artist tests options on your skin.

3. How far in advance should I book a trial for blush and bronzer for mature skin tones?

A trial is typically scheduled 2 to 4 months before the wedding. That leaves time to adjust shades and formulas. Book your wedding date earlier, since dates fill up. The article on how far in advance to book hair and makeup in Orange County covers timing. A trial helps assess comfort and the look, but it cannot guarantee that a reaction will never occur.

4. Do mothers of the bride or groom need different blush and bronzer?

The same principles apply. Choose by skin, outfit and photo plans, not by role or age. One mother may want soft color, and another may want something bolder. Read about bridal makeup for the mother of the groom for more.

5. How does corrective makeup relate to blush and bronzer?

Corrective techniques use targeted color and coverage to even out areas of the skin. Blush and bronzer then tie the complexion together. Corrective makeup softens how a concern appears. It does not change the skin. The overview of corrective makeup and who it is for explains the approach.

Posted on

Textured Bridal Waves: How to Get the Look

textured bridal waves

Textured bridal waves have defined bends and visible movement. The finish is less uniform than a row of matching curls. Some waves are tighter, some looser, and the ends may fall in different directions. The result looks polished without looking rigid.

Brides often choose this style for its balance. The waves give structure for photographs, and the texture keeps the hair soft around the face. It can also support a veil or accessory without looking stiff.

Brittany Brown Beauty provides mobile bridal hair and makeup across Orange County, San Diego and surrounding areas. This article explains what shapes textured waves, how a stylist builds them and what to consider for a coastal wedding. Use it to collect wedding hair ideas and plan bridal hairstyles in Orange County before your trial.

What Defines Textured Waves vs Smooth Curls

Smooth curls are uniform. Each curl has the same size, the same spacing and the same direction. They look sleek and matched. Textured waves keep the bend but vary the details.

Four elements separate the two looks:

  • Wave shape: Smooth curls repeat the same spiral. Waves form broader, S-shaped bends.
  • Spacing and definition: Waves can sit at different depths along the hair. Some are crisp and some are soft.
  • Direction: Alternating curl directions create a more relaxed finish. Matching directions create a polished, uniform one.
  • Volume: Texture adds body and lift. A tightly defined curl pattern adds less movement between curls.

What happens after curling matters as much as the curling itself. Brushing, separating and arranging the hair can change the pattern completely. A stylist may brush through cooled curls to turn them into waves, then reshape pieces by hand.

Textured waves do not have to look messy. They can look polished and intentional. A defined wave with a neat part and controlled ends reads as styled. Texture does not mean a lack of definition.

The result depends on your natural hair texture, length, density and cut. It also depends on the styling technique. No single method works equally well for every hair type, so the plan adjusts to your hair.

Achieving the Look

A stylist may follow a sequence like this one. The steps can change with your hair and your venue, so treat it as a framework, not a formula.

  1. Prepare the hair. Preparation helps the hair take a shape and hold it.
  2. Section the hair. Section size controls how defined or loose each wave becomes.
  3. Curl in varied directions. Mixed directions create movement and a relaxed finish.
  4. Let the curls cool. Cooling helps the shape settle before it is handled.
  5. Separate and arrange. This step softens the pattern and builds the final silhouette.
  6. Add support. Pins and finishing products give the style structure where it needs it.
  7. Check every angle. Front, sides and back each need to look balanced.

Tools and Techniques for Texture

The stylist selects curling tools and section sizes for the wave pattern you want. Hair length and natural texture guide the choice. A curling iron, a wand or hot rollers can all produce waves. Each leaves a slightly different shape.

Section size is one of the biggest controls. Smaller sections tend to produce tighter, more defined waves. Larger sections give broader, looser bends. Mixing section sizes in one head of hair creates a natural, irregular look.

Direction adds movement. Curling some sections toward the face and others away breaks up the pattern. It stops the waves from lining up like a row. It also changes how light moves across the hair.

Two examples show how the plan shifts. A bride with fine, straight hair who wants a loose look may need larger sections and more support. That helps the waves keep their shape. A bride with thick, naturally wavy hair may need less shaping. The stylist defines her existing pattern and refines the pieces around the face.

The ends can go either way. A stylist may leave them curled for a fuller finish. Or the ends may be reshaped and softened for a more relaxed look. The choice depends on your hair and the finish you want.

Brushing or gently separating the curls softens the pattern and opens the waves into larger shapes. The setting stage below explains when to do it.

The final shape also has to suit your outfit, veil and accessories. A veil may need a firm area to attach, so the stylist may leave a section less loose. Use the trial to find that balance.

Products That Enhance Natural Movement

Styling products each have a general role. Which ones a stylist uses depends on your hair’s condition, texture and density, and the finish you want.

  • Preparation products: These add grip or help hair take a curl. Some brides need more help here than others.
  • Heat protection: This goes on before hot tools. It is a standard part of styling with heat.
  • Volume or grip products: These add body and give pins something to hold. They matter most on fine or silky hair.
  • Finishing products: These set the final shape. A light application keeps movement. A heavier one makes waves stiffer.

Too much product can weigh the hair down and reduce movement. Too little support may make the style harder to shape. The right amount is different for each person. A trial helps the stylist find it.

No product prevents frizz or humidity changes, and none suits every hair type. Brand choice and ingredients vary, so ask your stylist what they plan to use and why.

Setting for the Best Possible Hold

Setting the waves before final shaping gives the stylist more control. Warm hair is still pliable. Cooled hair keeps the pattern the tool created. Handling it too soon can pull the waves apart.

  • Cool first: Allow curls or sections to cool before separating them, where appropriate.
  • Arrange after the shape forms: Position the waves once the pattern is set.
  • Add discreet pins: Place them where the style needs extra structure.
  • Finish selectively: Use finishing products only where they help.
  • Check all sides: View the style from the front, sides and back.

How well the style holds depends on your hair’s natural characteristics and the styling method. Products, weather and activity matter too. No one can guarantee that waves will last all day or remain unchanged.

Adapting Textured Waves to Southern California Coastal Conditions

Weddings in Orange County and San Diego often involve coastal air. Humidity can change definition, volume and frizz. Waves that looked crisp indoors may relax or spread outdoors. The article on bridal hairstyles that hold up in Southern California humidity covers more of these effects.

Sea air and wind affect loose waves in particular. A breeze lifts and tangles them. Salt in the air can add a slightly rougher feel. These changes can look natural in photos, but they do change the shape. The article on bridal hairstyles for beach weddings looks at shoreline settings.

A beach ceremony needs different planning than an indoor reception. A moving breeze suggests firmer sectioning and more structure. A controlled indoor setting may allow looser, softer waves. Many weddings include both, so the plan often needs to cover each.

The stylist can adjust the preparation, sectioning, setting and finishing choices based on your hair and your venue. Brittany’s on-location process, as described on the site, covers arrival, preparation, styling to your vision and setting the look. The details change with each bride.

Share your ceremony location, outdoor photography plans and getting-ready schedule before the appointment. These details let the stylist plan for textured bridal waves in Orange County conditions, not general ones. No technique or product eliminates humidity or wind effects, and no one can promise the hairstyle will stay intact.

Who This Style Works Best For

Textured waves suit brides who want movement without tightly defined curls. They can work across a range of lengths and natural textures. Each changes the final shape.

  • Shoulder-length hair: Waves sit as soft bends near the shoulders and can look light.
  • Long hair: Length adds weight, which pulls waves down. A stylist may add support or create larger bends.
  • Naturally wavy or curly hair: The stylist often works with the existing pattern, shaping instead of building it.
  • Straight hair: Waves may need more support to hold their shape.

Layers, density and curl pattern all affect the result. Layers add volume and movement. Dense hair carries more weight and often holds a shape well. Fine hair may need extra lift. The guide to bridal hairstyles by hair type offers more on how texture and density shape the options.

The style also works with veils, hairpins, combs and other accessories. A comb or pin can sit in a section with a bit more structure while the rest stays loose. The explainer on combs, pins and tiaras helps you choose.

A trial helps establish realistic expectations for your own hair. Textured waves are not unsuitable for any age, face shape or hair type, but results vary. See how they look on your hair before the wedding day. The portfolio shows finished hairstyles you can use as references.

What to Bring to Your Hair Trial

A trial helps the stylist assess the desired shape, product needs, accessory placement and practical options. Prepare these items:

  • Reference images: Show the wave pattern and overall finish you like. Results depend on your own hair.
  • Your veil and hair accessories: Bring them if you have them, so the stylist can test placement.
  • Outfit and neckline details: The neckline affects how the style sits and which angles show.
  • Venue and weather information: Share the setting, outdoor photography and local conditions.
  • Notes about your hair: Describe your natural texture, your usual routine and any concerns about keeping a style in place.

The trial is also where you test how the style feels and how the veil attaches. It cannot guarantee identical results in different weather. You can read more about Brittany’s approach on the About page. The article on how many bridal trials you need can help you plan.

Planning Your Wedding Hairstyle

When you inquire, share your wedding date, venue, getting-ready location, ceremony time and preferred hairstyle. These details help Brittany assess availability and understand the day’s requirements. Questions can go through the contact page. Click the button below to schedule a consultation online.

Frequently Asked Questions

1. How long does it take to create textured bridal waves on the wedding morning?

Brittany typically schedules about 90 minutes for the bride. Hair is one part of that time, and its share varies. Length, density, texture and the amount of support the style needs all affect it. Accessories matter too. Ask for your own estimate at the trial.

2. Will textured bridal waves hold up in Southern California humidity?

They can hold up well with planning, but humidity may soften the pattern or add frizz. Setting, sectioning and finishing choices help. The venue, time of day and your hair type still affect the result. No style is immune to coastal weather.

3. What accessories pair well with textured bridal waves?

Combs, pins, clips and veils all work with waves. They usually sit best in a section with more structure. Heavy pieces may need extra support. Test each one at the trial to see how it moves with your hair.

4. Should I wash my hair before styling textured bridal waves?

It depends on your hair and your stylist’s recommendations. Some hair holds a style better with a little texture. Others need a fresh wash. Ask what to do before your trial, then repeat it on the wedding day. See the guide to prepping your hair before your wedding.

5. Can textured bridal waves work with fine or naturally curly hair?

Yes, with adjustments. Fine hair may need more support. Naturally curly hair is often shaped instead of rebuilt. The article on styling curly and textured hair for your wedding covers that approach. No single technique works for every hair type.

Posted on

Getting-Ready Photo Makeup: What Photographers Look For

getting-ready photo makeup

Getting-ready photos capture a different side of the wedding. The camera moves in close on your eyes, your lips and your skin. It also catches candid moments, such as a mother zipping a dress or a bridesmaid handing you a bouquet. All of this happens before you leave for the ceremony.

Getting-ready photo makeup has to work in those frames and still look natural in the room. Lighting, timing and the photographer’s schedule all shape how the application is planned. Makeup is one piece of the picture, not the only thing that decides how the photos turn out.

Brittany Brown Beauty approaches bridal makeup with one idea: enhance the bride’s features instead of masking them. For getting-ready photos, that means a finish that still looks like you, with your features defined thoughtfully for the camera. This article shows how to plan for it.

Why Getting-Ready Photos Have Their Own Makeup Considerations

Ceremony and reception photos are usually taken at a distance, with movement and planned lighting. Getting-ready photos are often closer and quieter. The camera stays near your face while the light does most of the work.

Several things make this stage distinct:

  • Close-up shots: The photographer may capture your eyes, lips, hands and skin finish in detail.
  • Candid moments: Photographs may include the application itself and the final touch-ups.
  • Soft window light: Natural light from a window reveals blending, coverage and finish clearly.
  • Mixed lighting: A getting-ready room might combine window light, overhead bulbs and lamps.
  • Changing light: Light shifts as the sun moves. A bright corner at the start may look softer later.

The finish needs to look right in person and on camera. A look that seems balanced across the room can read differently in a close portrait. The article on why bridal makeup looks different in photos explains why. For that reason, the bride, makeup artist, photographer and schedule work best together.

Photographers have different styles and shot lists. Some photograph the entire application. Others prefer detail shots first and portraits after the makeup is complete. No single lighting setup or makeup look suits every photographer. Ask yours how they plan to work.

What Photographers Ask For

Photographers communicate different needs before and during the getting-ready session. The points below are common possibilities, not universal requirements. Your photographer’s plan comes first.

Skin That Reads Well in Soft, Indirect Light

Natural window light shows skin honestly. It can reveal how foundation was blended, how much coverage was applied and what the finish looks like up close. That makes careful application more useful than extra product.

A few approaches help makeup read well in this kind of light:

  • Build coverage in controlled layers: Apply a thin layer, check it, then add more only where the skin needs it. Adding product automatically can look heavy in close-ups.
  • Blend around the face and jawline: Side light from a window can show edges. Careful blending at the hairline, jaw and neck helps the base look continuous.
  • Choose a finish for your skin and plans: Matte, satin and dewy finishes all work for some brides. The right choice depends on your skin, your preferences, the lighting and the photography plan.
  • Use powder selectively: Set the areas that need it, such as the center of the face. Not every face needs heavy powder.
  • Check near a window when practical: Natural light is a useful test. Do not rely on one lighting condition alone, since the wedding day includes several.

Consider a bride with dry patches near the jawline. In window light, a thick base could emphasize them, while a lighter, well-blended layer lets her skin look like skin. Natural texture, pores and fine lines are part of real skin. They are not problems to hide. The goal is a smooth, even finish that still looks like skin. No one can promise a flawless result. The article on how wedding lighting affects bridal makeup shows how different light changes the same makeup.

Avoiding Heavy Product Buildup Before Application Finishes

Repeated layers over existing makeup can change the final finish. Extra product on top of product can look cakey and may shift when you move.

  • Let skincare settle: Give moisturizer and other products a few minutes to absorb before makeup begins, where appropriate.
  • Apply complexion products in manageable layers: Thin passes are easier to blend and adjust than one thick coat.
  • Use concealer and powder selectively: Place them where they are needed, not across the whole face.
  • Avoid unnecessary touch-ups early: Wait until the makeup is complete before fixing small things. Early fixes can add buildup.
  • Keep hands, brushes and tools clean: Clean tools apply product more evenly and are more comfortable on the skin.

Freshly applied makeup also needs protection. Wear a robe or a button-up top while you wait, so you do not pull anything over your face. Handle accessories gently. Ask the artist when it is a good time to put on jewelry or veils. Try not to touch your face while chatting or checking your phone.

Candid photographs are part of the day. A photographer can capture real behind-the-scenes moments during application. The completed look is then photographed after the final check. You do not need to avoid all candid photos while makeup is in progress.

If you have sensitive skin, keep your pre-wedding routine familiar. Raise any product concerns during your trial. A trial helps assess comfort and the planned look, but it cannot guarantee that a reaction will never occur. The overview of what happens during a bridal makeup trial explains what to expect.

Timing Application Around the Shot List

The makeup schedule works best when it accounts for the photographer’s planned images. Ask your photographer a few things in advance:

  • When do detail shots happen? Photographers may shoot the dress, rings or invitations before makeup, during it or afterward.
  • When should the makeup be finished? Plan time for final checks and touch-ups before portraits.
  • How much time do you need to dress? Allow time to change outfits, put on jewelry and prepare for photographs.
  • What are the key times? Share the ceremony time, the departure time and any important photo moments in advance.

Here is one example of how a morning might flow. It is an illustration, not a standard. Detail shots come first, then makeup application, then a final check near the window. You then get dressed, add jewelry and move to portraits. Your photographer and artist can reorder these steps to suit the day.

A rushed final application is easy to avoid. Build in extra time in case dressing or photography runs long. A short delay early on can push the makeup finish later than planned.

The schedule depends on the wedding timeline and the complexity of the makeup. It also depends on party size and the photographer’s plan. It is not a fixed formula. The guide to building your wedding morning timeline with your beauty team shows how to plan backward from the ceremony.

How Brittany Brown Beauty Coordinates With Photographers

Clear communication between the bride, the makeup artist and the photographer makes the morning smoother. A few details are worth sharing ahead of time. Useful details include the ceremony schedule, the planned getting-ready photos and the light in the room. Add the time the bride needs to be ready.

With those details, the artist can plan the application and final checks around the agreed schedule. The bride’s preferred look stays at the center. Brittany provides mobile bridal hair and makeup across Orange County, San Diego and surrounding areas. Planning getting-ready photo makeup in Orange County starts with the room where you will get ready.

Brittany’s photoshoot work offers a useful reference point. On commercial shoots, she reviews the lighting setup and the photographer’s direction. She then adapts her technique to how light falls on the face. Her article on commercial makeup for photoshoots describes that approach. Weddings are different, so the bridal plan comes from the details you share.

Bridal makeup ideas for the camera do not need to look dramatically different from your everyday style. The aim is a finish that suits your features, your preferences and the photographic conditions. Read more about Brittany on the About page. Browse the portfolio to see finished looks. As an Orange County bridal makeup artist, Brittany can use a few saved looks to understand the finish you want.

Preparing for Your Getting-Ready Makeup

A little preparation makes the wedding morning calmer. Treat this list as guidance, not strict rules.

  • Keep your skincare routine familiar. Unfamiliar products just before the wedding can change how makeup sits or cause a reaction.
  • Share sensitivities at your trial. Tell the artist about known sensitivities and product concerns early.
  • Bring reference photos. Choose photos that show the finish you like, and stay open to adjustments for lighting and your own features.
  • Confirm the key details. Check the ceremony time, the getting-ready location and the photo schedule.
  • Set aside a clean space. A table near good light gives the artist a place to work.
  • Keep the area organized. A tidy room lets the photographer work without interruptions.
  • Leave time for final checks. Check the makeup before you put on accessories or pose for completed-look photographs.

Avoid aggressive treatments or new skincare steps right before the wedding. They add variables close to the wedding. For longer-term preparation, see the guide to prepping your skin 30 days before your wedding. If you have questions about any of this, send them through the contact page.

Planning Your Wedding Makeup

During a consultation, share your wedding date, venue, getting-ready location, ceremony time and preferred makeup style. These details help Brittany assess availability and understand what your day needs. Click the button below to schedule a consultation online.

Frequently Asked Questions

1. What’s the best way to prep my skin for getting-ready photo makeup?

Keep your routine familiar and gentle. Use the products you already know, and give them time to settle before makeup begins. Skip new products and harsh treatments close to the wedding. Mention any sensitivities at your trial. The skin prep timeline covers longer-term planning.

2. How long will getting-ready photo makeup last through the ceremony and reception?

Application time and wear time are different things. How long makeup lasts depends on the products, your skin, the weather and how active the day is. No specific duration can be promised. Plan a few touch-ups. The article on making bridal makeup last without touch-ups explains the factors.

3. Can getting-ready photo makeup be adjusted for my specific skin tone or type?

Yes. Shade, finish and coverage can be adjusted to your skin and your preferences. Dry, oily and combination skin may call for different products or amounts. No single product suits everyone, so share your usual routine and any sensitivities.

4. Should my makeup be finished before getting-ready photos begin?

Not always. Photographers capture different stages, such as details before makeup, candid moments during application and portraits after. Discuss the shot list ahead of time, so you and the artist know which stage each photo covers.

5. Does natural window light change how bridal makeup should be applied?

It can. Window light shows blending, coverage and finish clearly, so careful blending at the edges matters. Check the look in other light too, since a finish that suits one setup may not suit another.

Posted on

Bridal Hairstyles for Birdcage Veils

bridal hairstyles for birdcage veils

A long veil falls behind you and mostly interacts with the back of the hairstyle. A birdcage veil works differently. It sits near your face. It changes how the hair around your face looks, and the hair changes how the veil sits. Bridal hairstyles for birdcage veils depend on three things. Consider where the veil sits, the shape of the hair around it and the look you want.

Brittany Brown Beauty provides mobile bridal hair and makeup for Orange County and San Diego weddings. This article covers five hairstyle options, veil positioning for photos and trial preparation. Use it to build a list of wedding hair ideas before you talk to your stylist.

What Makes Birdcage Veils Distinct

A birdcage veil is short, structured netting that frames part of the face. Depending on the design, it may sit across the forehead, near the eyes or along the cheek. Unlike traditional veils, it does not fall down the back. Instead, it adds shape to the front of the head.

Several details affect how the veil works with your hairstyle:

  • Length and shape: A veil that stops at the nose frames the face differently from one that reaches the chin.
  • Netting pattern: Fine netting creates a softer look, while bolder patterns add more structure.
  • Comb or attachment: Some veils use a comb, clip or band. Each attachment requires a suitable section of hair for a secure fit.
  • Placement: A veil can sit high on the side or low across the brow, changing how much hair remains visible.

The hairstyle should complement the veil without competing with its shape. For example, a very full, high style can crowd a small veil, while a flat, tight style may make a bold veil look top-heavy. Instead, aim for a balanced look that keeps both elements in proportion.

The attachment should also feel secure without pulling at the hairline or temples. A stylist can position the comb or clip in a stable section and check its comfort as you move.

Bring your actual veil to the trial whenever possible. This allows the stylist to assess its weight, stiffness and attachment rather than relying on photos alone. Additionally, consider which parts of your hairstyle you want to keep visible. For instance, netting across the forehead may cover bangs, while a side-placed veil could hide a curl or hair accessory.at crosses the forehead may cover or flatten bangs. A veil near the cheek can hide a curl or a face-framing strand. A side-placed veil may cover a hair accessory or leave it in view. Decide what you want visible, then plan the veil around it.

Styles That Pair Well With Birdcage Veils

These five options cover the most common choices. Each one can be adjusted to your hair and your veil.

  1. Sleek updos, from low buns to smooth chignons.
  2. Side-swept waves with movement near the face.
  3. Vintage-inspired shapes, such as polished waves or a defined side part.
  4. Short hair and bob-length styles.
  5. Soft, textured styles with a relaxed finish.

1. Sleek Updos

A low bun, a smooth chignon or another structured updo gives a clean silhouette. That clean line balances the texture of the netting. It also gives the veil a defined area to sit against.

The smooth shape works well with a veil that has an interesting pattern. You can see both the netting and the shape of the style. A low bun leaves the crown open, which can suit a veil placed high at the side. A smooth chignon gives a more sculpted shape that can pair with a veil resting near the brow.

The attachment point depends on the veil and the style. A comb might sit at the side of the crown or just above the bun. It might also sit along the front, where hair is pulled back. No updo is automatically more secure. A stylist can build a firm section for the comb and test it with movement. The comparison of low buns and high buns explains how bun height changes the look.

Long, thick hair gives plenty of material for a structured updo. Fine hair can work too, with the base built for support. Shorter lengths may need a smaller shape.

2. Side-Swept Waves

Side-swept waves bring movement near the face. They suit the soft, slightly vintage character of a birdcage veil. The sweep of the hair can lead the eye toward the veil instead of hiding it.

The veil changes some decisions. The part decides which side the veil can sit on. Volume near the veil matters, since too much can push the netting away from the face. Curls near the attachment need room, so the stylist places them around the veil instead of under it.

Outdoor weddings add variables. A breeze can lift waves and move netting against the face. Humidity can soften waves over time. The stylist can set the curls and anchor the veil firmly. No one can say how long a wave will hold. The article on updos versus down styles at windy coastal venues helps you weigh the options.

3. Vintage-Inspired Styles

Polished waves, sculpted shapes and a softly defined side part all feel vintage. The birdcage veil already carries that mood. The hairstyle can echo it without turning the whole look into a costume.

Keep one or two details as the focus. A sculpted wave and a clean part can carry the style. The rest can stay relaxed. A softer finish keeps the look modern, even with a classic veil.

Earrings and accessories belong in the same conversation. A veil near the face can cover or crowd earrings. A drop earring may tangle with a side-placed veil, while a small stud stays out of the way. A hair clip can compete with the veil if both sit near the same spot. Choose accessories that fit your outfit, your veil and your taste. The explainer on combs, pins and tiaras shows how different pieces work with veils.

4. Short Hair and Bob-Length Styles

A birdcage veil can work well with short hair. Long hair is not necessary to wear one.

Subtle volume at the crown, a defined part and a smooth or lightly waved finish all frame the veil. A carefully placed accessory can add interest when there is less hair to style. The veil itself can act as the main accessory.

Attachment depends on the length of your hair, how the veil is built and the design of any accessory. A comb needs enough hair to grip. A clip or band may suit very short hair better. The stylist tests the options at the trial. The guide to bridal hairstyles for short hair covers more styling ideas.

5. Soft, Textured Styles

A relaxed bun, gentle texture and a less structured shape suit brides who want an undone look. The veil adds a finished detail without making the style stiff.

These styles need balance. Natural movement is part of the charm, but the veil still needs a firm place to attach. The stylist may build a stable base under the loose texture, then place the veil there. Loose pieces around the face stay free, while the anchor stays hidden.

Realistic expectations help. The goal is a style that suits you and supports the veil. It is not a style that cancels the effect of humidity or wind. Texture often handles a little frizz well, since relaxed lines expect some movement. Natural curls can fit this approach too. The article on styling curly and textured hair explains how texture shapes the plan.

Positioning the Birdcage for the Best Photos

Check veil placement from several angles before the wedding day. A veil that looks right in a mirror can look different in a photograph. Small changes in height or angle change how the netting frames your face.

  • Front: Look at how the netting crosses the eyes, cheeks and forehead. Notice if it shadows your eyes.
  • Side: See how the veil sits against the hairline and if the comb shows.
  • Three-quarter: This angle often appears in portraits. Check how the netting meets your hair and neckline.

Netting can read differently depending on distance. In close-up portraits, it may look like a soft texture or a light shadow. In wider photographs, it may read as a simple line across the face. Light also matters. The same veil can look different in daylight and under reception lighting. No one can promise it will look identical everywhere.

Other elements affect the composition. Bangs, curls, earrings and hair accessories all share the space near the veil. The neckline matters too. A high neckline may meet the netting differently than a deep one. Check them together, not one at a time.

The photographer and stylist may need a brief conversation. The photographer may want the veil moved for certain shots, and the stylist can show how to adjust it. A short agreement on who handles it saves time. The veil placement guide offers more on positioning.

Test the veil with natural movement. Turn your head, nod, hug someone and walk. Confirm that the veil stays in place and feels comfortable. Take reference photos during the trial, so you can compare angles later.

Preparing for a Southern California Wedding

Weddings in Orange County and San Diego bring coastal conditions. Humidity can soften a hairstyle. Sea air can add moisture. Wind can lift netting and move hair. Indoor and outdoor settings differ too, and many weddings include both.

The stylist adapts to those conditions. The preparation, structure, veil placement and finishing steps may change with the hairstyle and the environment. A style for a bluff ceremony may need a firmer anchor than one for a shaded courtyard. The article on hairstyles that hold up in Southern California humidity covers the humidity side in more depth.

On the wedding day, Brittany arrives early to set up. She prepares the hair, styles to your vision and sets the finished look. The details adjust to the hair and the setting. No one can promise a fixed hold time.

Share useful details during your consultation. Mention the ceremony location, the getting-ready location, any outdoor photographs and the approximate schedule. These details help bridal hairstyles in Orange County fit the real conditions of your day.

What to Bring to Your Hair Trial

A trial lets the stylist test the veil, the style and your comfort together. Bring these items:

  • The birdcage veil and its comb or attachment: The stylist needs to see how it attaches and hangs.
  • Photos of hairstyles you like: Results depend on your hair and veil, so treat photos as direction, not a copy.
  • Your outfit or neckline details: The neckline and any back details affect how the style and veil read together.
  • Other accessories and references: Bring earrings, clips and any style references you have saved.
  • Ceremony and timeline details: Share the setting, outdoor photography plans and the wedding-day schedule.
  • Comfort notes: Mention scalp sensitivities, comfort concerns or past trouble keeping accessories in place.

The trial is the time to test placement, comfort and appearance from several angles. It is also the time to practice removing or repositioning the veil. A trial helps show how a look behaves, but it cannot predict every condition on the day.

Browse the portfolio for hairstyles you like and note what draws you to each one. Bring those notes to the trial.

Planning Your Wedding Hairstyle

Share your wedding date, venue, getting-ready location, ceremony time and preferred hairstyle when you inquire. These details help Brittany assess availability and understand what your day needs. Planning bridal hairstyles for birdcage veils in Orange County starts with that conversation. You can learn more about Brittany on the About page. Send questions through the contact page. Click the button below to schedule a consultation online.

Frequently Asked Questions

1. How long does it take to style bridal hair with a birdcage veil on the wedding morning?

The bride’s appointment with Brittany typically runs about 90 minutes, and the hair portion depends on several factors. Length, density, texture and the chosen style all play a part. A structured updo may take longer than a simple wave. The veil goes in at the end of styling. Ask for your own estimate at the trial.

2. Will bridal hairstyles for birdcage veils hold up in Southern California humidity?

Many styles hold up with the right planning, though weather can still change them. Humidity can relax waves and raise frizz, mainly in coastal areas. A firm anchor for the veil and a structure that suits your hair help. Venue, time of day and hair type still affect the result.

3. What accessories pair well with bridal hairstyles for birdcage veils?

Simple pieces tend to pair well. Small earrings, a slim pin or a delicate clip stay clear of the netting. Large pieces near the veil can crowd it. Test each accessory with the veil at the trial.

4. Should brides bring the birdcage veil to the hair trial?

Yes, if it is available. The veil’s weight, netting and comb decide where it can sit. If it has not arrived, bring photos and the seller’s details, then plan a short follow-up check once it does.

5. Can a birdcage veil work with short hair?

Yes. Long hair is not necessary for this veil. Attachment depends on hair length, veil construction and accessory design. Combs, clips and bands each suit different lengths, so test them at the trial.

Posted on

Bridal Makeup for Second-Day Brunch and Post-Wedding Events

bridal makeup for second-day brunch and post-wedding events

The wedding is over, and a brunch table is waiting. Maybe a farewell breakfast, time with family or a few more photos with the guests who traveled to see you. You want to look like yourself, a little more polished, without sitting through a second full makeup application.

Bridal makeup for second-day brunch and post-wedding events can be lighter and quicker without feeling unfinished. The plan comes down to a few choices. Think about skin preparation, products you already own, softer definition and the time you have that morning.

Brittany Brown Beauty approaches makeup with one idea: enhance natural features instead of masking them. The same idea works the day after the wedding. This article gives you specific ways to build that look.

Why Day-Two Makeup Should Feel Different

A post-wedding event has a different setting, schedule and mood than the wedding. Those differences shape the makeup plan.

Start with light. Brunch usually happens in daylight, which shows color and texture more honestly than evening reception lighting. The article on morning ceremonies versus evening receptions explains how time of day changes what makeup looks like. A base that felt right under warm reception lights may look heavier at a sunny table.

Next, consider the occasion. A relaxed gathering may call for less coverage or softer definition around the eyes and lips. Some brides enjoy that. Others want a bold lip at brunch, and that is fine. Neither choice is more correct.

Your outfit, hairstyle and accessories give useful direction. A crisp white sundress, a casual knit and a hat each suggest a different level of polish. Photo plans matter too. If a photographer is joining you, plan for a little more definition.

You do not have to recreate your wedding-day makeup or follow a trend. A familiar style can still feel special with a few deliberate changes. Try a different lip shade or a lighter eye. Lighter makeup does not mean less polished makeup. It means makeup chosen for the setting.

Building a Lighter Day-Two Look

These five bridal makeup ideas cover the practical decisions. Use the ones that fit your morning.

  1. Reuse suitable wedding-day products, carefully.
  2. Soften your eyes and lips for daylight, or keep them bold if you prefer.
  3. Follow a short application order to save time.
  4. Match the look to the venue and the schedule.
  5. Prepare a small touch-up kit for photos and conversation.

1. Reusing Wedding-Day Products

By the wedding, most brides have a go-to foundation, concealer, blush and lipstick. Reusing what you know can save time and money. Choose items that still suit your skin today, not only the ones you used yesterday.

A product that felt comfortable on the wedding day may not feel the same the next morning. A long day, travel, salty air, and changes in sleep and hydration can all affect how skin responds. Check how your skin feels before you commit to a full application.

Use a smaller amount of foundation. Spread it thinly, then add coverage only where you want it, such as around the nose or over a blemish. Concealer can do the targeted work, so the rest of the face needs less.

Do not layer new product over yesterday’s makeup residue. Cleanse gently first. Then reapply cream or powder products with a light touch, since extra layers can look heavier in daylight.

Check your products and tools before reuse. Look at the texture and smell of each item. Wash brushes and sponges, or use clean ones. Skip any product that has touched something unclean, and skip disposable applicators used on the wedding day. Stop using anything that has caused irritation. No product is suitable for every person, and your skin is the best guide.

2. Softening Eyes and Lips for Daytime

If your wedding look included strong liner or a smoky eye, you can soften it instead of starting over. Use a lighter hand. Blend the edge so the color diffuses outward. A smudged lash line with a neutral shadow can keep the shape of the look without the intensity.

You can also keep what you love. Lashes, mascara and defined eyes are not off-limits during the day. If you enjoyed how you looked in them, keep them. The guide to dewy and matte bridal makeup can help you choose a finish that suits the light.

For lips, choose a shade that suits your outfit and the polish you want. With a pale outfit, a warm rose can look fresh. With a darker outfit, a deeper berry holds its own. A wedding-day lip color may work just as well at brunch if it still flatters your outfit. A bride who wore a classic red can wear it again with a lighter eye. The article on red lip bridal makeup covers how to wear it.

Adjust cheek color to match the light. Blush in a slightly softer tone can look fresh in daylight. Bronzer and highlight depend on your preferred finish. Shimmer is fine if you like it. Just keep it where light naturally hits, such as the tops of the cheeks.

3. Quick Application for a Relaxed Morning

A short order of application keeps the morning calm. This sequence works for many people.

  • Skin first: Cleanse, then use the moisturizer you normally use.
  • Complexion: Even it out where you want it. Use a thin layer of foundation or only concealer.
  • Cheeks: Add color next. Cream blush blends quickly and looks soft.
  • Eyes: Define them with mascara, a soft liner or both.
  • Lips: Apply color, then blot once if you like a lighter finish.
  • Final check: Look at the result in natural light, near a window if you can.

Prepare your products and tools the night before. Lay them out on a clean surface. Put a mirror near the best light. Then the morning is about application, not searching.

Know the difference between a quick refresh and a complete application. A refresh cleans the skin, adds a little coverage and brings back color. A complete application builds each step. Pick the one that matches your event. Time varies by person, so there is no fixed number to aim for.

4. Adjusting Makeup to the Venue and Schedule

The venue changes the plan. Think through how you will see and be seen.

  • Outdoor brunch: Direct sun shows texture and any heavy base. A lighter base and softer cheek color often look natural. Shade and bright light can look different, so check both. Wind can blow hair across your lips, so choose a lip finish that stays comfortable near your hair. See natural bridal makeup in outdoor photography for more on this.
  • Restaurant gathering: Indoor light is often warmer and dimmer. A little more definition on the eyes or lips can keep your face from looking washed out.
  • Hotel event: Hotels often mix daylight with warm bulbs. Look at your makeup in more than one spot before you leave.
  • Casual family breakfast: There may be little time and little formal lighting. A quick refresh with cheek color and lip color can be enough.

Think about the schedule as well. A short brunch needs less planning than a long afternoon of photos and visiting. No one can say exactly how makeup will wear. The setting, your skin and the hours involved all affect it.

5. Keeping the Look Comfortable Through Photos and Socializing

Plan your touch-ups without carrying a full kit. A few items go a long way. A lip color, a small mirror and blotting papers, if they suit your skin, cover most needs.

What you need depends on the products you used, your skin and the weather. It also depends on how long the event runs. A two-hour brunch may need one lip touch-up. A full day of photos and visiting may need more. The article on making bridal makeup last without touch-ups covers the factors that affect wear.

Do not plan around a set number of hours. Instead, choose products you trust and check in with a mirror at natural pauses, such as before photos.

What to Skip the Day After

Day two does not need strict rules. A few habits are worth rethinking, though.

  • The full wedding-day routine out of habit: Prefer a lighter finish? Then skip the steps you do not need.
  • More foundation or powder over buildup: Refresh the skin first. Extra layers over residue can look heavy.
  • Unfamiliar products right before the event: New products can change how makeup sits or cause a reaction. Save experiments for another day.
  • Aggressive exfoliation or a new skincare routine: Do not compensate for the previous day with harsh treatments. Gentle and familiar is a safer choice.
  • Assuming sensitive-skin labels guarantee comfort: A product labeled for sensitive skin can still cause a reaction in some people.
  • Packing too many products: A few planned touch-ups are usually enough.

If you notice persistent or significant irritation, stop using the suspected product. Seek appropriate professional advice if you need it. A makeup trial helps assess product comfort and the planned look. It cannot guarantee that a reaction will never occur. An overview of what happens during a bridal makeup trial explains what a trial involves.

Planning Makeup for Your Post-Wedding Event

If you are planning bridal makeup for second-day brunch and post-wedding events in Orange County, mention it at your consultation. Share your wedding-day makeup preferences, the second-day events, your outfit, the location and the preparation time you will have. That helps your Orange County bridal makeup artist suggest products and a lighter plan that fit you.

Browse the portfolio to see finished looks and note which finishes you like. The About page explains Brittany’s collaborative approach to consultations. You can also reach us through the contact page. Click the button below to schedule a consultation online.

Frequently Asked Questions

1. What’s the best way to prep my skin for bridal makeup for second-day brunch and post-wedding events?

Keep it gentle and familiar. Cleanse off the previous day’s makeup, then use the moisturizer and other products you normally use. Give them a few minutes to settle before makeup. Skip new products or harsh treatments. The guide to prepping your skin 30 days before your wedding covers longer-term routines.

2. How long will bridal makeup for second-day brunch and post-wedding events last through the ceremony and reception?

The ceremony and reception belong to the wedding day. Day-two makeup is a separate application for a different event. Wear time depends on the products, your skin, the environment and the length of the event. No set number of hours can be promised. Plan touch-ups based on how the day unfolds.

3. Can bridal makeup for second-day brunch and post-wedding events be adjusted for my specific skin tone or type?

Yes. Shade, finish and coverage can all be adjusted to your skin. Dry skin, oily skin and everything between may need different products or amounts. Share your usual routine and any sensitivities. Do not assume any single product works for every skin type.

4. Do brides need a separate makeup artist appointment for a day-after brunch?

Many brides apply a lighter look themselves using products from the wedding day. The available information does not confirm that Brittany offers day-after appointments. If you want an artist for a second-day event, ask at your consultation. Availability depends on the date, schedule and booking terms.

5.Can brides reuse wedding-day lipstick and other makeup products?

Often, yes. Check that each product is clean, unchanged in texture and smell, and has not caused irritation. Use a clean applicator, not a disposable one from the wedding day. Colors can look different in daylight, so check in a window before you leave.