Posted on

Corrective Makeup for Scarring and Hyperpigmentation

corrective makeup for scarring and hyperpigmentation

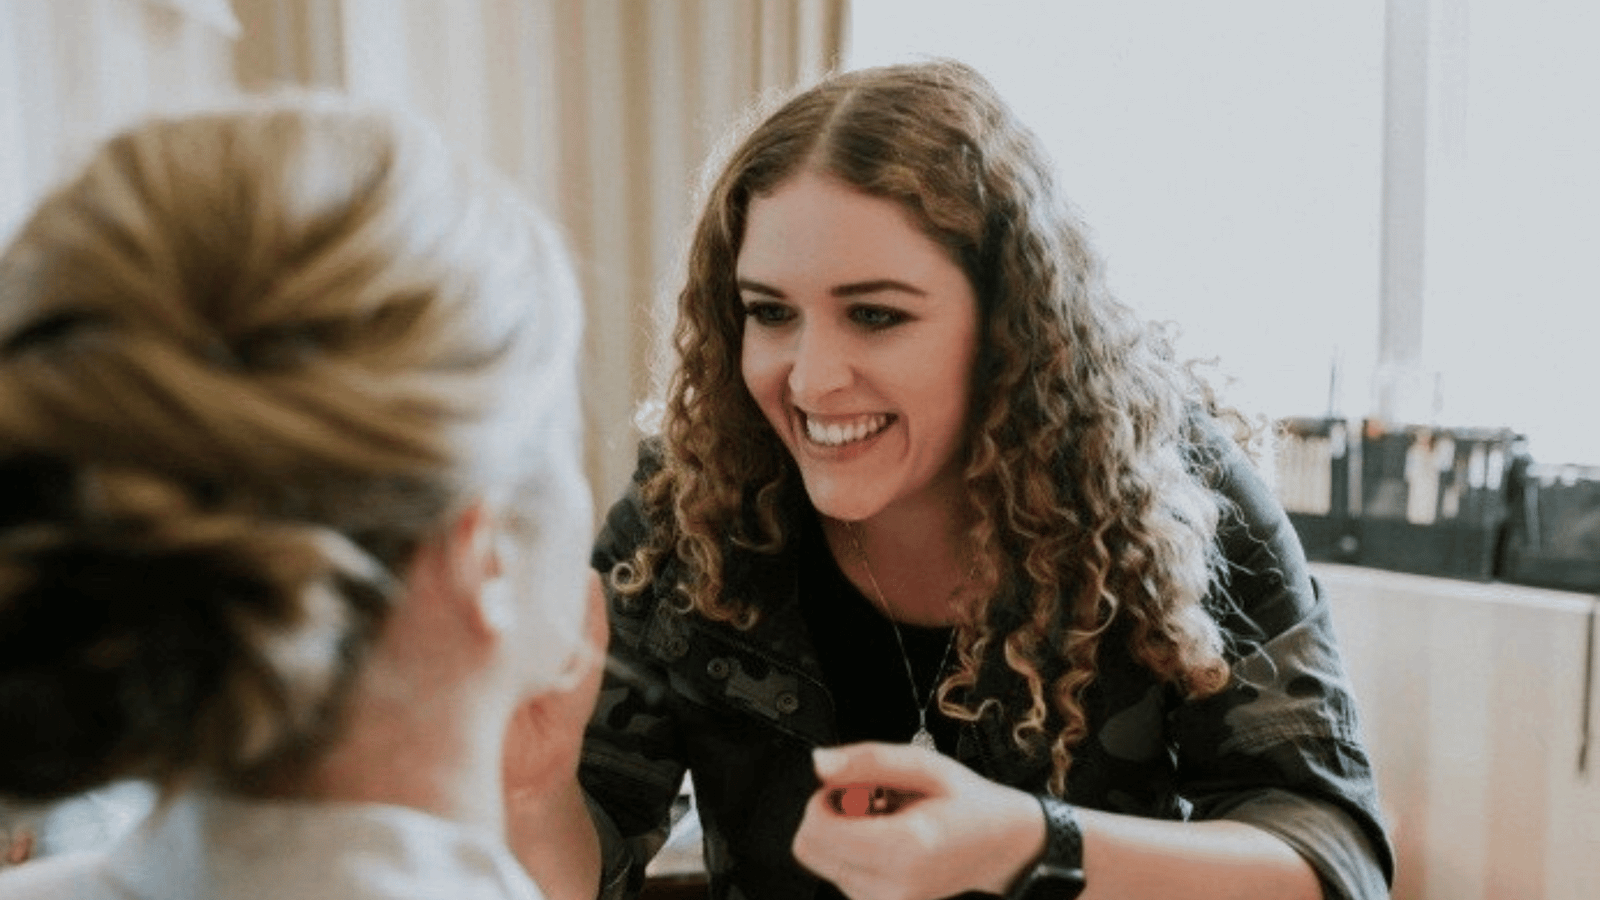
Every bride, mother of the bride, and client I sit down with has different skin, and I mean that beyond just tone or type. Scarring, hyperpigmentation, redness, and uneven texture are all things I work with regularly, and they’re areas I genuinely enjoy working in. Corrective beauty makeup comes naturally to me, I don’t have to think about it, I just do it. It’s one of the parts of this work that feels most rewarding.

Quick answer: corrective makeup for scarring and hyperpigmentation is a technique-based approach, built on color theory, layering, and setting, that visually evens out tone and texture for the day without masking your natural features. It’s not a medical treatment and it doesn’t change your skin permanently, it’s about how light and color are managed on the surface for however long your event lasts. Here’s how the process actually works.

What Corrective Makeup Actually Means

Corrective makeup isn’t about covering skin up or hiding it under layers of heavy product. It’s a more deliberate, technique-driven approach to evening out visible tone and texture, things like scarring, hyperpigmentation, redness, or discoloration, so the skin looks smooth and balanced in person and in photos. Little subtle changes on the skin can be very powerful, and that’s really the guiding idea behind corrective work: small, precise adjustments rather than broad, heavy coverage.

This is also where the enhance, don’t mask philosophy applies directly. The goal is never to erase who you are or flatten your natural features. It’s to bring balance to the skin so your features, not the areas you’re self-conscious about, are what stand out.

How Correction Works

Corrective makeup relies on a specific set of techniques, not just a heavier hand with foundation.

Color-Correcting Theory Basics

Color correction uses the color wheel to neutralize specific tones before foundation goes on. Certain shades are used to counteract redness, others to soften darker discoloration or hyperpigmentation, depending on what the skin actually needs. This step happens before base makeup, not instead of it, and it’s what allows the final coverage to stay lighter overall.

Layering for Even Coverage Without Heaviness

Once I neutralize the skin tone, I build coverage in thin layers rather than applying it all at once in a thick single pass. This keeps the final result looking like skin, not like a mask, while still achieving even, balanced coverage over scarring or uneven pigmentation. I use layering to create precise coverage, concentrating product only where it’s actually needed instead of applying it uniformly across the whole face.

Setting to Prevent Breakthrough

The final step is setting the work so it holds through the day, without discoloration or redness breaking back through as hours pass. This matters especially for long events like weddings, where makeup needs to look consistent from getting-ready photos through the reception, not just in the first hour.

Why This Is One of Brittany’s Named Specialties

Corrective beauty makeup is one of my named specialties, alongside bridal, print, and mature-skin makeup, and it’s an area I’ve built real depth in over 11+ years of hands-on bridal and print work. I also love to do mature makeup. I love to make moms, aunts, grandmas, and everyone in between feel beautiful and special too. Formulas and techniques that work beautifully on younger skin don’t always translate the same way to more mature complexions, and corrective work for scarring or hyperpigmentation often overlaps with that same skill set, adjusting technique to what a specific client’s skin actually needs rather than defaulting to one approach for everyone.

If you’d like to see how Brittany Brown Beauty approaches this kind of work, take a look at the portfolio, or read more about the background behind it on the about page. When you’re ready to talk through your own skin and what you’re hoping for, reach out through the contact page.

Frequently Asked Questions

1. How is corrective makeup for scarring and hyperpigmentation different from standard bridal makeup? 

Standard bridal makeup focuses on an overall look built around skin, dress, and venue. Corrective makeup adds a specific technical layer to that process, using color-correcting theory and precise layering to address particular areas of concern like scarring or hyperpigmentation, so the artist targets coverage instead of applying it uniformly.

2. What products work best for corrective makeup for scarring and hyperpigmentation? 

The right approach depends entirely on the individual’s skin, the type of discoloration or scarring, and the client’s skin type. Rather than relying on a single product recommendation that works for everyone, I assess your needs in person, since what works well for one skin concern may not be the right choice for another.

3. How far in advance should I book a trial for corrective makeup for scarring and hyperpigmentation? 

A trial is especially valuable for corrective work, since it’s the appointment where I test color correction and layering directly on your skin and adjust the approach as needed. Reaching out as soon as you confirm your date is the best way to make sure there’s time for a proper trial before the event itself.

Posted on

Waterproof Bridal Makeup for Beach and Outdoor Ceremonies

waterproof bridal makeup for beach and outdoor ceremonies

Beach and outdoor ceremonies are some of the most beautiful weddings I get to work on, and they also come with a very real question every bride should ask early: will my makeup actually hold up out here? Between happy tears, sea air, sun, and the occasional coastal breeze, an outdoor Orange County or San Diego ceremony asks a lot more of your makeup than an indoor venue does. After 11+ years of hands-on bridal work along this coastline, building a look that holds up outdoors is something I plan for from the very first consultation.

Quick answer: a truly reliable waterproof bridal look comes down to three things, a waterproof base and concealer, smudge-proof eye makeup, and a long-wear lip formula, all applied with proper skin prep and setting technique. No formula is completely foolproof for every skin type or every condition, which is exactly why a trial run matters. Here’s how I approach it, checklist-style, so you know what to ask about and expect.

Why Waterproof Formulas Matter for Outdoor Ceremonies

Outdoor ceremonies expose your makeup to conditions an indoor venue simply doesn’t have: direct sun, humidity, sea air, wind, and often genuine tears during the vows. Regular formulas can break down faster under that combination, especially around the eyes and along the base. Waterproof and long-wear formulas resist breakdown, which matters most during the moments when you want your makeup to last, walking down the aisle, exchanging vows, and through however many happy tears the day brings.

This is also where the “enhance, don’t mask” philosophy stays front and center. Waterproof doesn’t mean heavier or more done-up. The goal is still a natural, glowing look that feels like you, just built with formulas and techniques that can handle the elements.

Building a Waterproof Look

A waterproof bridal look isn’t one single product decision, it’s a combination of choices across the whole face.

Waterproof Base and Concealer

The base is where durability starts. A properly prepped, well-set base and concealer are formulated to resist moisture and humidity better than standard everyday makeup, which matters most under direct coastal sun or near the water. This is one of the areas where genuine coastal-conditions experience makes a difference, since choosing the right base for Southern California humidity and sea air is different from choosing one for an indoor, climate-controlled venue.

Smudge-Proof Eye Makeup

Eyes are usually the first area to show wear during an emotional ceremony, so smudge-proof eye formulas and careful application matter here more than almost anywhere else on the face. The goal is a look that stays soft and natural through happy tears rather than shifting or smudging the moment emotions run high.

Long-Wear Lip Formulas

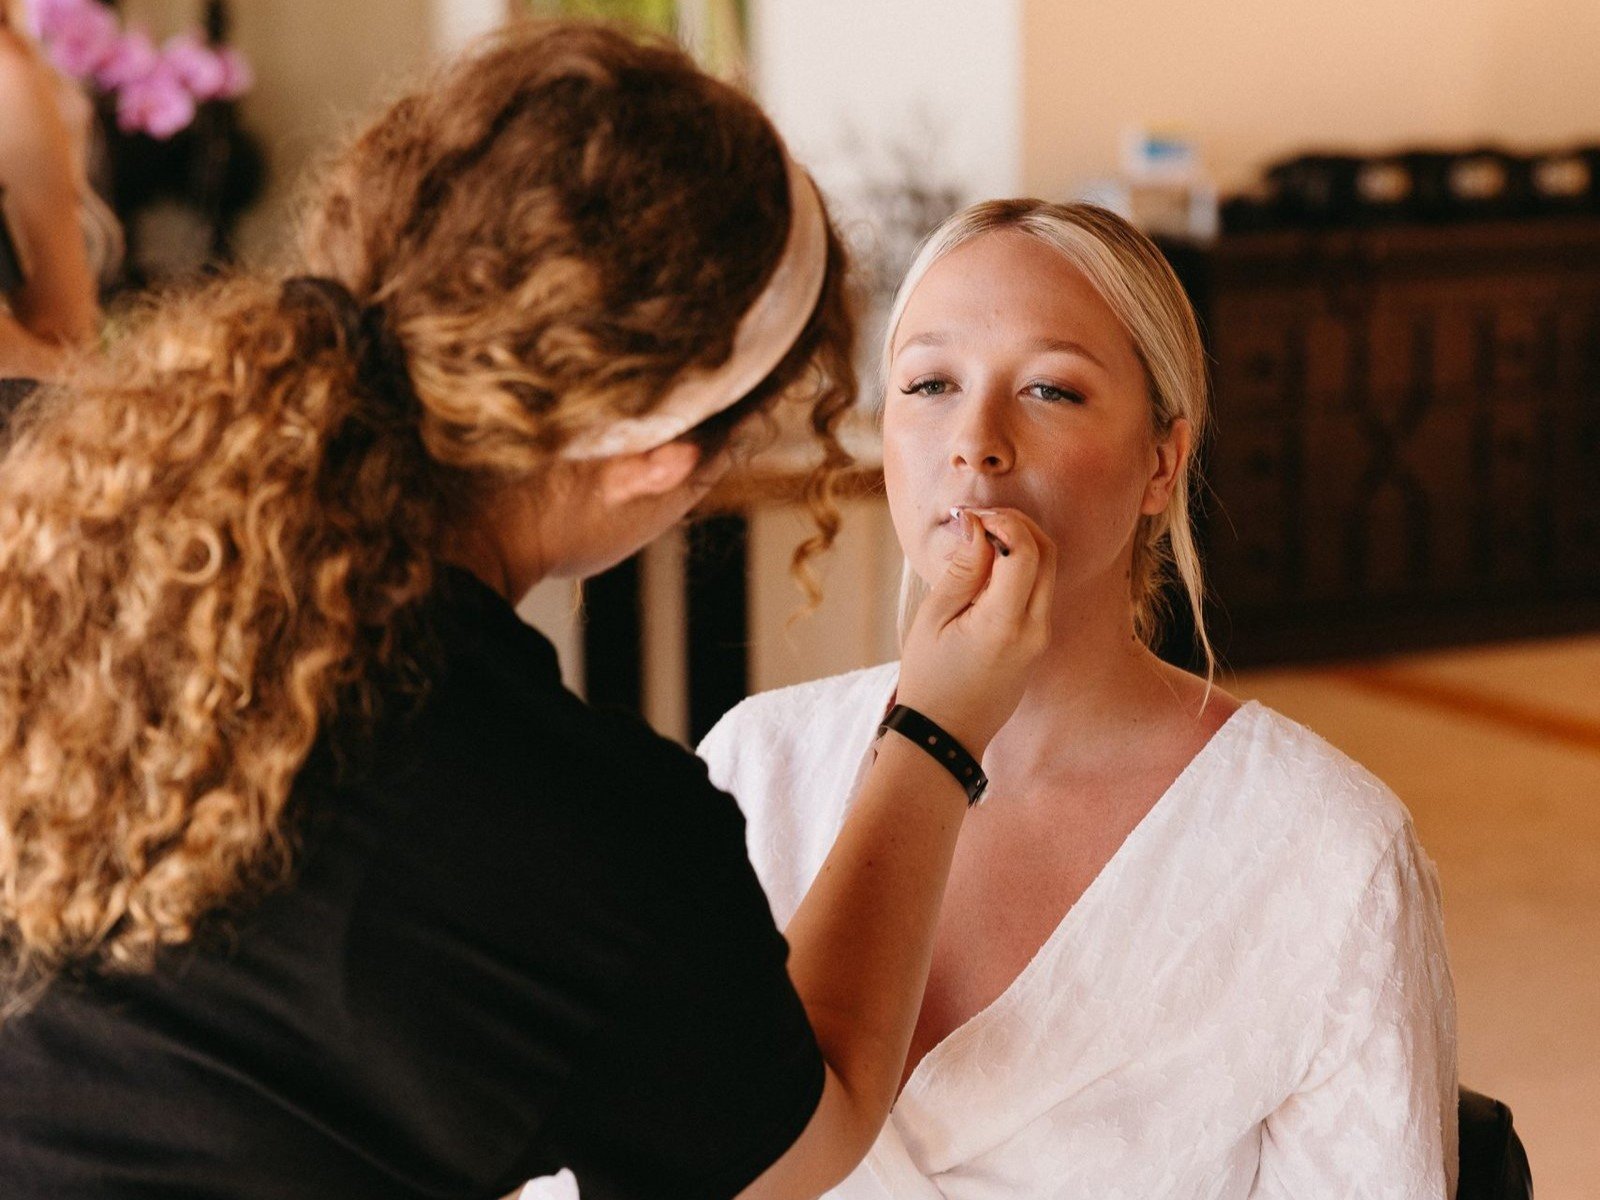
Wind, saltwater air, and hours between ceremony and reception can all wear down lip color faster outdoors. A long-wear lip formula, applied and set properly, helps color stay put through the ceremony, the receiving line, and photos, without needing constant reapplication.

What Waterproof Doesn’t Mean

It’s worth being upfront about this: manufacturers create waterproof and long-wear formulas to resist moisture and perform better in humidity and through tears, but no formula can promise the same results for every skin type or under every possible condition. Everyone’s skin behaves a little differently, and factors like oil production, sun exposure, and even how the day unfolds can all play a role. That’s exactly why a bridal trial matters so much for outdoor ceremonies specifically. A trial lets us test the actual formulas on your skin, in advance, so we can see how they perform and make any adjustments before the wedding day itself, rather than hoping for the best.

Brides often describe the result of this kind of prep the same way, feeling like themselves but elevated, confident that their makeup will still look like them by the time they’re dancing at the reception. That’s the outcome this whole process is built around.

If you’d like to see examples of past outdoor and coastal bridal looks, take a look at the portfolio, or read more about the experience behind it on the about page. When you’re ready to talk through your own outdoor ceremony, reach out through the contact page.

Frequently Asked Questions

1. What’s the best way to prep my skin for waterproof bridal makeup for beach and outdoor ceremonies? 

Good prep starts well before the wedding day. Avoiding new skincare products or treatments in the final 10 days before the wedding, keeping a consistent skincare routine for at least four weeks out, and staying well hydrated in the week leading up to the event all help create skin that holds waterproof formulas better and looks smooth under coastal sun.

2. How long will waterproof bridal makeup for beach and outdoor ceremonies last through the ceremony and reception? 

Longevity depends on skin prep, formula choice, and setting technique working together, and it can vary from bride to bride. A trial is the most reliable way to see how a specific look performs on your skin over several hours in real conditions. 

3. Can waterproof bridal makeup for beach and outdoor ceremonies be adjusted for my specific skin tone or type? 

Yes. Shade, formula, and technique are all chosen based on your individual skin, including adjustments for mature skin or other specific concerns, rather than a single fixed approach applied to everyone. No formula is described as working identically for all skin types, which is part of why fittings and trials matter.

Posted on

How Far in Advance Should You Book Hair and Makeup in Orange County

how far in advance should you book hair

One of the most common questions I hear from engaged couples is some version of “when should we actually book hair and makeup?” It’s a fair question, and the honest answer is that it depends on your wedding date, your venue, and how in-demand your specific weekend is. Booking too late can mean losing your first-choice artist entirely, so it’s worth understanding the general timeline before you get too far into vendor research.

Quick answer: For most Orange County and San Diego weddings, reach out as soon as you book your venue, especially if you’re planning a spring or fall wedding. Popular weekends often fill well in advance, while off-peak dates usually offer more flexibility. Your wedding date becomes official once you sign the contract and submit the required deposit. Here’s how to think through the timing.

Why Booking Timelines Vary by Season

Not every wedding date carries the same level of demand. Orange County’s wedding season has clear peaks, and beauty vendors who work with a high volume of brides during those peaks tend to book those weekends earliest. San Diego follows a similar pattern, with its own defined peak season. Outside of those windows, there’s typically more room to book closer to your date without the same pressure.

This is why “how far in advance should I book” doesn’t have one universal answer. A Saturday in peak season and a weekday or off-season date can have very different booking realities, even within the same general area.

Recommended Booking Windows

Here’s a general breakdown of how timing tends to play out across the year.

Peak Spring and Fall Weekends

Spring and fall are peak wedding seasons across Orange County, and popular venues and dates in that window book out well in advance. Once your venue is confirmed, reaching out promptly is the best way to make sure your preferred artist is still available for your date. For San Diego specifically, peak wedding season runs March through June and September through November, and booking a mobile artist six to twelve months ahead is a good general guideline for that market.

Off-Peak Booking Flexibility

Winter and summer weekdays, or dates outside the peak spring and fall windows, generally offer more flexibility. That doesn’t mean there’s no reason to plan ahead, but it does mean there’s often more breathing room if your date falls outside the busiest stretch of the calendar.

What Happens if You Book Last-Minute

Booking close to your wedding date isn’t impossible, but it does narrow your options. Popular dates often fill quickly, and artists with limited weekend availability may no longer have openings. A shorter timeline also leaves less room for a proper trial before the wedding. If you’re working with a shorter runway, it’s still worth reaching out directly to ask about availability instead of assuming nothing is left.

What Secures Your Date Once You Decide

Once you choose your beauty team, sign the contract and submit the required deposit to reserve your wedding date. This standard practice extends across the wedding industry and protects both you and your artist by putting the agreement in writing before anyone reserves the date. Because every vendor sets different deposit amounts, refund timelines, and cancellation policies, confirm those details directly before you book.

Beyond the booking process, take time to read what past clients say about working with the artist. Trustindex collects and verifies the reviews displayed on this site, confirming that they originated on Google. Reading verified third-party reviews gives you a more complete picture of a vendor before you sign a contract.

If you’d like to see examples of Brittany Brown’s work, take a look at the portfolio, or learn more about the artist behind it on the about page. When you’re ready to check availability for your date, reach out through the contact page.

Frequently Asked Questions

1. What should I ask before booking how far in advance should you book hair? 

Ask about availability for your specific date, whether the artist includes or recommends a trial, what the contract and deposit process looks like, and how the artist handles group or bridal party bookings for a larger wedding party. Getting clear answers upfront makes the rest of the planning process much smoother.

2. How far in advance should I secure how far in advance should you book hair? 

For peak spring and fall Orange County weekends, reaching out as soon as your venue is confirmed is the safest approach. For San Diego weddings specifically, six to twelve months ahead is a reasonable guideline during peak season, which runs March through June and September through November. Off-peak dates generally allow more flexibility.

3. What’s included once I sign a contract and pay a deposit? 

Signing a contract and paying a deposit secures your date and puts the working agreement in writing. Before signing, confirm the specific inclusions, payment schedule, and policy details directly with your vendor, since those details can vary.

Posted on

Bridal Makeup for Newport Ridge Estate Weddings

bridal makeup for newport ridge estate weddings

Newport Ridge is one of my favorite areas to work in. Private estate villas and Newport Ridge vacation rentals give couples a level of privacy and flexibility that a traditional hotel or ballroom venue just can’t match, and that flexibility is part of what makes bridal beauty prep here feel so relaxed and personal. If you’re planning a Newport Ridge estate wedding, here’s how I approach makeup for this specific setting, and what to expect from the getting-ready process.

What Estate Weddings in Newport Ridge Typically Involve

Newport Ridge sits within the broader Newport Coast market, alongside nearby favorites like the Resort at Pelican Hill and the Beachcomber at Crystal Cove. What sets a private estate wedding apart is that the entire day, from getting ready to ceremony to reception, often happens on one property. There’s no travel between locations, no hotel checkout to plan around, and often more control over timing and space than a resort property allows.

That kind of setting is a great match for a mobile artist, since it means the whole bridal party can get ready together in one place, without anyone needing to leave for a salon appointment mid-morning. It also tends to mean beautiful natural light, whether that’s soft interior light in a bedroom suite or the kind of golden-hour glow this coastal stretch of Orange County is known for.

Planning Your Makeup Around a Private Estate Setting

Private estates come with their own rhythm, and a big part of getting bridal makeup right here is planning around how the space itself works.

Indoor and Outdoor Lighting Transitions

Estate weddings often move between indoor prep spaces and outdoor ceremony or photo locations, and the lighting in each can look surprisingly different. A look that reads beautifully indoors under soft light needs to hold up just as well outside in direct coastal sun. Part of what I plan for during application is making sure your finished makeup translates cleanly across both, so you look like yourself in every setting, not just the one you got ready in.

Mobile Setup in a Private Home

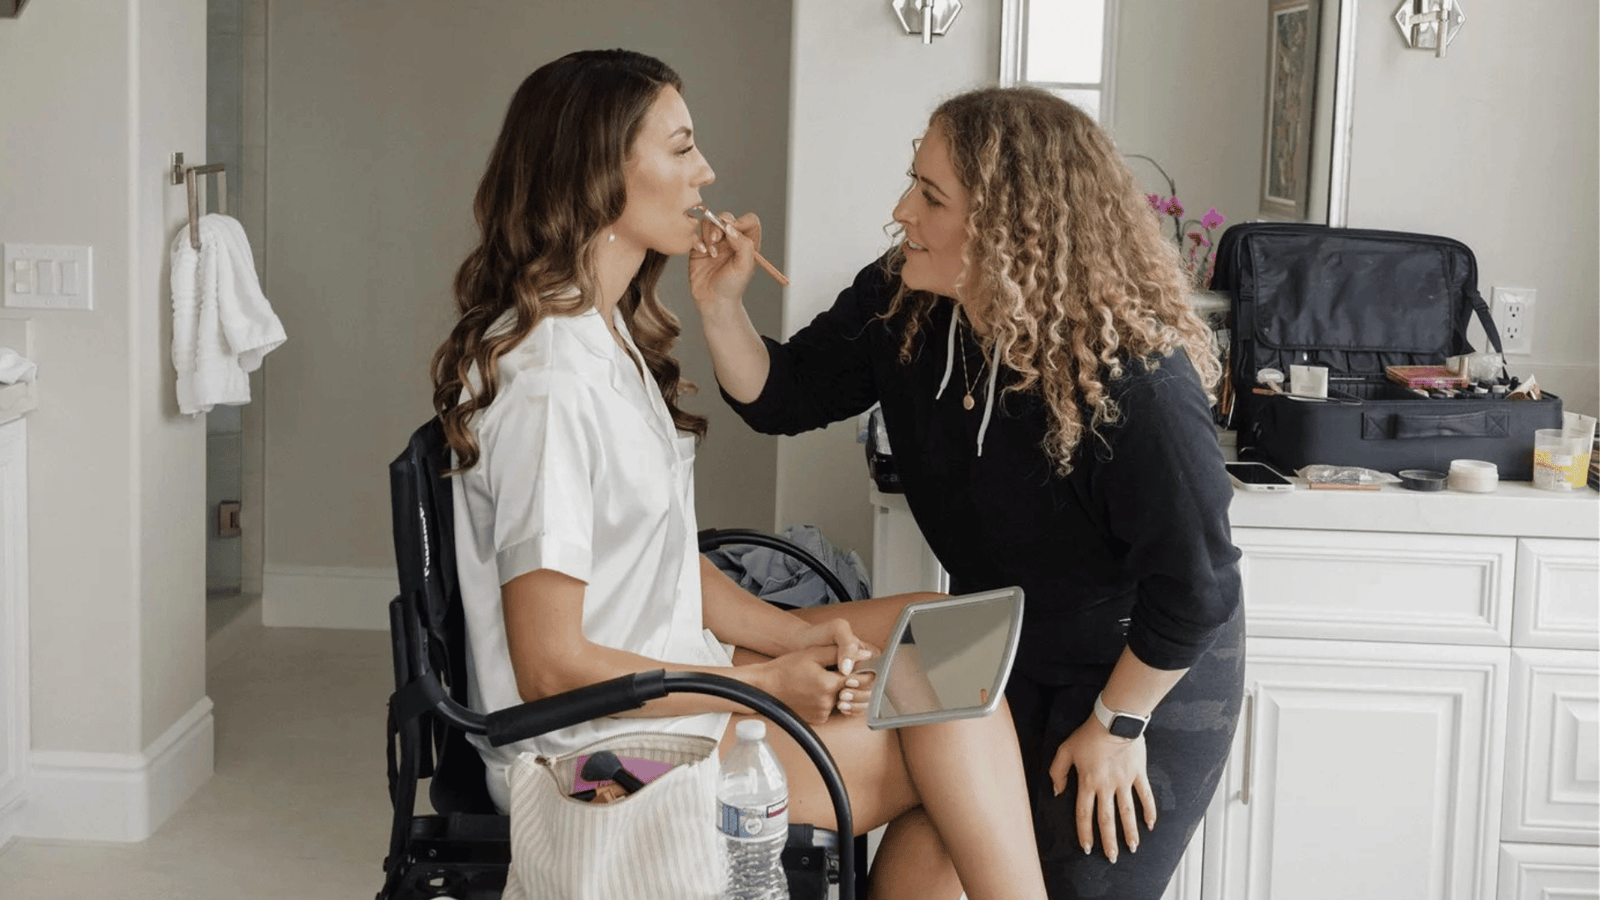
Because a private estate doesn’t provide a dedicated professional getting-ready space like many bridal suites do, I bring everything required to create one, including studio-quality lighting, professional seating, and a complete makeup kit. Setup typically takes about 15 to 20 minutes. From there, I prep the skin, apply the makeup, and set the finished look using the same reliable process I follow for every bridal client while adapting to the room or space you’ve chosen for the morning.

Coordinating With a Larger Bridal Party

Estate weddings often mean a larger, more relaxed guest list and a bigger bridal party getting ready on-site. For larger parties, I bring in additional artists so everyone is ready on schedule, without cutting corners on the bride’s application. That way the whole group, bridesmaids, mothers, and anyone else getting styled, stays on track without the bride’s own timeline being rushed to accommodate everyone else.

Why Mobility Matters Most at Private Venues

Private estates don’t come with a built-in glam room or professional lighting rig, which is exactly where a fully mobile artist makes the biggest difference. Bringing my own lighting and seating means the quality of your makeup never depends on what the house happens to have available. It also means your entire getting-ready experience, from your bridal party to your family, stays together in one place, with the timeline staying intact instead of being built around a commute to and from a salon.

Newport Coast venues, including private estates in Newport Ridge, tend to book up quickly during peak spring and fall wedding weekends. Once your venue is confirmed, it’s worth reaching out early to secure your date with a signed contract and deposit, especially if you’re hoping to book for a popular weekend.

If you’d like to see examples of past estate and coastal weddings, you can browse the portfolio, or read more about my background on the about page. When you’re ready to talk through your Newport Ridge wedding day, reach out through the contact page.

Frequently Asked Questions

1. What makes bridal makeup for Newport Ridge estate weddings different from other Orange County venues? 

The biggest difference is the setting itself. Private estates give couples a one-property wedding day with more flexibility and privacy than a resort or hotel venue. That flexibility changes how we plan the getting-ready timeline and makes a fully mobile setup especially valuable because private estates rarely provide a dedicated professional styling space.

2. How far in advance should I book for bridal makeup for Newport Ridge estate weddings? 

Newport Coast dates, including Newport Ridge estate weddings, tend to book well in advance during the busy spring and fall wedding seasons. Contact us as soon as you secure your venue to reserve your wedding date with a signed contract and deposit.

3. Does the venue affect my makeup or hair plan? 

Yes. The venue plays an important role in planning, from the way natural light moves through the space to the amount of time a larger bridal party requires. For example, a private estate with indoor and outdoor spaces requires a look that performs well in both environments. We discuss these details before the wedding, and they often help brides decide whether to schedule a pre-wedding trial.

Posted on

Choosing the Right Foundation Shade for Your Wedding Day

right foundation shade for your wedding day

Of all the small decisions that go into your wedding-day makeup, foundation shade might be the one with the biggest impact and the easiest to get wrong if it’s rushed. I’ve been doing bridal makeup for 11+ years now, and shade-matching is one of those things that looks simple until you’re standing in a dim bathroom mirror the morning of, trying to decide if a color reads right. It deserves more care than that, and it’s a big part of why I build shade confirmation into the process well before the wedding day itself.

My approach to foundation has always come back to the same philosophy: enhance, don’t mask. The right shade isn’t the one that changes how you look, it’s the one that disappears into your skin so completely that people just see you, glowing, on one of the most photographed days of your life. That’s the “like yourself, but elevated” feeling so many brides describe after their wedding and it starts with getting the shade right, not with piling on more product.

Why Wedding-Day Lighting Changes Shade-Matching

A shade that looks perfect under one type of lighting can look noticeably different under another. Store lighting, bathroom lighting, and phone-camera flash all render color differently than natural daylight, and natural daylight is what most photographers use throughout your wedding day, whether they’re capturing golden-hour portraits at Crystal Cove, harbor views in Newport Beach, or bright coastal scenes in San Diego.

That’s why I don’t rely on a quick shade match under artificial lighting. Instead, I check your foundation in natural daylight and, whenever possible, under lighting that closely matches your wedding day. That approach ensures the shade looks natural both in person and in your wedding photos.

How to Test and Confirm Your Shade

Getting the shade right isn’t about guessing at a bottle, it’s a process, and it’s one I go through carefully with every bride.

Testing in Natural Daylight

The most reliable way to confirm a shade is to apply a small amount along the jawline and blend it into the neck, then step into natural daylight near a window or outdoors to see how it actually reads against your skin. Artificial lighting can shift how warm, cool, or deep a shade appears, so daylight is the closest thing to a preview of how it will look in your ceremony and reception photos.

Checking Undertone, Not Just Depth

Depth (how light or dark a shade is) is only half the equation. Undertone whether your skin leans warm, cool, or neutral matters just as much, and it’s often where shade-matching goes wrong. A foundation can be the right depth and still look slightly off if the undertone doesn’t match, sometimes reading gray, orange, or pink against your natural skin. Part of what comes from years of hands-on bridal work is being able to spot that mismatch quickly and adjust, rather than defaulting to whatever depth looks “close enough.”

Why This Matters at Your Trial

This is exactly why I strongly recommend a bridal trial before the wedding day. A trial gives us the chance to test shade and formula directly on your skin, in real lighting, with time to adjust if something isn’t quite right instead of discovering an issue the morning of. It also gives us a chance to talk through any skin sensitivities or recent treatments, so the whole look is built around what your skin actually needs, not a guess. A trial isn’t about assuming something will go wrong; it’s about making sure nothing has to be figured out last-minute on a day that’s already full enough.

What Happens If Your Skin Tone Shifts Before the Wedding

It’s common for skin tone to shift a little between your trial and your wedding day a summer tan, more sun exposure, or even seasonal changes in skin can all play a role. This is one of the reasons I like to stay in touch with brides as the wedding date gets closer, especially if there’s been a noticeable change since the trial. If your tone has shifted, we can reassess and adjust the shade accordingly, rather than sticking rigidly to what was tested weeks or months earlier. The goal is always the same: a foundation that matches the skin you actually have on the day itself.

Built to Hold Up, Not Just Look Good at 9 AM

Southern California weddings come with their own conditions: heat, humidity, sea air, and long hours between getting-ready photos and the last dance. Shade matching is only part of the equation. I also apply and set each product to withstand those conditions throughout the day. I want every bride’s makeup to look the same in the reception photos as it did walking down the aisle, so I focus on proper skin prep, the right formulas for the day’s conditions, and a setting process that stands up to the coastal climate of Southern California instead of relying on a generic approach.

If you’d like to see how this comes together, you can browse real bridal looks in the portfolio, or read more about my background on the about page. When you’re ready to talk through your own wedding-day look, reach out through the contact page. I’d love to hear about your plans.

Frequently Asked Questions

1. What’s the best way to prep my skin for the right foundation shade for your wedding day? 

Good shade-matching starts with well-prepped skin. Avoiding new skincare products or treatments in the final 10 days before the wedding, keeping a consistent skincare routine for at least four weeks out, and staying well hydrated in the week leading up to the event all help create a smooth, even canvas for foundation to sit correctly and read true to your natural tone.

2. How long will the right foundation shade for your wedding day last through the ceremony and reception? 

Foundation and shade selection are just one part of longevity proper skin prep, formula choice, and setting techniques suited to Southern California heat and humidity all work together to help your look hold up through the ceremony, photos, and reception. A bridal trial is the best way to see how a specific formula and shade perform on your skin over several hours. 

3. Can the right foundation shade for your wedding day be adjusted for my specific skin tone or type? 

Yes. We select your foundation shade and formula based on your individual skin rather than a fixed package look. We consider your undertone, skin depth, and skin type, then adjust our products and techniques as needed for mature skin or other specific concerns. Every recommendation reflects what works best for your skin instead of following a one-size-fits-all approach.

Posted on

What to Bring to Your Bridal Makeup Trial

What to Bring to Your Bridal Makeup Trial

A bridal makeup trial gives you one real chance to test your wedding-day look before it counts. Walking in prepared helps your artist understand your skin, your vision, and your day, so the two of you can spend the appointment refining details instead of starting from scratch. A little planning ahead turns your trial from a guessing game into a working session that sets you up with a look you already trust.

At Brittany Brown Beauty, more than 11 years of Orange County bridal makeup experience shape how each trial runs, starting with what a bride brings in and how her skin has been prepping in the weeks before.

Why Preparation Makes Your Trial More Productive

Your artist can only work with what you bring, so preparation directly shapes how useful your trial turns out to be. When you arrive with inspiration photos, sensitivity notes, and a sense of your dress, your artist can skip the guesswork and start building your actual look right away.

Skin prep matters just as much as what you bring in your bag. Brittany Brown Beauty recommends starting a consistent skincare routine about four weeks before your trial, since hydrated, well-prepped skin holds makeup better and photographs more evenly. That same four-week window also gives your skin time to settle if a product doesn’t agree with it, well before your trial or your wedding day.

In the final 10 days before your trial or your wedding, avoid introducing any new skincare or beauty products. New products can trigger unexpected reactions like redness, breakouts, or sensitivity, and your artist needs to see your skin’s true baseline, not the effects of something you tried once.

What to Bring

Inspiration Photos

Bring a handful of photos that capture the look you want, whether you save them from Pinterest, Instagram, or magazines. Include a mix of full-face looks and close-up detail shots, since eyes, lips, and overall finish often come from different references. Photos give your artist a shared visual language, so you spend your trial adjusting a real starting point instead of describing an idea from scratch.

If you feel unsure about your exact style, bring a range of photos anyway. Seeing what you gravitate toward, and what you rule out, helps your artist narrow down your preferences just as effectively as a single clear reference would.

Your Dress or a Photo of It

Your dress sets the tone for your whole look, so bring it or a clear photo of it if you can. Neckline, fabric, and embellishments all influence how your artist balances your makeup, from how dramatic your eyes should look to how your skin should shine or stay matte.

If your dress lives at a bridal salon and traveling with it isn’t realistic, a few clear photos from different angles work well as a substitute. Your artist mainly needs to see color, formality, and overall style to build a cohesive look around it.

Any Skincare or Sensitivity Notes

Come ready to share your skin type, any known allergies, and any products or ingredients that have caused irritation in the past. Brittany Brown Beauty asks every bride to complete a sensitivity disclosure before her trial, so your artist can choose products that suit your skin from the very first application.

Mention any skin concerns you’re currently managing too, like dryness, redness, or breakouts, since these all shape which products and techniques your artist reaches for. The clearer your notes, the fewer surprises you’ll run into on your actual wedding day.

What Not to Worry About Bringing

Brides sometimes feel like they need to arrive with a long list of products, tools, or backup makeup, but a trial doesn’t require any of that. Your artist brings a full kit built to handle a wide range of skin types and tones, so you don’t need to supply foundation shades, brushes, or specific brands.

You also don’t need a finalized hairstyle or a complete vision for your whole wedding-day look before you walk in. Your trial exists precisely to help you figure those details out, so an open mind about color, finish, and overall style often serves you better than a rigid plan.

Skip bringing heavy makeup on the day of your trial. Your artist can see your skin’s natural texture and tone more clearly when you arrive with a clean or lightly made-up face, which makes it easier to build your look accurately from the start.

Ready to book your trial? Explore the portfolio for inspiration, learn more about Brittany Brown Beauty’s approach to bridal makeup, or contact the team directly to schedule your appointment.

Frequently Asked Questions

1. When should I start prepping for what to bring to your bridal makeup trial? 

Start gathering inspiration photos and thinking about your dress a few weeks before your appointment, but begin your skincare routine earlier, about four weeks out, so your skin has time to settle into a consistent routine before your trial.

2. What should I avoid in the days leading up to my wedding? 

Avoid trying any new skincare or beauty products in the final 10 days before your wedding. New products can cause unexpected reactions, and your artist needs your skin to reflect its true, consistent baseline on the big day, not the effects of something untested.

3. What should I bring up with my artist about what to bring to your bridal makeup trial? 

Mention any skin sensitivities, allergies, or products that have caused irritation in the past, along with any specific concerns like dryness or breakouts. Sharing this information upfront, alongside your sensitivity disclosure, helps your artist choose the right products and techniques for your skin from your very first trial.

Posted on

Bridal Makeup at the Resort at Pelican Hill: What to Know

bridal makeup at the resort at pelican hill

Perched above Newport Coast with sweeping ocean views, Pelican Hill is one of Southern California’s most iconic wedding venues. While the scenery is unforgettable, the coastal setting also creates unique conditions that can influence how bridal makeup wears throughout the day.

With more than 11 years of bridal makeup experience, Brittany Brown understands how coastal venues like Pelican Hill can affect the way makeup wears from the ceremony through the final dance. Here’s what to consider when planning bridal makeup for a Pelican Hill wedding.

What Makes Pelican Hill a Unique Makeup Environment

Pelican Hill is bright. Between the ocean light bouncing off the bluffs and the resort’s airy, sunlit rooms, makeup gets tested in a way it wouldn’t in a dimmer venue.

That brightness is flattering in photos, but it also means makeup needs to hold up under natural daylight, not just under warm indoor lighting. Products that look soft and blended indoors can read differently once a bride steps outside toward the coastline for portraits.

This is one of the reasons a fully mobile setup matters here. Bringing in professional, adjustable lighting means the makeup gets built to match how it will actually look outdoors, not just how it looks under whatever light happens to be in the getting-ready suite.

There’s also a scale factor. Pelican Hill hosts large, formal weddings often enough that timelines involve bigger bridal parties, more photography blocks, and more moving pieces overall. A makeup plan here has to work within that bigger picture, not just for the bride alone.

Planning Around the Venue

Resort Lighting and Room Setup

Getting-ready suites at Pelican Hill are beautiful, but resort lighting is built for ambiance, not makeup application. Overhead fixtures and warm-toned lamps can shift how colors read once a bride is out in daylight.

Because of that, a mobile artist who brings their own lighting setup has a real advantage here. It’s not about convenience alone. It’s about seeing true color and finish while application is happening, so nothing looks off once the bride is outside.

Room layout matters too. Suites at Pelican Hill are spacious, but they’re often shared with bridesmaids, family members, and photographers documenting the morning. A mobile setup that’s compact and self-contained keeps the space workable for everyone, without makeup application competing for room with the rest of the getting-ready timeline.

Coastal Bluff Conditions for Outdoor Portions

Pelican Hill’s bluff-top setting means wind and ocean humidity are part of the day, especially for outdoor ceremonies or bluff portraits. Makeup built for this venue needs to hold through both.

A long-wear, properly set base matters more here than at a fully indoor venue. So does a plan for touch-ups between the ceremony and reception, since coastal air can affect skin differently than an air-conditioned ballroom would.

Wind is worth planning for separately from humidity. Bluff-top ceremony sites can have a steady breeze even on a calm day elsewhere in Orange County. That affects hair more visibly than makeup, but it also means makeup should be able to hold through a bride touching her face, adjusting a veil, or simply being outside longer than planned for photos.

Time of day changes things too. A late-afternoon ceremony facing the ocean means direct light and warmer tones as the sun moves lower, while a midday event calls for makeup that can handle harsher, more direct sun. Knowing the ceremony time in advance helps shape those decisions ahead of the wedding day.

Timeline Considerations for a Resort Wedding

Resort weddings tend to run on a tighter, more layered schedule than backyard or private-estate weddings. Between resort check-in times, photography blocks, and vendor coordination, the makeup timeline needs to fit into a day that isn’t fully in the couple’s control.

Booking early matters for this reason too. Pelican Hill is a popular venue during peak wedding season, and a fully mobile bridal artist needs enough lead time to confirm arrival windows that work with the resort’s own schedule.

It also helps to build in buffer time. Resort weddings often involve valet arrival windows, security check-ins, and coordination with the venue’s own event staff, all of which can shift a morning timeline by 15 or 20 minutes without warning. A makeup schedule with a built-in cushion tends to hold up better than one planned down to the exact minute.

What Brittany Brown Beauty Has Learned Working This Venue

After multiple weddings at Pelican Hill, a few patterns have held true. Natural, luminous finishes photograph better here than heavy matte looks, especially with so much daylight involved. Long-wear setting techniques matter more given the coastal air. And flexibility in timing matters, since resort logistics can shift the schedule even with careful planning.

Working closely with the bridal party’s other vendors has made a difference too. Coordinating with the photographer’s shot list, for example, helps prioritize when the bride’s makeup needs to be fully finished versus when there’s still room for last touches. That kind of coordination tends to matter more at a venue with as many moving parts as Pelican Hill.

None of this changes the core approach. It’s still about enhancing what’s already there, not building a different face for the venue. It just means accounting for light, air, and timeline in a way that’s specific to Pelican Hill.

For brides curious what this looks like in practice, the portfolio includes looks built for coastal Orange County venues like this one. To talk through a specific wedding date, reaching out directly is the best next step.

Frequently Asked Questions

1. What makes bridal makeup at the Resort at Pelican Hill different from other Orange County venues?

The combination of bright coastal daylight and bluff-top wind and humidity sets it apart from most inland Orange County wedding venues. Makeup needs to be built to hold up outdoors, not just look good in the getting-ready suite.

2. How far in advance should I book for bridal makeup at the Resort at Pelican Hill?

Pelican Hill is a popular venue during peak wedding season, so booking early is worth prioritizing. Earlier booking also allows more time to plan a timeline that works with the resort’s own scheduling.

3. Does the venue affect my makeup or hair plan?

Yes. Lighting, wind, and humidity at a coastal bluff venue like Pelican Hill can all affect how makeup and hair hold up through the day. That’s part of why working with a mobile bridal artist familiar with the venue can be helpful for planning ahead.

Posted on

The Best Bridal Makeup Looks for High-Neck Wedding Dresses

Best Bridal Makeup Looks

High-neck wedding dresses have a quiet kind of drama. Lace collars, illusion necklines, and structured mock-necks draw the eye upward before anything else. That means the makeup has to hold its own against a lot of visual detail happening near the face.

Getting this balance right takes more than picking a pretty look from an inspiration photo. It takes understanding how a high neckline changes the proportions of the whole bridal look, and choosing makeup that works with the dress instead of competing with it.

Brittany Brown has spent more than 11 years building bridal looks around dresses just like this. Her approach comes down to one idea: enhance, don’t mask. The goal is always a bride who looks like herself, just elevated. Here’s how that philosophy plays out specifically for high-neck styles.

Why High Necklines Shift the Makeup Focus Upward

A high neckline covers the collarbone and often part of the neck itself. That’s a lot of skin that would normally draw the eye downward on a strapless or sweetheart gown.

Once that area is covered, the face becomes the main focal point of the entire look. Every detail near it, from brow shape to skin finish to lip color, carries more visual weight than it would with a more open neckline.

This is why makeup for high-neck dresses often needs a slightly different balance than makeup built for other silhouettes. Nothing has to change dramatically. But small decisions, like how much shimmer goes on the eyes or how bold the lip is, matter more here because there’s less going on elsewhere in the frame.

Best Looks to Try

Statement Eyes With a Softer Base

Since the eyes sit closest to a high collar, they’re often the first place worth adding intention. A defined eye, whether that’s a soft smoky effect or a precise winged liner, gives the face a clear focal point that photographs well against the structure of the neckline.

Pairing that with a softer base keeps the whole look from feeling heavy. A luminous, natural-finish foundation lets the eyes stand out without the rest of the face competing for attention.

This combination tends to work especially well with lace or illusion necklines, where there’s already a lot of texture happening near the face. A stronger eye and a softer base keep the makeup from adding even more visual noise on top of that detail.

An Elevated Lip for a Polished Finish

A high neckline often calls for a lip color with a bit more presence than a barely-there nude. This doesn’t mean bold or dark. It means a shade with enough depth to feel intentional, like a rosy mauve, a soft berry, or a warm terracotta, depending on skin tone and overall styling.

The lip becomes a natural finishing point for the whole face when there’s less skin showing elsewhere. A well-chosen lip color pulls the look together and keeps it from feeling unfinished, especially in photos where the neckline is fully visible.

This is also where individual coloring matters most. What reads as elevated on one bride can look completely different on another, which is part of why lip color is one of the details tested and adjusted during a trial.

Balancing a Structured Neckline With Soft Glam

Structured necklines, like mock-necks or high collars with boning, have a formal, tailored quality. Pairing that structure with equally sharp, heavy makeup can feel like too much polish stacked on top of more polish.

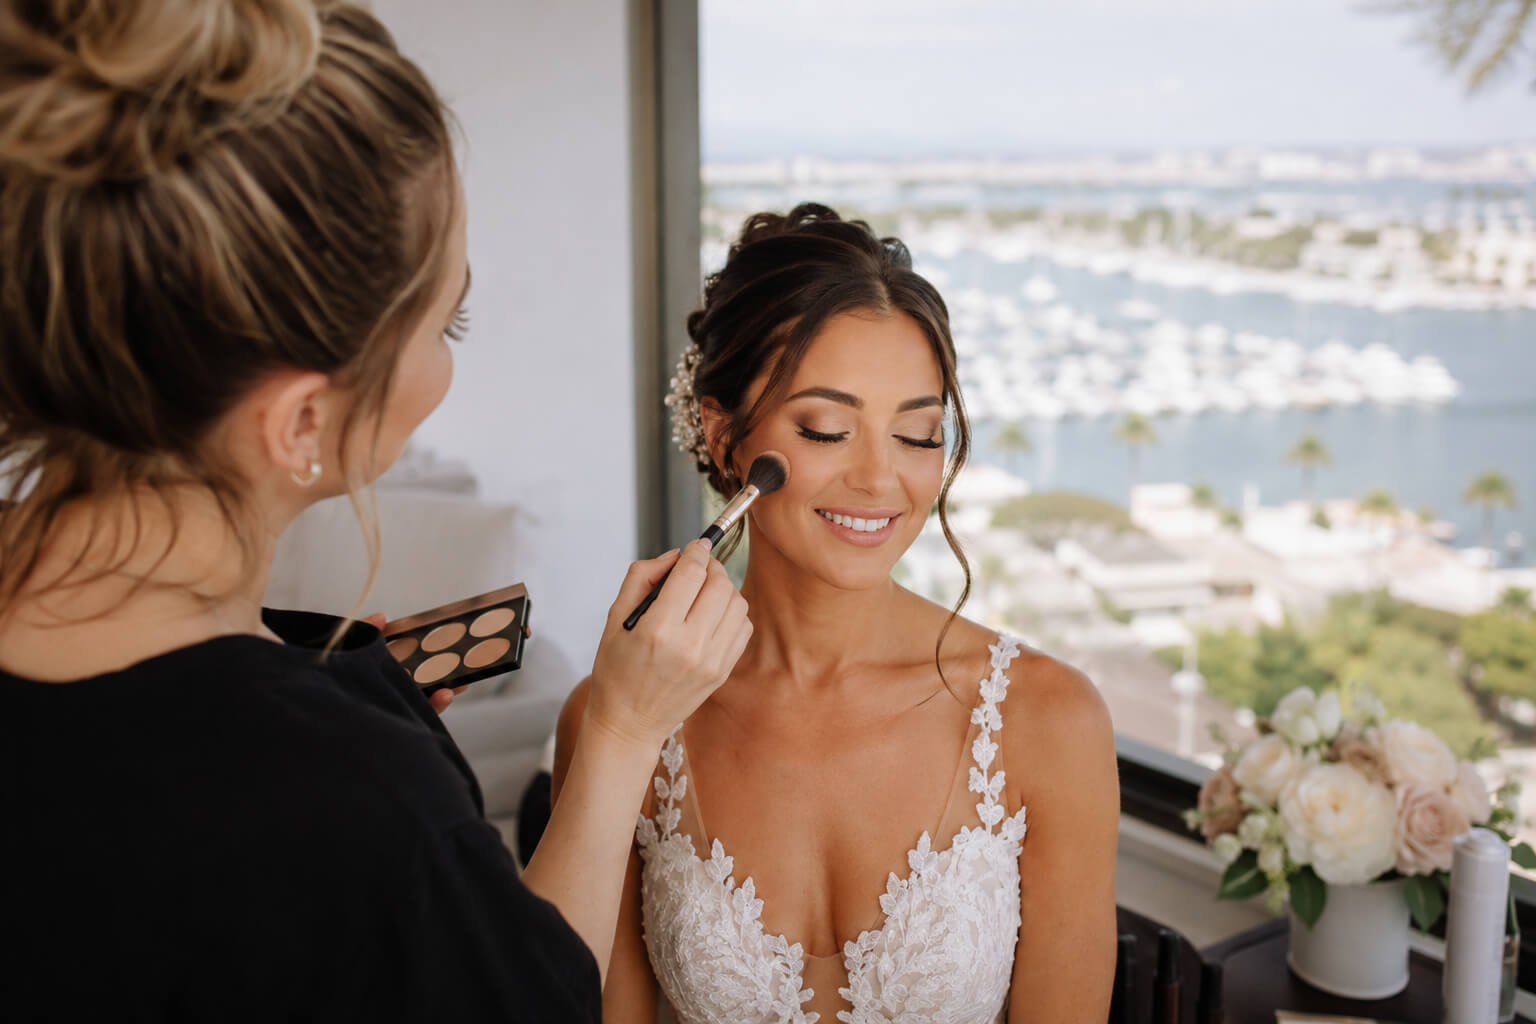
Soft glam offers a better balance. Think diffused eyeshadow instead of hard lines, a soft-focus glow instead of full matte, and blush placed to warm the face rather than sculpt it aggressively.

The result feels intentional without fighting the formality of the dress. It’s a look that photographs as elevated, not overdone, which fits the “like yourself, but elevated” feeling most brides are actually looking for.

What to Avoid With High-Neck Styles

A few choices tend to work against high-neck dresses more than they work with them:

  • Heavy contour that competes with the collar. Sharp, sculpted lines near the jaw can feel visually busy next to a structured neckline. A softer contour keeps the focus on the whole face rather than one feature.
  • Overly matte skin under structured necklines. A flat matte finish can look harsh against the texture of lace or beading near the collar. A soft, natural glow tends to feel more cohesive.
  • Skipping a proper trial. High-neck dresses often come with more fabric and detail near the face, so there’s less room for a makeup misstep to go unnoticed. A trial is the time to test how a look holds up and how skin responds to the products used, well before the wedding day itself.

None of these are hard rules. They’re patterns worth being aware of, then adjusting based on the specific dress, skin, and bride.

How Brittany Brown Beauty Approaches This Look

Every high-neck look starts with the dress itself. Details like lace pattern, collar height, and fabric texture all inform decisions about eye intensity, lip color, and finish.

From there, the process leans on Brittany’s enhance, don’t mask philosophy. The goal isn’t to create a dramatically different face. It’s to bring out what’s already there, in a way that photographs beautifully against a more structured silhouette.

A trial appointment is where this comes together. It’s the opportunity to test the full look, check how it holds up over several hours, and make sure the skin responds well to everything used. Brides consistently describe the result the same way: familiar, but elevated. That feeling is the actual goal behind every decision made in the chair.

For anyone curious what this looks like in practice, the portfolio includes a range of bridal looks built around different neckline styles. And for brides ready to talk through their own dress and vision, reaching out directly is the easiest next step.

Frequently Asked Questions

1. What’s the best way to prep my skin for this kind of look? 

Skin prep matters more with high-neck dresses, since the face carries more visual focus. A consistent routine with moisturizer and SPF in the weeks before the wedding gives foundation a smooth, even base to work with. Bigger skincare changes, like a new treatment or product, are best avoided close to the wedding date. Testing everything during a trial helps confirm the skin is ready and responds well to the products chosen.

2. How long will this makeup last through the ceremony and reception?

With the right prep and setting technique, a well-built look can hold through a full day of ceremony, photos, and reception. Wear time depends on factors like skin type, weather, and how the look is set, which is exactly why a trial is so useful. It’s a chance to test the products under real conditions before the wedding day arrives.

3. Can this look be adjusted for my specific skin tone or type?

Yes. Every recommendation here is a starting point, not a fixed formula. Eye intensity, lip shade, and finish are all chosen based on the individual bride during the trial, so the final look fits her coloring and skin needs rather than a generic template.

Posted on

Veil Placement Guide for Every Bridal Hairstyle

Veil Placement Guide

A veil can make or break how a bridal hairstyle photographs, moves, and holds up throughout the wedding day. Yet many stylists don’t decide on veil placement until the final minutes of styling, almost as an afterthought after completing the hairstyle. In Orange County and San Diego, where ceremonies take place on bluffs, beaches, and open-air terraces, that timing matters even more. Sea air, wind, and shifting humidity all affect how a veil sits, and its placement shapes how the entire hairstyle looks on camera.

This guide breaks down veil placement by hairstyle, so the veil supports the style instead of fighting it. At Brittany Brown Beauty, every bridal hairstyle is planned with veil placement in mind from the beginning, not as a last-minute addition.

Why Veil Placement Depends on Your Hairstyle

Veil placement is not one-size-fits-all. Where the comb sits, how many bobby pins anchor it, and how much volume surrounds the base all depend on the hairstyle underneath. A veil pinned into an updo behaves completely differently than one pinned into loose, down curls.

The base of the hairstyle needs to be built with the veil in mind from the very beginning, not added on top of a finished look. That means the stylist should know before the first pin goes in whether the veil will sit high on the crown, low at the nape, or somewhere in between, and how securely it needs to hold through wind, an ocean breeze, or a full evening of dancing.

Southern California adds its own variables. Coastal humidity can soften a style faster than inland heat does, and a breeze off the water can lift a veil that isn’t anchored correctly. A placement that looks perfect standing still indoors may shift the moment a bride steps outside for photos or walks down an oceanfront aisle. Getting the placement right at the start of the arrival and prep process means fewer adjustments later, when there’s no time for a redo.

Placement by Style

Updos and Buns

Updos and buns offer the most flexibility for veil placement because they provide a defined base for the stylist to anchor the veil. With a low bun or chignon, the stylist typically secures the veil just above the bun, combing it into the hair directly behind it so the comb stays hidden and the veil cascades naturally over the style. For a high bun or topknot, the stylist usually positions the veil slightly lower, at the crown or just behind it, so it doesn’t compete with the bun’s height.

Because stylists create updos with more structure and secure them with additional pins, they usually hold veils firmly through wind and movement. That makes them a practical choice for beach and bluff ceremonies along the coast. The stylist must place the veil comb carefully to avoid creating a visible bump or pulling on the updo’s smooth lines. That’s why testing the placement during a hair trial matters. A comb that feels secure in a quiet studio may shift once coastal wind and sea air come into play.

Half-Up Half-Down Styles

Half-up half-down styles are one of the most common bridal looks, and they call for a veil placed at the crown or just behind it, nestled into the pulled-back section of hair. This placement anchors the veil into the most secure part of the style, the gathered section, while still allowing the down portion of the hair to move freely underneath.

The balance here is between security and softness. If the veil sits too far back, it can feel disconnected from the pulled-up section and slip during the day. If it sits too far forward, it can flatten the volume at the crown that gives the half-up style its shape. A well-placed veil in this style should look like it’s part of the hair’s natural part and lift, not pinned on top of it.

Humidity along the coast tends to affect the down portion of a half-up style more than the anchored top section, so setting technique on the lower hair matters just as much as veil placement itself.

Down Styles and Loose Curls

Fully down styles and loose curls require the most secure anchoring, since there’s no bun or gathered section to pin into. The veil comb usually sits at the crown, woven into a small section of hair and backcombed slightly underneath for extra grip before the rest of the curls fall over it.

This is the style most affected by SoCal coastal conditions. Wind off the water can lift a loosely anchored veil away from the head, and humidity can cause curls to relax around the veil’s base, loosening the hold over several hours. A stronger setting approach at the crown, along with a few extra pins placed to disappear into the curl pattern, helps the veil stay put through the ceremony, photos, and a reception that may run late into the evening.

Down styles photograph beautifully with a veil layered through loose waves, but they benefit most from a stylist who accounts for wind and humidity during the setting process rather than after the veil starts to slip.

Every hairstyle is photographed differently depending on where the veil is secured. Browse our bridal portfolio to see how different veil placements complement updos, half-up styles, and loose curls.

Attaching and Removing the Veil for the Reception

Most brides don’t wear the veil for the full day, and planning that transition is part of getting veil placement right from the start. The veil is typically designed to be removed cleanly after the ceremony and formal photos, without disturbing the hairstyle underneath.

A few things make this transition smoother:

  • Removable combs over sewn-in attachments. A veil secured with combs, rather than sewn directly into the style, can be lifted out in seconds without pulling hair or loosening pins.
  • A plan for where pins go. Since removing a veil often means removing a few supporting pins as well, having a couple of matching pins on hand to close any gaps keeps the hairstyle looking finished for the reception.
  • A quick check in the mirror. Volume at the crown can compress slightly under a veil’s weight over several hours. A brief reshape after removal, especially for down styles and loose curls, restores lift before reception photos and dancing begin.

If you’re planning your wedding in Orange County or San Diego and want a hairstyle designed to work seamlessly with your veil, learn more about Brittany Brown and her personalized approach to bridal hairstyling, or contact Brittany Brown Beauty to schedule your bridal hair consultation or trial.

Frequently Asked Questions

1. How long does veil placement typically take on wedding morning? 

Veil placement is usually a quick final step, often taking less than fifteen minutes after the stylist completes the hairstyle. Most of the styling appointment focuses on creating a strong foundation so the veil has a secure, well-hidden anchor point. Brides who book Brittany Brown Beauty’s full bridal hair service can expect veil placement near the end of the appointment, with the stylist making final adjustments to ensure it looks beautiful and moves naturally before everyone heads to the ceremony.

2. Will veil placement hold up in Southern California humidity?

It can, with the right setting technique. Coastal humidity and ocean breezes are common at Orange County and San Diego weddings, and they affect down styles and loosely anchored veils more than secure updos. Backcombing at the base, using enough pins to distribute support, and choosing a placement that complements the hairstyle all help keep the veil secure throughout the ceremony, photos, and reception, even in sea air.

3. What accessories pair well with a veil, depending on placement?

Accessories work best when they complement the veil instead of competing with its anchor point. A hairpiece or comb at the crown pairs naturally with a veil positioned slightly behind it, while a low bun with a veil above it leaves space for a delicate pin or vine along the front hairline. The best combination depends on the veil’s position and how much of the hairstyle the bride wants guests to see after placing the veil.

Posted on

Bridal Makeup for Hooded Eyes: What Works Best for Wedding Day

Bridal Makeup for Hooded Eyes

A bride sits down for her makeup trial with a folder full of inspiration photos. Every image shows a stunning eye look, deep crease work, dramatic liner, bold lash volume. The artist recreates the look beautifully. Then the bride opens her eyes and almost all of it disappears.

This is one of the most common experiences for brides with hooded eyes. What photographs beautifully on a different eye shape can vanish once hooded lids fall forward and cover the work. On a wedding day, that gap between expectation and reality can feel genuinely stressful.

Bridal makeup for hooded eyes is not simply a variation on standard eye makeup. It requires different placement logic, different product choices, and a completely different approach to how the finished look reads in photographs, across a twelve-hour day, and under the specific lighting conditions of a venue.

The goal is not to fight the eye shape. The goal is to design a look that works with it, one that stays visible, photographs well, and still looks balanced when a bride is laughing, crying, and dancing all evening.

What Are Hooded Eyes and Why Do They Affect Bridal Makeup?

Hooded eyes have a fold of skin that sits low and covers part or most of the mobile lid. When the eyes are open, this hood reduces the amount of visible lid space. The crease, if it can be seen at all, appears lower or is hidden entirely.

This affects makeup in a very direct way. Eyeshadow applied to the mobile lid gets covered when the eyes are open. Liner placed along the lash line sits under the hood and compresses rather than defines. A crease color placed at the socket can end up sitting far above the visible eye area, creating a shadow that looks disconnected from the lash line.

For everyday makeup, this is manageable. For a wedding day, it requires specific planning. A bridal look has to hold up through a ceremony, a reception, close-up portraits, wide venue shots, and emotional moments. Makeup that looks correct in the chair but disappears in every photograph is not serving the bride well.

Why Bridal Makeup for Hooded Eyes Requires a Different Approach

Reduced Visible Lid Space

The most immediate challenge is that there is less visible canvas to work with. Many techniques that create drama on a non-hooded eye, such as foiled shimmer all over the lid, a deep cut crease, or a graphic liner shape, rely on the lid being visible when the eyes are open. On a hooded eye, these placements either disappear or look heavy in ways that were not intended.

Placement has to shift upward. Work often needs to extend above where the natural crease appears to fall so that when the hood drops into place, something is still visible. This is a significant departure from standard eye makeup logic and one reason why experience with hooded eye shapes matters for a bridal artist.

Increased Risk of Smudging and Creasing

A wedding day runs long. Most brides are in makeup for ten to fourteen hours, sometimes longer. During that time, the skin above and around the eye is moving constantly, blinking, expressing emotion, squinting in outdoor light, and reacting to heat and humidity.

The hood of the eye sits against the skin beneath it. That contact point creates friction and heat, which accelerates product transfer. Shadow migrates onto the lower hood. Liner smudges. Mascara tracks downward. In humid summer conditions or warm indoor venues, this can happen within hours.

Long-wear primers, waterproof formulas, and setting sprays are not optional for hooded eyes on a wedding day. They form the base the entire eye look depends on.

Photography Considerations

Bridal photography captures a range of moments, wide reception shots from across a room, ceremony images from a distance, and close-up portraits where every detail is visible. Makeup for hooded eyes has to read well at all of these distances.

What looks balanced and defined in person can flatten in photographs. Soft blending that looks elegant in the mirror can disappear under flash. Colors that appear rich in natural light can look washed out in indoor photography. A bridal makeup plan for hooded eyes has to account for how the final look will translate across different photographic conditions, not just how it appears during the trial.

Eye Makeup Techniques That Work Well for Hooded Eyes

Shadow Placement Above the Natural Crease

On a hooded eye, the visible crease is not where shadow work should stop. Placing deeper tones above the natural crease, sometimes significantly above it, ensures definition remains visible once the eye is open and the hood drops into position.

The exact placement depends on how much hood is present and how much mobile lid remains visible. Some brides with moderate hoods need a small upward shift. Others with deeper hoods need the entire transition zone mapped higher. This is one of the first things a skilled bridal artist evaluates during a trial, and the adjustment can make the difference between eye makeup that reads clearly and eye makeup that disappears.

Softly Lifted Eye Shapes

A technique that angles shadow upward toward the outer corner, creating a gentle visual lift, works well for hooded eyes in a bridal context. The shape follows the direction of the brow bone, pulling focus upward and outward rather than straight across the lid.

This does not require a heavy-handed approach. A soft wash of color angled in the right direction creates more visible definition than a precise crease technique placed at the socket. The lift is subtle, but it registers in photographs and gives the eye more openness.

Strategic Outer-Corner Definition

Concentrating deeper color at the outer corner and diffusing it upward creates definition without requiring the entire lid to carry the look. This approach photographs well because the definition sits in an area less affected by the hood.

For brides who want a more dramatic look, building intensity outward gives the eye shape and dimension without the risks that come from applying heavy shadow across a lid that will be partially covered. The outer corner becomes the anchor point for the look rather than the crease.

Controlled Shimmer Placement

Shimmer on a hooded eye needs careful placement. Applied across the entire lid, shimmer can emphasize the weight of the hood and make the eye look heavier rather than brighter. Placed in the inner corner or along the center of the visible lid, shimmer adds light exactly where it is most effective.

For wedding photography, a small amount of strategic shimmer catches light well. The goal is to create glow where it will register in images rather than applying shimmer broadly and having it read as flat or heavy. Matte shades do most of the structural work. Shimmer serves as an accent.

Eyeliner Techniques for Hooded Eyes

Why Thick Eyeliner Often Creates Problems

A thick band of liner along the upper lash line reduces visible lid space further. On a hooded eye, the hood already sits close to or against the lash line. Adding a thick liner compresses the remaining space and can make the eyes look smaller rather than more defined.

This is one of the most common mistakes in hooded eye makeup and one of the easiest to make, because thick liner often looks striking in editorial images that are usually shot on different eye shapes.

Thin Liner and Tightlining

A thin liner placed close to the lash roots gives definition without reducing visible lid space. Tightlining, applying liner to the waterline and inner lash line, adds density to the lash line without creating a visible band above it. This makes lashes look fuller and the eye more defined without the drawbacks of heavy upper liner.

For many hooded-eye brides, tightlining combined with fine liner and well-placed lashes creates a cleaner and more balanced result than traditional liner styles.

Soft Wing Placement

A wing that follows the natural eye shape rather than a fixed angled direction works better for hooded eyes. The classic liner wing often points upward at a sharp angle. On a hooded eye, that angle can disappear under the fold or look disconnected from the eye shape.

A softer wing that follows the natural line of the lower lash line stays more visible and looks intentional rather than forced. The wing should always be checked with the eyes open to ensure it sits in the right position before it is finalized.

Choosing Wedding-Day Lashes for Hooded Eyes

Lash Styles That Create Lift

Lashes with length and curl in the center and outer corner create the appearance of a more open eye. They lift the gaze visually and add definition that registers in photographs even when lid space is limited. For hooded-eye brides, lashes are often doing a significant portion of the work that crease shadow cannot.

Styles that flare outward toward the outer corner are particularly effective. They direct the eye’s focus upward and outward, complementing the lifted shadow placement used elsewhere in the look.

Why Heavy Lashes Can Hide Eye Makeup

Very dense, heavy lash bands can weigh down the upper lid and bring the hood even lower. A lash that adds too much volume across the entire lid can undo the lifting effect of carefully placed shadow. For hooded eyes, a lash that creates dimension and curl is more effective than one that adds mass.

Wispy or natural-finish lashes with longer fibers at specific points tend to work better than thick, uniform-density styles. The goal is height and separation rather than volume.

Balancing Comfort and Visibility

A bride wearing lashes for twelve hours needs them to stay comfortable. Heavy lash bands become uncomfortable and can pull the lid downward over time, making hooding worse as the day progresses. Lighter lash styles that are properly adhered with a high-quality adhesive stay comfortable and maintain their position through the entire day.

The trial is the right time to assess how lashes feel after several hours, not on the wedding day itself.

Lash Choices for Photography

Lashes with longer fibers catch light and create a more dramatic effect in photographs than they appear to in person. For hooded-eye brides, a lash that looks understated in the mirror can read beautifully in images. This is worth discussing with the artist before the trial, particularly if the bridal look is intended to be more natural in person but still show well in photographs.

Bridal Makeup Styles That Usually Work Well for Hooded Eyes

Soft Glam

Soft glam translates well for hooded eyes because it prioritizes blended definition over sharp precision. The look uses deeper shades to shape the eye and add dimension, without relying on graphic liner or a distinct cut crease that would disappear under the hood.

For brides who want presence and polish in wedding photos, soft glam delivers drama through depth and lash volume rather than visible lid detail. It suits a wide range of venues and photographs well in both natural and flash conditions.

For a deeper comparison of this approach against a more pared-back look, soft glam vs natural bridal makeup breaks down how each style reads in photography.

Natural Bridal Makeup

A natural look works particularly well when it is built with the right techniques for the eye shape. Rather than reducing the makeup further, the goal is to create a look that appears effortless but has enough structure to stay visible in photographs. Light shimmer on the inner corner, a well-placed matte transition shade, and strong lashes give the natural look definition without obvious makeup.

The risk for hooded eyes is going too minimal. A look that appears barely there in the mirror can disappear entirely in photographs. The artist should build enough structure so the eye reads as defined even in wide shots.

Romantic Bridal Makeup

Romantic looks, warm browns, soft mauves, and rose tones, sit well on hooded eyes because the color palette works with blended, diffused placement rather than precise lines. The softness of the technique suits the eye shape. Warm tones also add dimension without requiring sharp contrast that could feel too strong over a long wedding day.

Photography consideration: romantic tones look different under warm versus cool lighting. For candlelit or warm-toned evening venues, these palettes photograph beautifully. In cooler or daylight conditions, they may need slightly more depth to show clearly.

Modern Bridal Makeup

Modern bridal looks that use graphic liner or negative space techniques require more careful adaptation for hooded eyes. The look can be achieved, but the placement logic changes significantly. A modern cat-eye, for example, may need reshaping so the defining line sits where it remains visible rather than where a standard cat-eye would usually fall.

Brides pursuing a more editorial bridal look should factor additional time into the trial to test whether specific techniques work with their eye shape.

For a broader look at the full range of options, bridal eye makeup styles and how to choose the right one covers each style in detail.

Common Bridal Makeup Mistakes for Hooded Eyes

Copying Makeup From a Different Eye Shape

Bringing inspiration images without considering the eye shape in those photos is the most common starting point for problems. Most bridal inspiration images feature non-hooded eyes, and the techniques used on those eyes, such as precise crease work, visible lid shimmer, and sharp liner, are not directly transferable.

The solution is not to abandon inspiration images. They are still useful for communicating mood, color direction, and overall level of glamour. A skilled artist will interpret the inspiration for the specific eye shape rather than copying it exactly.

Choosing Excessively Thick Liner

A thick liner often feels like a natural choice when the goal is visible definition. On a hooded eye, it creates the opposite effect. The liner sits under the hood and makes the eye look heavier rather than more open.

Thin liner, tightlining, and lash density can create the same level of definition without reducing visible lid space.

Using Lashes That Are Too Dense

Very full lash styles can weigh down the lid and make hooded eyes look heavier than intended. They can also feel uncomfortable over a long wedding day.

Choosing lashes based only on how they look in packaging often leads to this mistake. Testing lashes during the trial and photographing the result with eyes open helps prevent issues on the wedding day.

Ignoring Long-Wear Performance

Eye makeup on hooded eyes has more contact with the skin. The hood presses against the lid, creating heat and friction. Without long-wear primers and setting products, shadow can migrate, liner can transfer, and mascara can smudge by mid-afternoon.

Product selection for longevity is part of the makeup design itself. Even the most precise application will not hold up if the base is not built for long wear.

Skipping Trial Photos

The biggest mistake is not photographing the trial look with eyes open. In the mirror, hooded-eye makeup can look minimal. In photographs, the same look can appear polished and defined.

The opposite is also true. A look that feels strong in the mirror can flatten in images. Testing under lighting similar to the wedding venue and reviewing photos is the only reliable way to judge the final result.

How Wedding Lighting Changes Eye Makeup for Hooded Eyes

Outdoor Weddings

Natural daylight is the most honest light source for makeup. In direct sunlight, colors appear as they truly are, but contrast can be harsh. Outdoor ceremony settings often involve a mix of shade and sunlight, which means the eye look needs enough definition to read clearly in both conditions.

Brides with hooded eyes at outdoor weddings benefit from slightly deeper definition at the outer corner and along the lash line. This creates a shadow that still registers in photographs, even when the eye is partially closed or squinting in bright light. Very light or neutral eye looks can become almost invisible in wide outdoor shots.

Indoor Weddings

Indoor venues vary widely, from bright churches with large windows to dimly lit ballrooms. In lower light, eye makeup needs more depth and contrast to remain visible. Soft blended looks that appear balanced in bright conditions can flatten in dim reception spaces.

Warm indoor lighting also affects color. Cool-toned shadows can appear dull or muddy, while warm and neutral tones tend to hold better and stay defined under tungsten and LED lighting.

Evening Weddings

Evening events with mixed artificial lighting require eye makeup with enough pigment to stand out under warm and colored light sources. Candlelight and soft bulbs absorb light rather than reflecting it. For hooded eyes, minimal eye definition can read as no definition at all in photographs taken in these conditions.

Evening bridal makeup for hooded eyes often needs more depth than expected in a makeup room. The goal is how it photographs at the venue, not how it appears during application.

Flash Photography

Flash can reduce contrast and flatten dimension. A look that appears naturally sculpted may lose definition under flash because added light fills in shadows. For hooded eyes, this is especially important because the makeup relies on placement and blending rather than visible lid space.

Building slightly more intensity than feels necessary, then testing with flash during the trial, is the most reliable approach.

For a full breakdown of how venue lighting interacts with bridal makeup, see how wedding lighting affects your bridal makeup. For a deeper explanation of why results differ in photos, why bridal makeup looks different in photos covers this in detail.

Why a Bridal Makeup Trial Matters for Hooded Eyes

For most eye shapes, a trial is a helpful preview. For hooded eyes, it is close to essential.

During a trial, an experienced bridal artist can assess how much visible lid space is actually available, where shadow placement needs to shift, which liner technique creates the best definition without compression, and which lash style creates lift without adding heaviness. None of these decisions can be made reliably without seeing the specific eye shape in person.

Beyond placement, the trial is the opportunity to test long-wear performance. Shadow can be applied, and after several hours, the bride and artist can assess whether any creasing or transfer has occurred. Adjustments to primer, setting products, or formulas can be made before the wedding day rather than discovered during it.

The trial is also the right time to take photographs. An artist who evaluates the look only in the mirror is missing half of the picture. Photographing with eyes open, from both close distance and across the room, confirms whether the placement decisions are producing the intended result in images.

Lash comfort deserves attention during the trial as well. A lash that feels manageable for two hours can become uncomfortable by hour eight. Testing lash adhesion and comfort during a full trial length is the most reliable way to confirm the right choice.

For a complete picture of what to expect, what happens during a bridal makeup trial walks through the process in detail. And for the errors that can compromise even a well-planned trial, bridal makeup trial mistakes that change your final look is worth reading before scheduling one.

Book a Bridal Makeup Consultation

Hooded eyes do not need more makeup. They need makeup designed specifically for the eye shape, with thoughtful placement, the right product selection, and techniques that account for how the look performs across a full wedding day.

Photography, venue lighting, wear time, and lash selection all influence the final result. A look that works well in one lighting condition may need adjustment in another. A product that holds for two hours may not hold for twelve. These are not details that can be decided the morning of the wedding.

At Brittany Brown Beauty, bridal consultations and trials include a full assessment of the eye shape and how specific techniques translate for each bride. Rather than applying the same eye makeup approach to every client, the look is designed around how the face reads in person, in photographs, and across the specific conditions of the wedding.

Reach out to schedule a consultation and bridal makeup trial before the wedding day. Starting early allows time to test placement, assess long-wear performance, evaluate photographs, and make adjustments so that on the day itself everything performs as planned.

Frequently Asked Questions

1. What bridal eye makeup works best for hooded eyes?

Placement above the natural crease, outer-corner definition, and strategic shimmer placement create the most visible results. Soft, blended techniques tend to photograph better than precise or graphic approaches, because they translate more reliably across different lighting conditions and remain visible when the hood of the eye drops over the lid.

2. Should brides with hooded eyes wear eyeliner?

Yes, but the approach matters. Thin liner along the upper lash line and tightlining tend to work better than thick liner bands, which reduce visible lid space further. The wing shape, if used, should follow the natural direction of the eye rather than a standard angular direction, and should always be checked with the eyes open before it is finalized.

3. Do hooded eyes need false lashes for wedding makeup?

False lashes are not strictly necessary, but they are highly effective for hooded eyes. Well-chosen lashes create definition and lift that compensates for limited visible lid space. Wispy or curl-forward styles work better than heavy, dense bands, which can weigh down the lid. Mascara alone can work for brides who prefer a minimal look, but lashes genuinely add to the result in photographs.

4. How can bridal makeup stay visible on hooded eyes throughout the day?

Long-wear eye primer is the foundation of any hooded-eye bridal look. Beyond primer, waterproof formulas for liner and mascara, setting powder on the hood and lid, and a finishing setting spray all extend wear significantly. The contact point between the hood and the lid generates friction and heat that accelerates product breakdown, so every product choice should prioritize longevity.

5. Does hooded eye makeup photograph differently than it looks in a mirror?

Often, yes — and usually in a more positive direction. A look that appears minimal in the mirror can read as defined and polished in photographs. The key is testing it with photographs taken during the trial, with eyes open, rather than relying entirely on mirror assessment. Flash photography in particular can flatten shadows, so testing under similar conditions to the actual venue gives the most accurate preview.

Related Articles:

  1. How Wedding Lighting Affects Your Bridal Makeup
  2. How to Match Bridal Makeup to Your Skin Undertone
  3. Bridal Eye Makeup Styles: How to Choose the Right Look for Your Wedding
  4. Bridal Makeup Trends 2026 in Orange County
  5. How to Make Bridal Makeup Last All Day Without Touch-Ups
  6. Brittany Brown Bridal Makeup Routine: How It Lasts All Day 
  7. Bridal Makeup for Mature Skin: What Works and What to Skip
  8. Best Foundation Types for Bridal Makeup
  9. Bridal Makeup Trial Mistakes That Change Your Final Look