Posted on

Long-Wear Lip Color Tips for Brides

long-wear lip color tips for brides

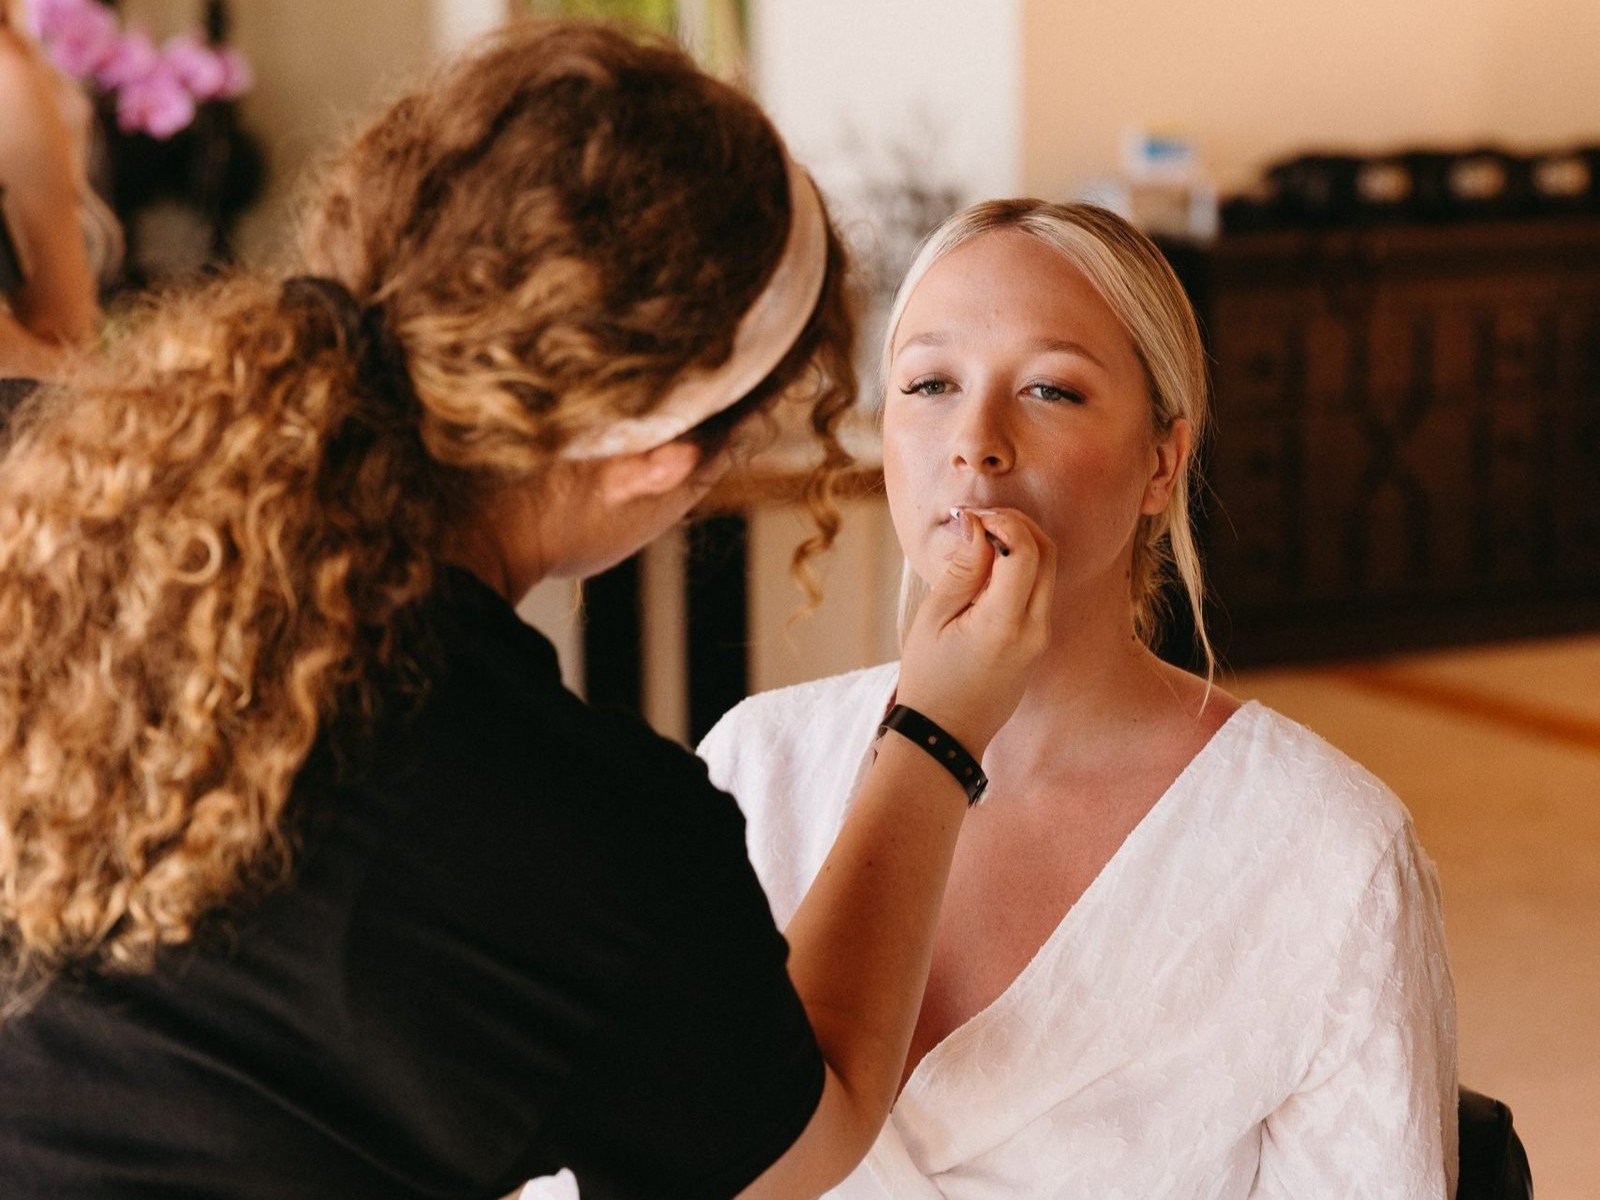
Your lips get more attention than almost any other feature on your wedding day. You will talk, laugh, sip champagne, and kiss your new spouse, and every photo will catch them. These long-wear lip color tips for brides come from Brittany Brown, a mobile bridal hair and makeup artist with 11+ years of hands-on experience. The goal is a lip look that feels like yourself, but elevated, and that holds up from the first look to the last dance.

Brittany follows an “enhance, don’t mask” philosophy at Brittany Brown Beauty. The same idea applies to lips. A good lip look should bring out your natural color and keep you comfortable, not feel heavy or stiff.

Why Lip Color Fades Faster Than Any Other Product

Lips work harder than any other part of your face on a wedding day. You eat, drink, speak, hug, and kiss, so lip color has constant friction to fight. Lips also have very few oil glands, so they dry out easily, and dry lips can make color look patchy.

Climate adds another factor. Orange County and San Diego weddings often happen near the coast, where sea air, humidity, and direct sun affect how products wear. Brittany chooses products with those conditions in mind, whether you are planning a waterfront celebration with a bridal makeup artist in Newport Beach or a bluff-top ceremony down the coast. If your ceremony is outdoors, her guide to outdoor wedding makeup that lasts in heat and humidity covers the full look. Wind matters for lips too, since loose strands can stick to color, so bridal makeup for windy coastal ceremonies is worth a read if you are marrying near the water.

Skin prep matters too. Brittany suggests starting a consistent skincare routine at least four weeks before the wedding and staying hydrated in the week leading up to it, especially in summer. In the weeks before the wedding, a simple, gentle lip balm habit is an easy way to keep lips comfortable. Hydrated lips give color a smoother surface to sit on.

Building Long-Wear Lips
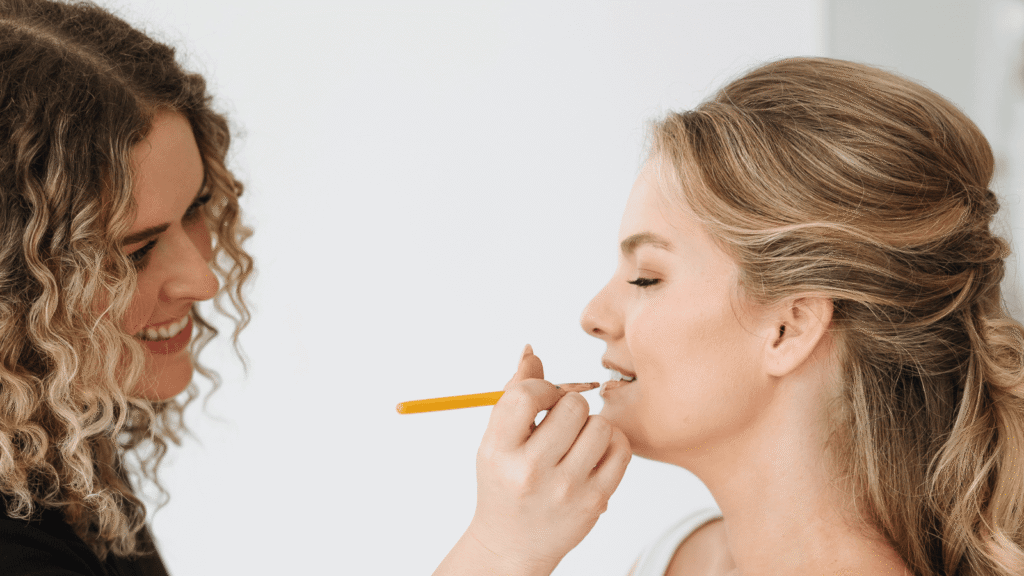
Long-wear lips come from layers, not one thick swipe of product. Each step has a job, and together they help the color last through a long day. Brittany takes the time to build each layer carefully, because a calm, thorough application sets the base for everything that follows.

Lip Liner as a Base Layer

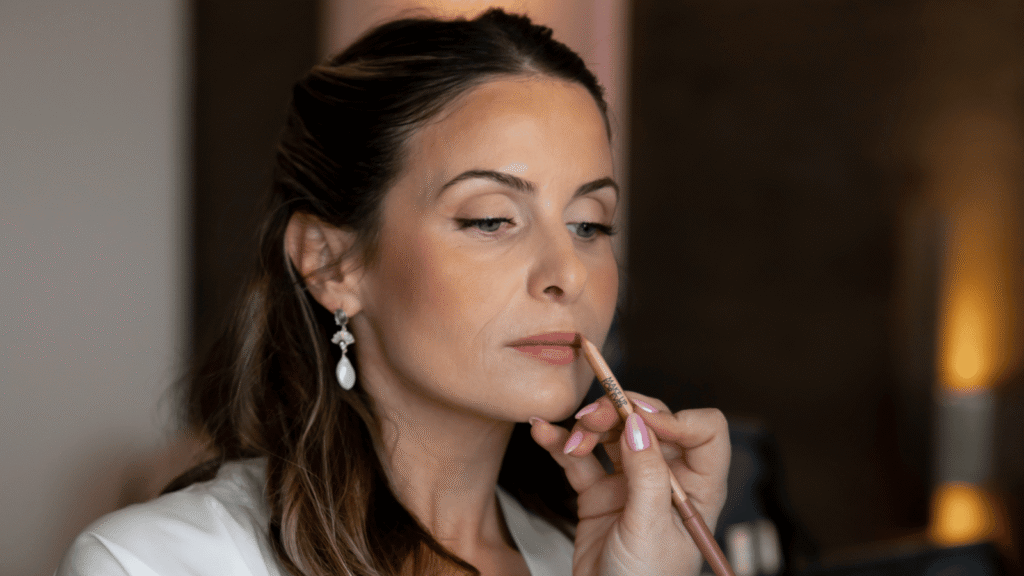
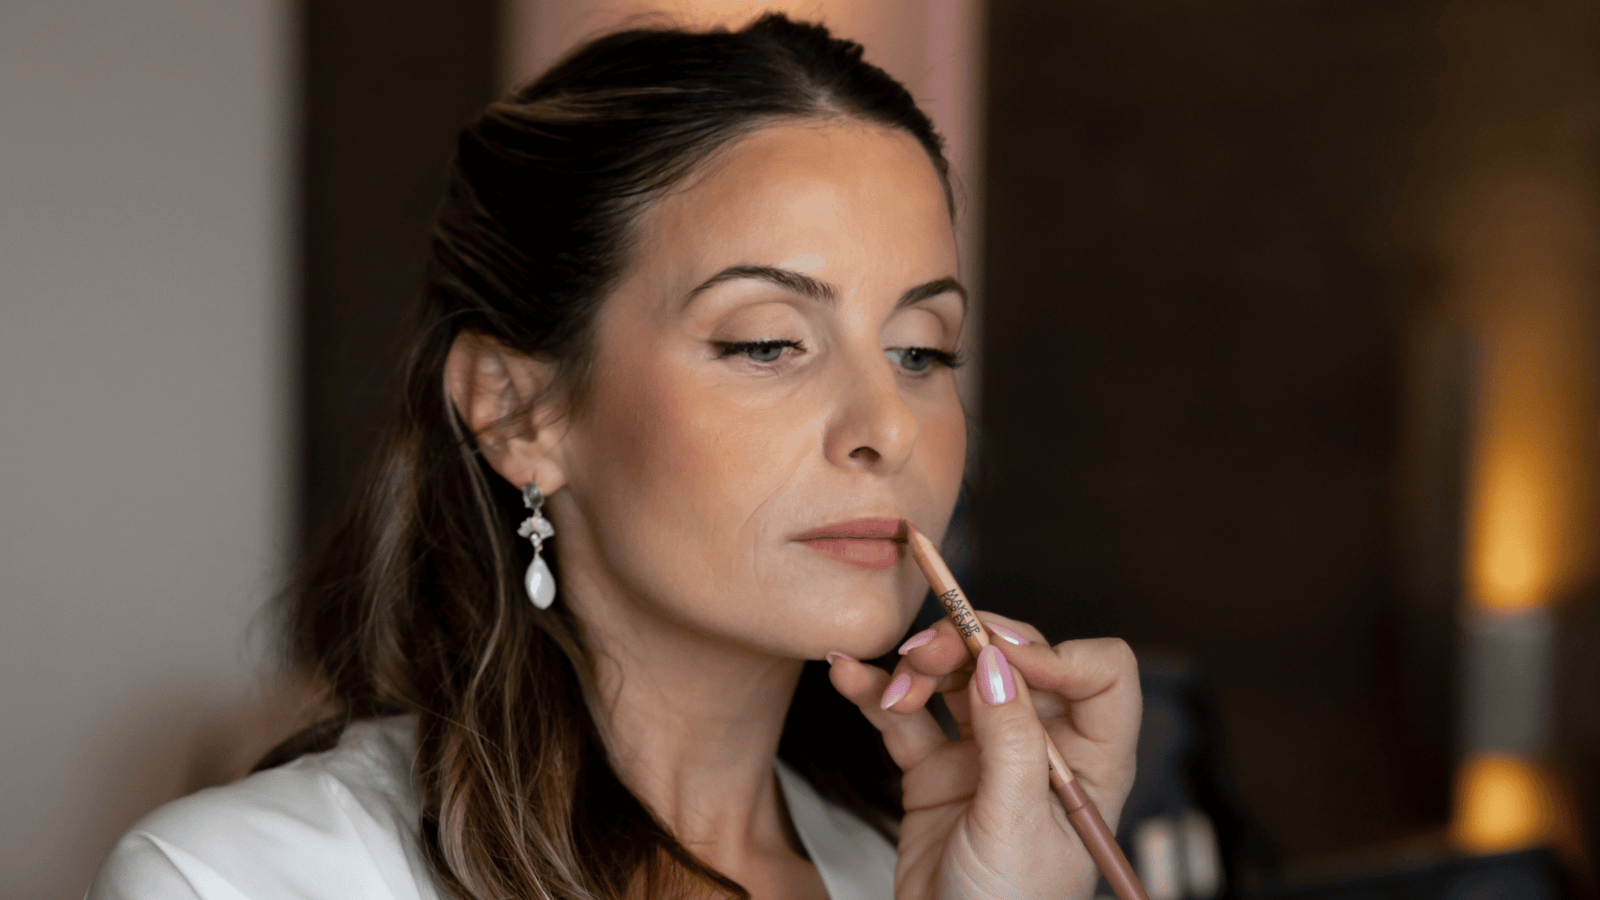
Lip liner does more than outline your lips. A liner close to your lip color can also fill them in, which gives the lipstick something to grip. This helps color stay put as you eat and drink.

Choose a liner that matches your lipstick or sits close to your natural lip tone. A liner that looks too dark or too different can draw attention to the edge as your lipstick wears. Blend it softly so the shape looks natural, in line with the no-makeup-makeup look.

If your lips are slightly uneven or you want to balance their shape, subtle liner work can help. Brittany specializes in corrective beauty makeup, and you can read more about what corrective makeup is and who it’s for.

Blotting and Layering Technique

Layering is the heart of a long-wear lip. Apply a thin coat of color first, then blot gently with a tissue. Add a second thin coat and blot again if needed. Each thin layer builds depth without creating a thick, heavy feel.

This method keeps the color looking soft and wearable. It also leaves less product on the surface to smudge, transfer, or feather. Brittany tailors the layers to your lips and your chosen shade, so no two applications look exactly alike.

Finish matters as well. Very matte formulas can feel dry over a long day, while creamier ones can slip faster. Your trial is the time to find the balance that feels comfortable to you. Mature lips often need extra care, since some formulas can settle into fine lines around the mouth. Brittany adjusts her technique for this, and her guide to bridal makeup for mature skin explains what works and what to skip.

Touch-Up Kit Essentials

With proper prep and product choice, most brides do not need a touch-up kit during the event. Even so, Brittany provides every bride with a complimentary touch-up kit as a safety net. The kit includes lipstick, powder, and blotting sheets, so a quick refresh stays easy during a long day.

Hand the kit to your maid of honor or tuck it into a small bag. Then reapply your lipstick after dinner or before your sunset portraits. Blotting sheets also help you manage shine on the rest of your face. Keep in mind that no lip color is completely kiss-proof. Expect a little transfer after the first kiss and plan a quick check in the mirror before photos.

Choosing a Shade That Photographs Well
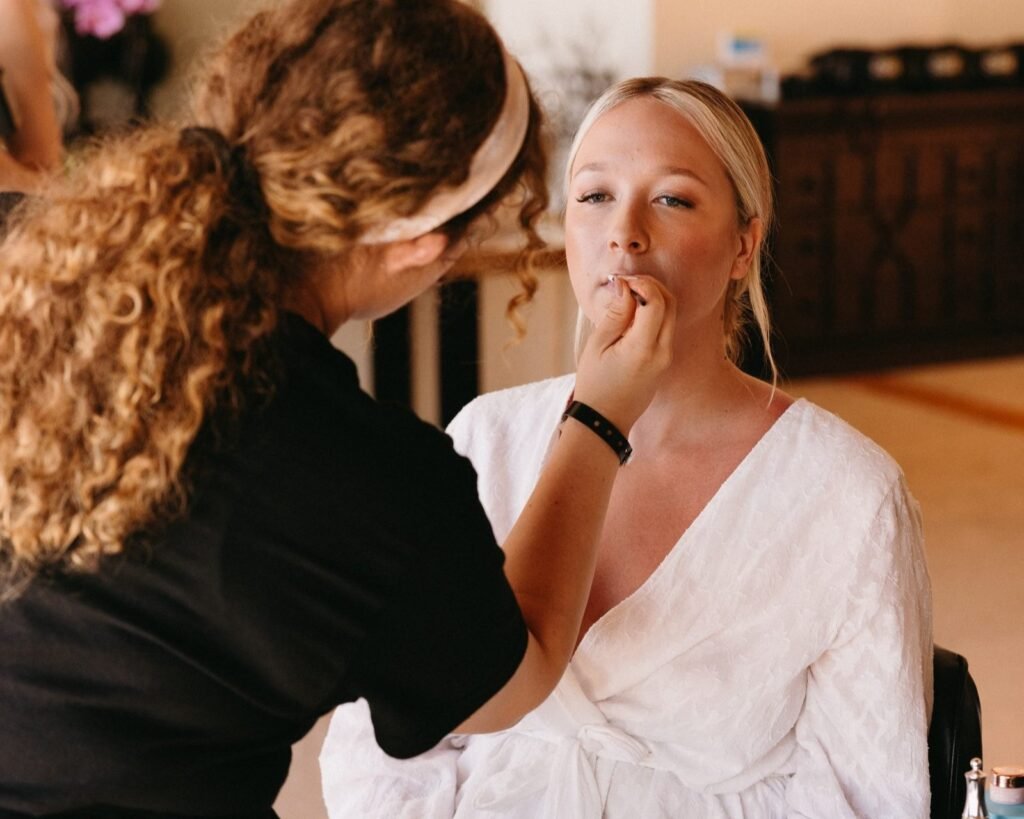
A great shade looks beautiful in person and on camera. Start with your undertone and your overall look. Consider your dress color, your bouquet, and the lighting at your venue. If you are still deciding on your palette, matching your bridal makeup to your bouquet and color palette can help you see how lips, florals, and attire work together. A soft rose or warm nude often suits the natural, radiant style many brides want. Some brides prefer a bolder shade, and that works beautifully when the rest of the look stays balanced.

Your lip shade also works best when it sits well with the rest of your face. The finish you choose for your skin, whether dewy or matte, will influence which lip texture looks most natural, and this breakdown of dewy vs. matte bridal makeup is a helpful starting point. Your base color matters too, so it is worth reading about choosing the right foundation shade for your wedding day.

Lighting changes how a lip color reads. A golden-hour ceremony, such as at Crystal Cove in Newport Coast, can warm up a shade. A bright midday sun can make the same shade look lighter. Brittany brings her own studio-quality lighting and seating to every location. That setup lets her check your color in controlled light before you head to your ceremony.

The best way to choose is to test it. Brittany strongly recommends a bridal makeup trial, where she tries your look and products on your skin. You can compare shades, see how they wear, and make adjustments well before the wedding. Tell her about any skin sensitivities, reactions, or recent treatments during the trial, so she can plan around them. It also helps to avoid new skincare products or treatments in the final 10 days before the wedding. If you are still comparing artists, these questions to ask before hiring a bridal makeup artist can help you feel confident in your choice.

Want to see how these looks come together? Browse Brittany’s portfolio for real bridal work, or read more about her background and training.

Book Your Bridal Consultation

If you want a lip look that feels like you and lasts through the whole day, the next step is a conversation. Contact Brittany to talk through your date, venue, and vision, and to ask about scheduling a bridal makeup trial. Brittany will get back to you as soon as she can and answer your questions along the way.

Frequently Asked Questions

1. What’s the best way to prep my skin for long-wear lip color tips for brides?

Start with a consistent skincare routine at least four weeks before your wedding, and stay hydrated in the final week. Keep your lips moisturized so color has a smooth surface to sit on. Avoid trying new skincare products or treatments in the last 10 days. On the day, Brittany handles lip prep as part of your application.

2. How long will long-wear lip color tips for brides last through the ceremony and reception?

Wear time depends on your lips, your product, and how much you eat, drink, and kiss. Layering, blotting, and a liner base all help color last longer. Brittany cannot promise an exact number of hours, so she gives each bride a complimentary touch-up kit for a quick refresh during the reception.

3. Can long-wear lip color tips for brides be adjusted for my specific skin tone or type?

Yes. Brittany tailors every look to the individual, including shade, formula, and technique. Your trial is the best time to test different options on your own skin. Tell her about any sensitivities or recent treatments, and she will adjust her approach.

4. How can I keep my long-wear lip color from fading after eating and drinking?

Build the color in thin layers and blot between them. Use a liner as a base, and choose a shade you feel comfortable wearing. Take small bites, sip through a straw when you can, and blot gently instead of rubbing. Then refresh with your touch-up kit as needed.

5. Should I bring my long-wear lip color for touch-ups on my wedding day?

Brittany provides a complimentary touch-up kit for brides, with lipstick, powder, and blotting sheets. If you have a favorite shade you want to use for touch-ups, bring it to your trial and ask how she would like to handle it. Keep your kit with you or give it to a trusted member of your bridal party so a quick refresh is always within reach.
Posted on

Contouring Dos and Don’ts for Brides: Photos and In Person

contouring dos and don'ts for brides

A contour that looks balanced in the mirror can look much stronger in a wedding photo. A shadow near the cheekbone may deepen under certain lighting, while a contour that seems barely visible during the getting-ready process can become more noticeable in close-up photos. That is why bridal contour needs a lighter touch than simply following a contouring trend or copying a placement chart.

Contouring for a wedding takes more than choosing where to place a darker shade. The amount, placement, and blending all affect how the face looks in person and on camera. At Brittany Brown Beauty, we consider the bride’s features, the overall makeup look, and the lighting when deciding how much definition to add.

The right amount of contour should work with the foundation, blush, bronzer, and eye makeup rather than compete with them. When the placement and blending are right, contour can add dimension without making the makeup look heavy up close.

Why Bridal Contour Is Different From Everyday Contour

Everyday contour is judged in a mirror, at a short distance, under one kind of light. Wedding makeup has to work in many more situations. Photographers shoot close-ups and wide shots. The light changes from the getting-ready room to the ceremony to the reception. Flash and natural light show makeup in different ways, and the camera angle shifts with every pose.

That is why heavy contour can look one way in person and another in photographs. Cameras can flatten the face, and some definition may read softer on camera than it does in the room. Stronger is not automatically better, though. Flash and close-up shots can make a heavy or poorly blended contour look harsh. Our article on why bridal makeup looks different in photos explains more about these factors.

Bridal makeup has to work both in person and in photographs. That calls for controlled blending and a result that still looks natural up close. No single contour technique suits every bride, so the approach depends on your features, your skin, and the setting.

Dos: What Works for Photos and In Person

These habits help natural bridal contour hold together in person and in wedding photos. They apply to wedding makeup contour of any intensity, from soft to more defined.

Do Match the Intensity to the Rest of the Makeup

Contour should make sense next to your foundation, blush, bronzer, eye makeup, and lip color. A soft, natural look usually calls for a lighter hand. A bolder eye or lip may support a bit more definition. Whatever the balance, the pieces should read as one look.

Do Build Gradually

Thin layers give the artist more control. It is often easier to add definition than to take it away, so building slowly leaves room to adjust intensity as the look comes together. This does not guarantee a particular result, but it makes adjustments easier. Skin condition matters too. Dry or textured areas may hold product differently than smooth areas, so preparation and formulas matter. Our guide to bridal makeup for different skin types covers how skin type can shape the application.

Do Blend Beyond the Initial Placement

Contour looks most natural when it fades softly into the surrounding complexion. Blending beyond the first placement softens the edges, so the contour reads as shadow instead of a line. The same goes for the areas around it, such as foundation and blush.

Do Consider Your Face Shape Without Following a Rigid Template

Face shape can influence where contour sits. There is no single contour map that every bride needs to follow, though. Your bone structure, your features, and the look you want all matter more than a template. A good artist adjusts placement to you.

Do Check the Makeup Under Different Lighting

Look at your makeup in the getting-ready environment, and where practical, under lighting that resembles your wedding setting. Window light, indoor light, and flash can each show contour differently. Photography is part of this check, which is one reason it belongs in the trial process.

Do Keep the Overall Look Balanced

Contour should support the rest of the makeup instead of becoming the main feature. If the eyes are the focus, contour can stay softer. Our article on bridal eye makeup styles shows how different eye looks change the balance of the whole face. It is also a good source of bridal makeup ideas.

Don’ts: Common Contouring Mistakes

These common mistakes can make contour look heavy, harsh, or out of place.

Don’t Copy a Contour Map Without Considering Your Features

Online diagrams are starting points, not universal instructions. They assume a certain face, and your features may not match. Copying one exactly can put contour where it does not suit you.

Don’t Use Too Much Product at Once

Too much product at once makes blending harder and makes contour more noticeable. A heavy first layer can be difficult to soften later. Start light and add only where the face needs it.

Don’t Leave Hard Lines

Hard edges can make contour look like makeup. In photographs, they may read as stripes. Soft transitions keep the result believable at close range.

Don’t Match Contour to Your Foundation Shade

Foundation and contour do different jobs. Foundation evens the complexion, while contour adds depth. Treating them as the same shade family can leave the result looking flat or muddy, depending on your skin and the formulas. Exact shade choices vary with complexion, undertone, and product, so it is better to test them than to follow a fixed rule.

Don’t Judge the Finished Look Only in One Mirror

One mirror shows one kind of light from one distance. Lighting, camera distance, and viewing angle can all change how contour appears. Step back, move to a window, and look at photos from the trial before you decide.

Don’t Chase a Completely Different Facial Shape

Contour cannot create a new face, and trying to do so can look unnatural. Our approach is enhance, don’t mask. The bride should still look like herself, with definition that supports her natural features. A few small, well-placed touches often do more than a dramatic change.

Testing Your Contour at the Trial

A bridal makeup trial is the best place to test contouring for bridal makeup. You and your artist can see the look in person, check how it photographs, and adjust it before the wedding. Topics worth talking through include:

  • How much definition you prefer, from soft to more defined.
  • Where the contour sits, and whether the placement feels natural on you.
  • How the contour looks in person and in photographs.
  • How it works with your foundation, blush, eyes, and lips.
  • How it looks under different lighting.
  • What you like and what you want changed.

A trial is also the place to see how the makeup wears and feels on your own skin over several hours. No one can promise how contour will last through an entire wedding day, so the trial is the best way to plan for it. If you have concerns about sensitivity, tell your artist before the trial.

Plan Your Bridal Makeup Trial

Your trial is the time to put these contouring dos and don’ts to work and to choose contour placement and intensity before the wedding. It gives your artist a chance to discuss your preferred level of definition, your overall makeup style, and how the look photographs. Brittany Brown Beauty provides mobile bridal hair and makeup in Orange County, San Diego, and surrounding areas. Click the button below to schedule a consultation online.

Frequently Asked Questions

1. How should brides prepare their skin before contouring?

Keep a consistent skincare routine well before the wedding, and avoid new skincare or makeup products during the final 10 days. Arrive with clean, comfortable skin. Tell your artist about any sensitivities so the products can be chosen with that in mind.

2. How long does bridal contour last?

No specific number of hours can be promised. Wear depends on skin type, preparation, the formulas used, layering, setting, weather, and how active the day is. Wearing your look for several hours at a trial gives you a better idea of how it holds up on your skin.

3. Can contour be adjusted for different skin tones and features?

Yes. Shade, formula, placement, and intensity can all be adjusted for the individual bride. The right choices depend on your complexion, your features, and the look you want. A trial lets you compare options on your own face.

4. How much contour is right for wedding photos?

It depends on your features, the lighting, and the camera distance. The aim is enough definition to add dimension while staying soft enough to look natural in person. The main contouring dos and don’ts for brides come down to blending, balance, and testing, and photos from your trial show whether the level feels right.

5. Should brides test contour at the bridal makeup trial?

Yes. The trial lets you see how the contour looks in person and in photographs, and how it works with the rest of your makeup. It also gives you a chance to say what you like and what you would change.

Posted on

Eyebrow Shaping Before Your Wedding: What to Know

eyebrow shaping before your wedding

Brows frame your face in every photo, so they deserve a little planning. Shape them too early, and they may look different by the wedding. Shape them too late, and you risk redness or a result you cannot easily adjust in time. With more than 11 years of experience as a makeup artist in Orange County, I have seen how much brows can change a finished look.

At Brittany Brown Beauty, I believe in enhancing your natural beauty rather than masking it, so your brows should look like yours, only more polished. That is the heart of looking like yourself, but elevated.

This guide covers what to do, when to do it, and what to tell your makeup artist. It focuses on appearance and comfort and does not replace advice from your doctor or a skincare professional.

Why Brow Shape Frames Your Whole Bridal Look

Brows sit at the center of your face, so they influence how your eyes, cheeks, and forehead look in photographs. A soft, balanced brow helps your eye makeup look intentional. A brow that appears too thin, too sharply defined, or uneven can draw attention away from the rest of your look.

Here are four reasons brows matter so much for a bride:

  1. They frame your eyes: Your eye makeup sits beneath your brows, so the two work together. If you are choosing an eye look, my guide to choosing the right bridal eye makeup style covers different options.
  2. They show up in close-ups: Portraits and candid photographs capture fine details, and your brows appear in nearly every frame.
  3. They support a natural makeup look: Soft, natural brows can keep your face looking fresh rather than heavily defined.
  4. They affect how you feel: When your brows look familiar and suit your features, you may feel more comfortable and confident in front of the camera.

Your preferred eye makeup also influences how the brows should be shaped and defined. If you are considering a more dramatic look, my guide to smokey-eye bridal makeup and when to skip it explains how to decide whether that style suits your overall bridal look.

My approach stays the same here as everywhere else. I work with your natural brows and focus on soft definition rather than an unnecessary reshape. Many brides tell me they want to feel like themselves on their wedding day, and brows play a big part in that.

Timing Your Brow Shaping

eyebrow shaping before your wedding

Timing is one of the most common concerns brides have. A few simple guidelines can help you plan calmly and leave room to make adjustments.

How Far in Advance Should You Shape Your Brows?

I suggest completing any major brow shaping well before your wedding so you have time to see how the result settles and how your skin responds. Some brides arrange an initial shaping appointment and a smaller maintenance appointment later. Ask your brow professional which schedule is appropriate for your hair growth, preferred shape, and skin.

Here is a simple order to follow:

  1. Decide on your goal early: Look at photos of brows you like and consider whether you want a light cleanup or a more noticeable change.
  2. Book your first brow appointment in advance: Ideally, do this before your bridal makeup trial so I can plan your makeup around the shape you expect to have.
  3. Plan maintenance carefully: Leave enough time for your skin to settle, and avoid unfamiliar services close to your wedding.
  4. Share your plans with me: Tell me when you had your brows done and whether you had them shaped, tinted, or treated in another way.

Remember my general skin preparation guidance. Start a consistent skincare routine at least four weeks before your wedding, and avoid new skincare products and treatments during the final 10 days. That is a useful precaution when considering any unfamiliar brow service.

Avoiding Over-Plucking Too Close to the Date

Over-plucking is a common brow regret. Brows that look slightly full in the mirror can suddenly seem as though they need more cleanup when wedding nerves set in. A last-minute appointment may remove more hair than intended, and regrowth takes time.

Keep these points in mind:

  1. Leave your brows alone in the final week or two: A few stray hairs rarely make a noticeable difference in photographs, and makeup can soften their appearance.
  2. Do not try a new tool or method right before the wedding: Stick with an approach you already know your skin tolerates.
  3. Avoid unfamiliar services close to the date: Some treatments can leave the skin around your brows looking red or feeling tender.
  4. Choose a light touch over a dramatic change: Small adjustments can make a meaningful difference without changing the shape you are used to.

If your skin reacts easily, tell your brow professional before your appointment. Please also let me know about any skin sensitivities, reactions, or recent treatments at your bridal trial so I can plan your makeup with care.

Tinting and Filling Your Brows for Photos

Cameras can make light or sparse brows appear less defined than they do in person. Professional tinting and makeup application are two options to consider.

  1. Professional brow tinting: Tinting can add color to existing brow hairs. Ask your brow professional about timing and suitability, particularly if you have sensitive skin. Try unfamiliar services well before your wedding rather than during the final 10 days.
  2. Filling your brows with makeup: I can add soft definition on the wedding morning, giving your brows a polished appearance without making a lasting change.

Some brides prefer to keep things simple and let makeup do the work. That approach avoids introducing a new service close to the wedding. No product or treatment works the same way for everyone, so testing your look during the bridal trial helps us see how the brows appear alongside your complete makeup.

My post on why bridal makeup looks different in photos and how to get it right explains why a look can change between the mirror and the camera.

Adapting Brow Makeup to Your Eye Shape and Accessories

Brow shaping is not just about the brows themselves. The overall effect depends on your eye makeup, facial features, and any accessories that influence the way your eyes appear in photographs.

If You Wear Glasses on Your Wedding Day

If you plan to wear glasses during your wedding, your frames become part of your overall look. The shape and thickness of the frames can influence how defined your brows appear, so it helps to consider the two together rather than planning your brows in isolation.

My guide to bridal makeup for brides who wear glasses offers advice on coordinating your makeup with your frames. Bring your glasses to your trial if you plan to wear them for your ceremony, reception, or photographs. We can check the balance between your brows, eye makeup, and frames and make adjustments where needed.

Finding the Right Balance for Your Eye Makeup

The goal is to make your brows complement your eye makeup rather than compete with it. A softly defined eye often pairs well with natural-looking brows, while a more dramatic eye look may benefit from slightly more structure. Neither requires an extreme brow shape.

At your trial, we can consider:

  • How much definition you want in your brows.
  • Whether your eye makeup will be soft, smoky, or more dramatic.
  • How your brows look with your hairstyle and accessories.
  • How the full look appears in natural light and photographs.

If you wear glasses, want a smokey eye, or prefer a minimal makeup style, those preferences should all be part of the discussion.

What Brittany Brown Beauty Does With Brows on the Wedding Day

eyebrow shaping before your wedding

On your wedding morning, I will come to you. I arrive with a complete professional kit, including studio-quality lighting and seating, so I can see your brows and skin clearly even when the room’s lighting is not ideal. Setup typically takes about 15 to 20 minutes before we begin.

Here is how brows fit into the morning:

  1. Skin and base preparation: I start with skincare, primer, and base preparation, and I never rush this step.
  2. Brow definition: I work with your natural brow shape and add soft definition to complement your eye makeup and overall look.
  3. Balancing the full face: I check the brows alongside your foundation, eye makeup, and other features so the finish feels cohesive.
  4. Finishing the look: I complete your makeup with appropriate setting techniques to help it wear well throughout the day.

I do not promise that makeup will last a specific number of hours, since skin, weather, and activity all play a part. I plan each look carefully, and every bride receives a complimentary touch-up kit with lipstick, powder, and blotting sheets for a quick refresh.

For outdoor weddings, you may also like my guide to natural bridal makeup for outdoor photography.

I strongly recommend a bridal makeup trial. It lets me test products on your skin, work through adjustments, and help you feel confident about your complete look before the wedding day. It is the best time to see your brows alongside your eye makeup and discuss any shaping or filling you plan to do before the event.

I generally plan around 60 to 90 minutes for the bride’s makeup and 45 to 60 minutes for each bridesmaid’s makeup, adjusting for the size of the group and the services required. For larger bridal parties, I can bring additional artists to help everyone get ready on schedule.

Plan Your Bridal Makeup

Your wedding makeup should bring your vision together and help you feel confident in every photograph. From brow shape and eye makeup to the overall finish, Brittany Brown Beauty offers personalized bridal makeup tailored to your features, preferences, and wedding style.

A bridal consultation is an opportunity to discuss your desired look, ask questions, and explore the services that best suit your plans. You can also review the bridal hair and makeup services and browse the Brittany Brown Beauty portfolio for inspiration.

Ready to plan your wedding-day look? Contact Brittany Brown Beauty with your wedding date and details to discuss your makeup preferences and check availability. Spring and fall weekends in Orange County book out well in advance, so reaching out once your venue and date are confirmed is a good place to start. Your date is secured with a signed contract and deposit.

Frequently Asked Questions

1. When should I shape my eyebrows before my wedding?

Plan any major shaping well in advance so you have time to see how the result settles. Avoid making dramatic changes or trying unfamiliar brow services in the final 10 days. Your preferred schedule will depend on your hair growth, skin, and the shaping method you choose.

2. Should I tint or fill in my brows for wedding photos?

Both are options, depending on your preferences. Professional tinting can add color to existing brow hairs, while makeup provides temporary definition on the wedding day. If you are considering tinting for the first time, arrange it well in advance and discuss suitability with your brow professional.

3. Can my makeup artist adjust my brows to suit my eye makeup?

Yes. I consider your natural brow shape alongside your eye makeup and overall look. The goal is a balanced definition rather than an unnecessary reshape. Your bridal trial is the best opportunity to assess the combination and make adjustments.

4. What if I wear glasses on my wedding day?

Bring your glasses to your bridal trial if you plan to wear them during the ceremony or in photographs. The frames can influence how your brows and eye makeup appear, so seeing the full look together helps us make suitable adjustments.

5. What should I tell my makeup artist about my brows at my trial?

Share any recent shaping or tinting appointments, treatments you are planning, and your preferences for brow definition. Mention skin sensitivities or previous reactions, too. Bringing reference photos can help explain the look you want and make it easier to plan your makeup before the wedding.

Posted on

Bridal Makeup for Acne Scarring and Uneven Texture

Some brides worry about how acne scarring and uneven skin texture will look on their wedding day, especially in close-up photographs. That concern is understandable, but it does not have to take over your planning. With more than 11 years of hands-on bridal experience in Orange County, I have worked with many skin types and complexion concerns, and I approach each look with technique rather than heavy coverage.

At Brittany Brown Beauty, I believe in enhancing your natural beauty rather than masking it, so you look like yourself, but elevated.

This guide explains how makeup techniques can soften the appearance of discoloration and uneven texture while creating a natural-looking finish. It focuses on appearance and comfort rather than treating skin conditions. If you have questions about your skin or are considering a treatment, consult your doctor or a qualified skincare professional.

Why Texture Changes How Foundation Should Be Applied

Acne scarring and uneven texture can affect how light moves across your face. Raised or indented areas may catch light or create small shadows, while foundation can settle into certain areas and make them more noticeable. Applying more coverage everywhere does not necessarily solve the problem.

I take a different approach. Instead of covering your entire face with thick layers of product, I build coverage gradually and place it where it helps most. Corrective beauty makeup is a technique I particularly enjoy because small, targeted adjustments can make a meaningful difference to the overall finish.

The goal is skin that still looks like skin, only more even and polished. This is the no-makeup-makeup approach at work.

Here is what I keep in mind:

  • Avoid unnecessary layers: Heavy coverage can emphasize texture rather than soften its appearance.
  • Be selective with shimmer: Strong shimmer and glitter can draw attention to uneven areas under certain lighting conditions.
  • Build coverage gradually: Thin, deliberate layers give me more control over the finish.
  • Prepare the skin carefully: The way makeup sits on the skin depends partly on the preparation underneath.
  • Adjust for each person: Every complexion is different, so I do not use one fixed approach for everyone.

I do not promise that makeup will make acne scars or uneven texture disappear. What I focus on is a carefully planned application that helps you feel confident in person and in photographs.

For more information about targeted coverage, read my guide to corrective makeup and who it is for. It explains how specific makeup techniques can help address the appearance of uneven tone and other complexion concerns without automatically applying heavy coverage everywhere.

Techniques That Help Create a More Even Finish

Schedule a Consultation

These three techniques form the core of how I approach uneven texture. Each helps me balance coverage and finish while keeping the makeup looking natural.

Priming for Smoother Application

A polished base starts with preparation. On your wedding morning, I begin with skincare, primer, and base preparation, and I take that step slowly on purpose. A well-prepared surface can help foundation apply more evenly and reduce the appearance of patchiness.

You can start preparing your skin well before your wedding. My guide to the 90-day skin prep countdown before your wedding walks through a longer preparation timeline.

These basics are useful for many brides:

  • Maintain a consistent skincare routine in the weeks before your wedding.
  • Stick with products your skin already tolerates comfortably.
  • Stay hydrated, especially in the week leading up to the event.
  • Avoid introducing new skincare products or treatments during the final 10 days.
  • Avoid picking at scars or breakouts, which can irritate the skin.

I choose primers and foundations based on your skin, preferred finish, and wedding conditions, including Southern California heat, humidity, and sea air. I do not claim that any single product suits every skin type. Testing products on your skin and assessing the finish at your trial help us make more informed choices.

Color-Correcting Acne Scarring

Acne scarring can involve discoloration as well as changes in skin texture. Marks may appear red, pink, or darker than the surrounding skin, and uneven color can draw attention even when foundation is otherwise well blended.

Color correction can help neutralize the appearance of discoloration before foundation is applied.

Here is how I approach it:

  1. Assess the area: I look at where discoloration appears and how its color compares with the surrounding skin.
  2. Choose a suitable correcting shade: The appropriate color depends on the complexion and the discoloration being addressed.
  3. Apply sparingly: A small, precise application gives me more control than spreading a large amount of product across the area.
  4. Blend the edges: The corrector should blend into the surrounding skin without a visible line.
  5. Build the base gradually: Once the color looks more balanced, I use thin layers of foundation where additional coverage is helpful.

The shade and amount vary from bride to bride. I choose them based on the skin in front of me rather than following a universal formula.

If you have fair skin and want more guidance on choosing complementary shades, read my bridal makeup for fair skin: product and shade guide.

It is also important to distinguish between discoloration and physical texture. Color correction can soften the appearance of uneven color, but it cannot fill indentations or remove raised scars. My approach accounts for both concerns without promising that either will disappear completely.

Setting Without Emphasizing Texture

Setting products help makeup wear well, but excessive powder can create a dry finish or make uneven texture more noticeable. I prefer to set selectively rather than automatically covering the entire face with powder.

My approach looks like this:

  1. Focus on areas that need it: The T-zone and areas prone to creasing or excess shine may need more attention.
  2. Keep the high points soft: Cheekbones and other areas where light naturally falls can retain a gentle glow.
  3. Use a light hand: I apply only as much product as the finish requires.
  4. Finish thoughtfully: Appropriate setting techniques help support the makeup through the ceremony, photographs, and reception.

Your skin’s response to products and the conditions of your wedding day both influence the finished look. I do not promise that makeup will last for a specific number of hours, since skin, weather, and activity all play a part.

I do plan each application carefully, and every bride receives a complimentary touch-up kit containing lipstick, powder, and blotting sheets for a quick refresh when needed.

What to Discuss at Your Bridal Makeup Trial

Your trial is the best place to talk through your skin concerns and decide how much coverage feels right. I strongly recommend one because it lets me test products on your skin, make adjustments, and help you understand what to expect before the wedding day.

It also gives us an opportunity to assess the finished makeup in natural light and photographs, where uneven texture may appear different from how it looks in a mirror.

Please bring up the following:

  • Areas of your skin you would like softened and features you want to highlight.
  • Any skin sensitivities, previous reactions, or recent treatments.
  • Past experiences with makeup that felt heavy, cakey, or uncomfortable.
  • Your preferred level of coverage and finish.
  • Photos of your dress, hairstyle, and makeup looks you admire.
  • Any questions about products, techniques, or how the makeup may appear in photographs.

Honest feedback helps most. If something feels heavy or does not look like you, tell me so we can discuss adjustments. I would rather address a concern during your trial than leave you uncertain on your wedding morning.

If you are unsure how to explain the look you have in mind, my guide to what to explain to your makeup artist during a trial offers tips for communicating your preferences with reference photos and clear feedback.

You may also find my article on avoiding makeup that settles into fine lines useful. Although acne scarring and fine lines are different concerns, both illustrate why product placement, application technique, and the amount of coverage matter when creating a natural-looking finish.

After the trial, pay attention to how the makeup looks and feels. If you notice a concern, contact me so we can discuss adjustments before the wedding.

What to Expect on Your Wedding Morning

Schedule a Consultation

Because I am fully mobile, I come to you with a complete professional kit, including studio-quality lighting and seating. This allows me to assess your complexion clearly, even when the room’s lighting is not ideal.

You avoid the salon commute, your getting-ready party can stay together, and your morning can follow the schedule you have planned.

My process begins with skin and base preparation, followed by foundation, targeted coverage, and finishing techniques suited to your look. I adjust the application as needed rather than applying the same amount of product across every area of your face.

I generally plan around 60 to 90 minutes for the bride’s makeup and 45 to 60 minutes for each bridesmaid’s makeup, adjusting for the size of the group and the services required. For larger parties, I can bring additional artists so everyone is ready on schedule without cutting corners on the bride’s application.

I trained at Empire Academy of Makeup in Orange County, and my work has been featured in Voyage LA Magazine and SDVoyager. You can learn more about my background and see examples of my soft, natural style in the Brittany Brown Beauty portfolio.

Plan Your Bridal Makeup

Acne scarring and uneven texture do not mean you have to abandon the bridal makeup look you love. The goal is to find an approach that balances coverage, finish, and your personal preferences without adding unnecessary products.

During a consultation, we can discuss your skin concerns, the level of coverage you prefer, your wedding venue, and the look you want to achieve. We can also talk about whether a bridal trial would help you assess the makeup in person and in photographs before the big day.

If you are planning other wedding-day beauty services, you can explore my bridal hair and makeup services to learn more about the options available for your wedding party.

Spring and fall weekends in Orange County book out well in advance, so I encourage you to get in touch once your venue and date are confirmed. Your date is secured with a signed contract and a deposit. To discuss your wedding plans and availability, contact Brittany Brown Beauty.

Frequently Asked Questions

1. How should I prepare my skin before bridal makeup for acne scarring and uneven texture?

Maintain a consistent skincare routine in the weeks before your wedding and stick with products your skin already tolerates comfortably. Avoid introducing unfamiliar products and treatments during the final 10 days. On your wedding morning, I begin with skincare, primer, and base preparation to help create a more even-looking surface for makeup.

2. How long will bridal makeup for acne scarring and uneven texture last through the ceremony and reception?

Wear time depends on your skin, the weather, and how active your day is, so I do not promise a set number of hours. I plan carefully with appropriate preparation, product choices, and finishing techniques to support the overall look. Every bride also receives a complimentary touch-up kit with lipstick, powder, and blotting sheets for a quick refresh.

3. Can the makeup be adjusted for my skin tone and type?

Yes. I adjust the amount of coverage, correcting shades, and finishing techniques according to your complexion, skin, and preferences. I do not use one fixed look for everyone. Your bridal trial lets me assess how the makeup looks on your skin and make adjustments before the wedding day.

4. Will my acne scars show in wedding photographs?

Makeup can soften the appearance of discoloration and help create a more even-looking complexion, but it cannot guarantee that physical texture will disappear. I use targeted color correction, thin layers, and selective setting to create a natural-looking finish. Reviewing the makeup in photographs during your trial helps you understand what to expect.

5. Should I get a skin treatment before my wedding to improve texture?

That is a question for your doctor or a qualified skincare professional, since I do not provide medical advice or treatment recommendations. Avoid experimenting with unfamiliar skincare products or treatments during the final 10 days before your wedding. If you have had a recent treatment, tell me during your trial so I can plan your makeup carefully.

Posted on

Bridal Makeup for Sensitive Skin and Rosacea-Prone Skin

bridal makeup for sensitive skin and rosacea-prone skin

If your skin flushes easily, reacts to new products, or tends toward redness, wedding planning can bring an extra layer of worry. You may wonder whether makeup will feel comfortable for hours, whether redness will show in photos, and whether anything could go wrong on a day you cannot repeat. Those concerns are understandable, and careful preparation can help you feel more confident.

With more than 11 years of hands-on bridal experience in Orange County, I have worked with many different skin types and sensitivities.

At Brittany Brown Beauty, I believe in enhancing your natural beauty rather than masking it, so you look like yourself, but elevated.

This guide is educational and focuses on makeup appearance and comfort. It is not medical advice. If you have questions about rosacea, persistent redness, or another diagnosed skin condition, speak with your doctor or a qualified skincare professional before your wedding.

Why Sensitive and Rosacea-Prone Skin Needs a Gentler Approach

Skin that reacts easily calls for extra care at every step. Redness may become more noticeable, some products may feel uncomfortable, and heavy layers can make the complexion appear less even. Heat, sun exposure, and a long wedding day may also influence how your skin looks and feels.

I do not diagnose or treat skin conditions, and I do not claim that any makeup product is safe or suitable for everyone. What I can do is take time to understand your concerns, assess how your skin looks on the day, and build a makeup look around your needs and preferences.

A gentler makeup approach often involves:

  • Choosing products carefully rather than applying unnecessary layers.
  • Building coverage gradually instead of using a heavy base.
  • Taking time with skin and base preparation on the wedding morning.
  • Testing the makeup during a bridal trial before the big day.
  • Discussing previous product reactions and any known sensitivities in advance.

Heavy coverage can draw attention to texture and create a mask-like finish. A softer approach can help the complexion look more even while preserving its natural appearance. The aim is not to hide your skin completely, but to create a finish that looks polished and feels comfortable.

Building a Comfortable Makeup Base

bridal makeup for sensitive skin and rosacea-prone skin

A comfortable-looking base starts well before makeup touches your face. On your wedding morning, I begin with skincare, primer, and base preparation, and I take that step slowly on purpose. A well-prepared surface helps subsequent makeup layers apply more evenly.

You can support that result in the weeks before your wedding. My guide on how to prep your skin 30 days before your wedding walks through the preparation timeline in more detail.

Here is the preparation I recommend discussing as part of your wedding plan:

  • Maintain a consistent skincare routine in the weeks before your wedding.
  • Stick with products your skin already tolerates comfortably.
  • Avoid introducing new skincare products and treatments during the final 10 days.
  • Stay hydrated, especially during the week leading up to the event.
  • Avoid picking at your skin or trying an unfamiliar last-minute fix.

Dryness and flaky patches can make foundation appear uneven or cling to certain areas. If that is one of your concerns, my guide to skin prep for dry or flaky patches before your wedding offers additional advice on preparing your skin before makeup application.

If you have persistent irritation, active flare-ups, or concerns about changing your skincare routine, check with a qualified skincare professional rather than experimenting with new treatments just before the wedding.

Color-Correcting Redness

Color correction can help neutralize the appearance of redness so your foundation does not have to cover it with thick layers. I use a small amount of a suitable correcting shade where needed, blend the edges carefully, and apply a lighter base over the top.

Here is how I approach this step:

  • Identify the areas: I look at where redness appears, such as the cheeks, nose, or chin.
  • Apply selectively: A small, precise amount can be more effective than spreading product across the entire face.
  • Blend the edges: The corrector should blend into the skin without a visible line.
  • Build coverage gradually: I add thin layers of foundation where more evenness is needed.
  • Keep the finish natural: The goal is a polished complexion rather than a flat or mask-like appearance.

Little, subtle adjustments can make a meaningful difference. Rather than concealing the entire face, I focus on the specific areas that benefit from additional coverage.

If you want to explore how makeup techniques vary across different skin concerns, read my guide to the best bridal makeup for oily, dry, and acne-prone skin.

Choosing Products With Care

When skin reacts easily, product choice and communication matter. I do not make blanket claims about any formula, and I do not promise that a particular ingredient or product will suit every person. Instead, I consider your existing routine, previous experiences, skin preferences, and the finish you want.

You can help by sharing what you already know about your skin:

  • Make a note of products or ingredients that have caused problems in the past.
  • Tell me if you prefer products without added fragrance so we can discuss appropriate options.
  • Bring information about your current skincare routine.
  • Mention whether you have noticed changes in how your skin responds to heat, sun, or other environmental conditions.
  • Ask about any makeup product or technique you are uncertain about.

If you have a diagnosed condition or a history of significant reactions, discuss product suitability with your healthcare professional. A makeup trial can help us assess the appearance and comfort of your chosen products, but it cannot guarantee that a product will never cause a reaction.

I would rather hear about a concern during the planning stage than discover it on your wedding morning. An open conversation gives me more time to adapt the makeup approach thoughtfully.

What to Discuss at Your Bridal Makeup Trial

The bridal trial is one of the most useful planning steps when you have sensitive or rosacea-prone skin. I strongly recommend one because it allows us to test the look, make adjustments, and discuss your preferences before the wedding day.

My post on what happens during a bridal makeup trial explains the process in more detail.

Please tell me about the following at your trial:

  • Any skin sensitivities, previous reactions, or recent treatments.
  • Areas where your skin becomes red, feels tight, or tends to look uneven.
  • Previous experiences with makeup that felt heavy or uncomfortable.
  • Features you love and want to highlight.
  • Areas you prefer not to emphasize.
  • Photos of your dress, hairstyle, and makeup looks you admire.

Honest feedback is important. If the makeup feels too heavy, the coverage looks different from what you expected, or the finish does not feel like you, let me know so we can discuss adjustments.

It is also useful to explain your vision clearly. You do not need professional makeup terminology to do this. Reference photos, details about your preferred coverage, and examples of looks you dislike can help communicate your expectations. My guide to how to explain your vision to your makeup artist during a trial offers practical tips for making that conversation easier.

After your trial, pay attention to how your skin feels and looks. If you notice a concern, contact me so we can discuss the makeup plan. If you experience a suspected skin reaction, seek appropriate medical advice rather than continuing to test the product yourself.

Several brides have told me they want to feel like themselves, but elevated. That feeling starts with knowing your concerns have been heard and your preferences have been considered.

Managing Skin Changes on the Wedding Day

bridal makeup for sensitive skin and rosacea-prone skin

Even with careful planning, your wedding day may bring excitement, warmth, and strong emotions. These can affect how your skin looks, and it is not possible to predict exactly how your complexion will behave throughout the event.

I cannot guarantee that makeup will prevent redness or remain unchanged for a set number of hours. What I can do is prepare carefully, adjust the application to your skin’s appearance on the day, and leave room for practical touch-ups.

Here is how I approach the wedding morning:

  • I arrive with enough time for an unrushed setup, which typically takes about 15 to 20 minutes.
  • I use my professional lighting setup to assess your complexion clearly, even when the room’s lighting is not ideal.
  • I adjust the makeup approach if your skin looks or feels different from how it did during your trial.
  • I apply thin layers and set selectively to avoid unnecessary product buildup.
  • I finish with appropriate setting techniques to support the overall look through the ceremony, photographs, and reception.

A few habits on your end can also help keep the morning comfortable:

  • Avoid introducing new skincare or makeup products that morning.
  • Follow your normal routine and any guidance provided by your healthcare professional.
  • Eat something before you begin getting ready.
  • Tell me promptly if a product feels uncomfortable.
  • Keep any familiar skincare products available if they are part of your established routine.

I also provide every bride with a complimentary touch-up kit containing lipstick, powder, and blotting sheets. It gives you a convenient way to refresh your makeup when needed, although it is not a treatment for redness or irritation.

Because I am fully mobile, I come to you, whether that is a private home, hotel suite, resort room, or estate. You avoid the salon commute, your getting-ready party can stay together, and your morning can follow the schedule you have planned.

I generally plan around 60 to 90 minutes for the bride’s makeup and 45 to 60 minutes for each bridesmaid’s makeup, adjusting for the services required and the size of the group. For larger parties, I can bring additional artists so everyone is ready on schedule without cutting corners on the bride’s application.

You can see my soft, natural style in the Brittany Brown Beauty portfolio and learn more about my background and training, including my training at Empire Academy of Makeup in Orange County.

Plan Your Bridal Makeup

Your wedding makeup should reflect your personal style while taking your skin’s needs into consideration. Brittany Brown Beauty offers personalized bridal makeup, with time to discuss your preferred coverage, desired finish, and any sensitivities or concerns before your wedding day.

A consultation is the perfect place to discuss your vision, review your options, and determine whether a bridal trial would help you feel more prepared. You can also explore the bridal hair and makeup services to find the right fit for your wedding plans.

Ready to plan your bridal look? Contact Brittany Brown Beauty with your wedding date, venue, and makeup preferences to discuss your needs and check availability. Spring and fall weekends in Orange County book out well in advance, so reaching out once your venue and date are confirmed is a great place to start. Your date is secured with a signed contract and deposit.

Frequently Asked Questions

1. How should I prepare my skin before bridal makeup for sensitive or rosacea-prone skin?

Maintain a consistent skincare routine in the weeks before your wedding and stick with products your skin already tolerates comfortably. Avoid introducing unfamiliar skincare products and treatments during the final 10 days. If you have a diagnosed skin condition or concerns about irritation, ask your healthcare professional for guidance before changing your routine.

2. How long will bridal makeup last on sensitive or rosacea-prone skin?

Wear time depends on your skin, the weather, and how active your day is, so I do not promise a set number of hours. I plan carefully with appropriate preparation, product choices, and finishing techniques to support the look. Every bride also receives a complimentary touch-up kit with lipstick, powder, and blotting sheets.

3. Can bridal makeup be adjusted for my skin tone and sensitivity concerns?

Yes. I adapt my approach according to your complexion, features, preferences, and the products your skin already tolerates. Your bridal trial gives us an opportunity to assess the appearance and comfort of the makeup and adjust the finish before your wedding day.

4. Should I tell my makeup artist about my skin concerns before the wedding?

Yes. Share any known sensitivities, previous reactions, recent treatments, and products that have caused problems in the past. This information helps your artist plan more carefully. For medical questions about rosacea or persistent redness, consult your doctor or a qualified skincare professional.

5. Can you help cover redness without making my skin look heavy?

I focus on targeted color correction and thin layers of foundation rather than automatically covering the entire face with heavy makeup. The goal is a more even-looking complexion while preserving a natural finish. Your trial allows us to assess how the approach looks on your skin and in photographs.

Posted on

Setting Spray Guide for Orange County Brides

setting spray guide for orange county brides

Setting spray is one of the most talked-about products in bridal makeup, and also one of the most misunderstood. Some brides think it works like a magic seal. Others skip it completely. The truth sits in the middle. A setting spray can help your look sit more smoothly and hold up better, but it works best as one step in a plan. With 11+ years of hands-on bridal experience in Orange County, I have learned that the plan matters more than any single product. 

At Brittany Brown Beauty, I believe in enhancing your natural beauty rather than masking it, and every step I take, including setting, supports a look that feels like you, but elevated.

Why Setting Spray Matters for Coastal Weddings

Southern California weddings come with real conditions. Coastal humidity, sea air, direct sun, and wind all affect how makeup wears. A look that stays put in a cool, dry room can behave differently on a bluff-top terrace or a sunny patio near the water. If your ceremony will be on the sand or in the open air, my guide to waterproof bridal makeup for beach and outdoor ceremonies goes into more detail.

Waterfront venues require their own considerations, too. Reflective light, open-air settings, and coastal breezes can affect how your makeup appears in photographs. For a location-specific example, read my guide to Lido Isle bridal makeup for waterfront weddings in Newport Beach.

That is why I treat setting as part of the whole process instead of a last-second spritz. When I arrive at your getting-ready location, I set up my station with studio-quality lighting and seating, then start with skincare, primer, and base preparation. I take that first step slowly on purpose, because a well-prepared base gives every later layer a better surface to sit on. After I apply your look, I finish with setting techniques and sealants that help it hold through the ceremony, photos, and reception.

Setting spray is a finishing mist applied over makeup, and it plays a role in that final stage. It can soften the look of powder, help layers blend together, and give your skin a more unified finish. It does not replace good prep, thoughtful product choice, or a bridal trial.

Choosing the Right Setting Spray

setting spray guide for orange county brides

No single setting spray suits every bride. Skin, weather, venue, and personal style all shape the choice, and I never promise that one product works for everyone. Instead, I choose based on what I see on your skin and what your day will involve. Here is how I think it through.

Matte vs. Dewy Finish Sprays

The finish you want drives this choice more than anything else. A matte-leaning finish gives a softer, more velvety look and can suit brides who notice shine early in the day. A dewy-leaning finish keeps skin looking fresh and luminous, which fits the no-makeup-makeup look I love to create.

Neither option is better. The right choice depends on your skin and your taste. If your forehead and nose tend to shine, I may use a more controlled finish there while keeping a soft glow on your cheekbones. If your skin runs dry, I lean toward a finish that looks comfortable and fresh instead of flat. Glowing skin and shiny skin are different things, and finishing products help me keep that line clear.

Your preferred makeup style also influences the finish. Some brides prefer a natural, softly defined look, while others want stronger color and more dramatic definition. If you are still deciding between these approaches, my guide to bold bridal makeup vs. soft glam can help you work out how much definition you want.

If you are unsure which finish you prefer, bring photos of looks you love to your trial. We can test your options and compare them on your skin, in natural light and in photographs.

Layering Technique for All-Day Wear

Many brides picture a single heavy spray over the whole face. I prefer a layered approach. Each step in my process supports the next one: skincare, primer, base, soft color, powder where needed, and then setting. Applying thin layers in the right order gives me more control and keeps your skin looking like skin. You can read more about my full process in my bridal makeup routine and how it lasts all day.

A few principles guide my layering:

  • Prep first: Hydrated, prepared skin gives makeup a better foundation.
  • Thin layers: Building gradually keeps the finish soft and helps avoid a heavy look.
  • Light touch with powder: I place it where it helps and skip it where it does not.
  • Setting last: The spray ties the layers together instead of trying to fix them.

I do not guarantee how long any makeup will last, since skin, weather, and activity all play a part. What I can promise is a carefully built look. One San Diego bride shared that her makeup stayed beautiful through her happy tears, and that is the kind of real-day performance I plan for.

You can help your skin, too. Start a consistent skincare routine at least four weeks before your wedding, drink plenty of water in the week leading up to it, and avoid new skincare products and treatments in the final 10 days.

Reapplying During the Reception

With proper prep and product choice, the goal is for you to enjoy your day without checking your face every hour. Still, a long celebration deserves a safety net, so I give every bride a complimentary touch-up kit with lipstick, powder, and blotting sheets.

When you want a quick refresh, keep these tips in mind:

  • Blot before you add: Press a blotting sheet gently on shiny areas first. Adding more product over oil can look heavy.
  • Use powder sparingly: A small amount on the T-zone is usually enough.
  • Refresh your lips: Lipstick is a common spot to touch up after dinner and toasts.
  • Skip extra layers of spray: More spray may not help and can disturb the finish you already have.

Ask a bridesmaid or a trusted friend to hold the kit, so you can step away for a minute between photos and dancing.

Some brides also plan a different hairstyle for the reception, especially if they want a change from a formal ceremony look to something more relaxed for dancing. If that is part of your plan, my guide to second-look bridal hair transformations for the reception explains how to prepare for a hairstyle change. Coordinating your makeup touch-ups with the transition helps keep your overall look feeling cohesive.

What Setting Spray Can’t Fix

Setting spray has limits, and I would rather tell you that now than let you expect too much. It cannot rescue skin that did not get prepped, and it cannot make a heavy base look light. It also cannot predict how your skin will respond to a new product on your wedding morning.

Here is what setting spray cannot do:

  • Replace skin prep or a consistent skincare routine.
  • Fix a base that is too heavy or does not suit your skin.
  • Protect against every condition, including strong wind or heat.
  • Guarantee a specific number of hours of wear.

Skin reactions deserve a mention, too. Skin is personal, and I do not make blanket claims about any product being right for everyone. That is exactly why I strongly recommend a bridal makeup trial. A trial lets me test products on your skin, work through any adjustments, and make sure you walk into your wedding day knowing what to expect.

If you want a preview of the appointment, read what happens during a bridal makeup trial. Please tell me about any skin sensitivities, reactions, or recent treatments at your trial so I can plan around them.

Preparing for Your Bridal Makeup Trial

setting spray guide for orange county brides

Your trial is also the best time to explain the finish you want, discuss your concerns about makeup wear, and make adjustments before the wedding. You do not need professional makeup terminology to communicate your preferences. Reference photos and clear feedback about what you like or dislike are often enough to get the conversation started.

My guide to how to explain your vision to your makeup artist during a trial offers practical advice for making that conversation productive.

It helps to arrive prepared. Bring inspiration photos, details about your dress and venue, and any products you already use and enjoy. My checklist on what to bring to your bridal makeup trial explains what to gather before your appointment.

Mature skin deserves a mention here as well. Some formulas settle into fine lines or look heavy on more mature complexions, so I adjust my technique and setting approach for brides and mothers of the bride and groom who want a soft, natural finish.

Because I am fully mobile, I come to you, whether that is a private home, hotel suite, resort room, or estate. You skip the salon commute, your whole getting-ready party stays together, and your timeline stays intact.

For larger bridal parties, I bring additional artists so everyone is ready on schedule without cutting corners on the bride’s application. You can see my soft, glowing style in my portfolio, and you can learn more about my background and training before you book.

Plan Your Wedding-Day Makeup

Your wedding makeup should look polished from the ceremony through the reception while still feeling like you. Brittany can discuss your skin type, preferred finish, venue, and wedding-day schedule to help plan a look that suits your needs. A bridal trial can also help you test your makeup and make adjustments before the big day.

If you’re comparing artists, review these questions to ask before hiring a bridal makeup artist to help you prepare for your consultation.

With more than 11 years of experience in the beauty industry, Brittany takes a personalized approach to bridal makeup, focusing on enhancing your natural features and reflecting your personal style.

Spring and fall weekends in Orange County can book quickly, so reach out once your venue is confirmed. A signed contract and deposit secure your date. Contact Brittany Brown Beauty to discuss your wedding plans and availability.

Frequently Asked Questions

1. How should I prepare my skin before using setting spray on my wedding day?

Start a consistent skincare routine at least four weeks before your wedding. Drink plenty of water, especially during the final week. Avoid new skincare products or treatments in the last 10 days. On your wedding morning, I begin with skincare and primer. This creates a smooth base for your makeup and setting products.

2. How long can setting spray help my bridal makeup last?

Wear time depends on your skin, the weather, and your activity level. I cannot promise a set number of hours. Instead, I focus on proper preparation and products suited to your skin and setting. Finishing techniques also help your makeup hold up. Every bride receives a complimentary touch-up kit with lipstick, powder, and blotting sheets.

3. Can setting spray be adjusted for my specific skin type?

Yes. I tailor my setting approach to your skin and preferred finish. Your features and personal style also guide my choices. I never rely on one fixed routine for everyone. During your bridal trial, we can test products and refine the finish before your wedding day.

4. Should I choose a matte or dewy setting spray for a coastal wedding?

Your skin type and preferred look can help guide the decision. A matte finish may suit brides who notice shine early. A dewy finish creates a fresh, luminous look. Coastal humidity, sea air, and sun can also affect your makeup. During your trial, we can test different options and choose what feels and looks best on you.

5. Can I bring my own setting spray to my bridal makeup trial?

Absolutely. Bring any products you already use and love. Photos of your favorite makeup looks are helpful, too. Please mention any skin sensitivities, previous reactions, or recent treatments. This information helps me assess which products work well with your skin. Together, we can plan a finish that suits your preferences.

Posted on

Highlighter Placement Tips for Camera-Ready Bridal Skin

highlighter placement tips for camera-ready bridal skin

Glowing skin is one of the most requested looks in bridal makeup, and highlighter is a big part of how it happens. Placed well, it makes your skin look fresh, lit from within, and soft on camera. Placed poorly, it can look shiny, patchy, or distracting in photos. With more than 11 years of hands-on experience as a bridal makeup artist in Orange County, I have seen both outcomes, and the difference often comes down to where the product goes and how it is applied.

At Brittany Brown Beauty, I believe in enhancing your natural beauty rather than masking it, and highlighter is one of my favorite ways to do that.

This guide walks you through where the highlighter belongs, why placement matters in front of a camera, and how to avoid common problems that show up in photographs.

Why Highlighter Placement Matters More on Camera

Highlighters work by catching light. In person, that can look like a soft glow. In a photograph, especially with flash, bright sunlight, or a high-resolution camera, the same product can appear much stronger than it does in the mirror. A little too much product, or too much in the wrong place, can turn a glow into shine. If you want to understand why this happens, read why bridal makeup looks different in photos and how to get it right.

That is why I think about the camera from the very first conversation. Camera-ready skin means a look that holds up in the way your photographer will capture it, not only in the bathroom mirror on your wedding morning. Your day will include portraits, candid moments, and photographs in different lighting conditions, from shaded getting-ready rooms to open outdoor spaces.

The venue matters, too. Harbor-reflected light, direct sunlight, and studio lighting can affect how your skin and makeup appear. My guide to Balboa Island wedding makeup and preparing for harbor light explores how coastal light can influence a bridal look. For a more technical look at color accuracy under controlled lighting, you can also read pigment control: keeping makeup colors true under studio lighting.

Placement also shapes your face. Highlighter draws the eye to the area where it sits, so I use it to emphasize the features I want to bring forward. Used with care, it supports the no-makeup-makeup look, where your skin looks like skin, only polished. Many brides tell me they want to feel like themselves on their wedding day, and I always keep that in mind. The goal is a glow that looks like you, but elevated.

Here is a quick checklist of what good highlighter placement should achieve:

  • Look soft and blended, with no visible edges.
  • Sit on the high points of your face where light naturally falls.
  • Support your natural features instead of covering them.
  • Suit your skin, your dress, and your venue lighting.
  • Photograph as a glow, not as shine.

Where to Place Highlighter

balboa island wedding makeup

Every face is different, so I adjust placement for each bride. Still, a few areas work well for many looks. Treat the following as a guide for the conversation we will have at your bridal trial, where I can test the products and techniques directly on your skin.

Highlighter is only one part of a balanced base. If you have specific concerns such as redness, discoloration, or uneven skin tone, my guide to corrective makeup and who it is for explains how targeted techniques can help create a more even-looking complexion without applying unnecessary coverage everywhere.

Cheekbones and Brow Bone

The tops of the cheekbones are the classic spot for highlighter because this is where light naturally lands. I place it on the high point, just above where a warm, soft contour sits, and blend outward so there is no hard line. Warm, bronzed contour paired with a soft glow on the cheekbones gives your face dimension without heaviness.

The brow bone is a smaller area and deserves a lighter touch. A subtle amount just beneath the arch of the brow can open up the eye area and add polish. I use less here than many people expect because the brow bone sits close to the eye and can look shiny very quickly under bright light.

Here is what to keep in mind for both areas:

  • Apply highlighter to the high points only, not across the whole cheek.
  • Blend the edges until they disappear into the skin.
  • Use less product on the brow bone than on the cheekbones.
  • Check the look in natural light before deciding it is finished.

If your skin tends to get oily, especially across the forehead, I pay extra attention to where the glow sits. A glow on the cheekbones can look beautiful while excess shine across the forehead may be distracting in photos. I place each product with that difference in mind.

Your skin tone and undertone also influence how the finished look comes together. I consider those details when choosing complementary blush, contour, and highlight shades so the result looks balanced rather than overly warm, cool, or metallic.

Cupid’s Bow and Inner Eye Corner

These are small areas that can make a visible difference. A touch of highlighter on the cupid’s bow, the dip at the center of the upper lip, adds subtle dimension and helps define the lips in photographs. A small amount at the inner corner of the eye can brighten the eye area and make you look more rested.

Both spots need a light hand. The inner eye corner is delicate, and too much product can look stark in a close-up photograph. The cupid’s bow works best with a tiny amount that blends into the surrounding skin.

A few points to remember:

  • Use a small amount and build only if needed.
  • Use a small, precise brush or a fingertip for control.
  • Blend until the highlight looks like a natural reflection of light.
  • Skip the area entirely if it feels like too much for you. Your look should feel comfortable.

These subtle adjustments can make a difference without requiring a dramatic amount of product. I do not add them to every bride’s look. I decide based on your features, preferences, and the overall finish we build together.

Collarbone for Off-Shoulder Dresses

If your dress shows your collarbones, shoulders, or neckline, your highlighter plan may extend below your face. A soft glow on the collarbones can bring your face and skin tone together so everything looks cohesive in photographs. Without it, your face can look luminous while your neckline appears comparatively flat.

I use a light touch here, too. The skin on your neck and chest has a different texture from your face, and too much product can become noticeable quickly. I blend carefully and match the finish to what is happening on your face.

When your dress has an off-the-shoulder or open neckline, remember these points:

  • Bring a photo of your dress to your trial so we can plan your neckline and face together.
  • Match the glow on your collarbones to the finish on your face.
  • Keep the effect soft rather than glittery.
  • Consider how your necklace, veil, or hair will sit against the area.

Your bouquet and wedding color palette can also influence the overall makeup look. The goal is not to match every shade exactly, but to choose complementary tones that work with your complexion and wedding colors. For more guidance, read how to match your bridal makeup to your bouquet and color palette.

Avoiding Flashback in Photography

Flashback is the pale, white, or overly bright patch that can appear in photographs taken with flash. It can happen when certain products reflect light back toward the camera more strongly than the surrounding skin. Highlighter is one product that can contribute to an overly reflective finish, which is why I treat photography as part of the planning process from the start.

Here is how I approach it. I prepare your skin carefully, choose products and finishes suited to your skin and wedding setting, and apply highlighter with restraint. I then check the look in different kinds of light because a glow that looks perfect in one room can appear different in another.

For more guidance on light and makeup, see how wedding lighting affects your bridal makeup.

This is also where your photographer can help. If you tell me about your photographer’s style, portrait schedule, and whether flash will be part of the day, I can plan your glow around those details.

Here is a checklist to help reduce the risk of an overly reflective finish in photographs:

  • Ask your photographer whether they plan to use flash, and share the answer with me.
  • Bring inspiration photos that show the glow you love.
  • Take test photos at your trial, with and without flash, and review the results together.
  • Use less product in areas that reflect the most light.
  • Tell me about any concerns you have with shine in past photographs.

Studio lighting deserves attention, too. Different light sources can change how makeup colors appear, and a shade that looks balanced in one setting may read differently under another. My guide to pigment control and keeping makeup colors true under studio lighting covers the relationship between lighting, pigment, and the final image.

Your trial is the best way to reduce surprises. I strongly recommend one because it lets me test products on your skin, work through adjustments, and make sure you walk into your wedding day knowing what to expect.

It also gives you a chance to tell me about skin sensitivities, previous reactions, or recent treatments so I can plan around them. I do not make blanket claims about how every product will work on every skin type. Testing your actual skin and reviewing the finish under appropriate lighting help us determine what works best for you.

Prepare Your Skin Before the Wedding

Skin preparation supports everything above. I suggest starting a consistent skincare routine at least four weeks before your wedding, staying hydrated in the week before, and avoiding new skincare products or treatments during the final 10 days.

My guide on how to prep your skin 30 days before your wedding lays out the full timeline.

On the morning of your wedding, I begin with skincare, primer, and base preparation, and I take that step slowly on purpose. A prepared surface can help highlighter sit more smoothly and create a more natural-looking finish.

The products and techniques I choose depend on your skin, the makeup look you want, and the conditions you will encounter. If you have concerns about texture, uneven tone, or areas that need additional coverage, we can discuss those during your trial and adjust the application accordingly.

What to Expect From Your Bridal Makeup Artist

highlighter placement tips for camera-ready bridal skin

Because I am a fully mobile artist, I come to you. I arrive with a complete professional kit, including studio-quality lighting and seating, so I do not have to rely entirely on the room’s natural light. This setup lets me assess your skin clearly and place every product with care.

You also avoid a salon commute, your getting-ready party can stay together, and your timeline can follow the schedule you have planned. Setup typically takes about 15 to 20 minutes before we begin.

For a closer look at the available services, visit my bridal hair and makeup services page.

After your makeup is complete, I use setting techniques intended to help your look wear well throughout the day. Every bride also receives a complimentary touch-up kit with lipstick, powder, and blotting sheets, so a quick refresh is simple when needed.

The goal is to give you a look that photographs beautifully while still feeling comfortable and natural in person. I consider the details together, from your skin preparation and highlighter placement to the light at your venue and your photographer’s plans.

Plan Your Bridal Makeup Today

Your wedding makeup should look beautiful both in person and in photographs. Brittany can discuss your preferred finish, skin concerns, venue, and photography plans to help you plan a look that suits your style.

A bridal trial gives you an opportunity to test your makeup and make adjustments before the wedding day. If you’re traveling to Orange County or San Diego, read this guide to booking a bridal trial as an out-of-town bride. You can also learn how to explain your vision to your makeup artist during a trial to help communicate your preferences.

Browse Brittany’s bridal makeup portfolio for inspiration or learn more about her background and training. Spring and fall weekends in Orange County can book quickly, so reach out once your venue is confirmed. Contact Brittany Brown Beauty to discuss your wedding plans and availability.

Frequently Asked Questions

1. How should I prepare my skin for camera-ready bridal makeup?

Start a consistent skincare routine at least four weeks before your wedding. Stay hydrated, especially during the final week. Avoid trying new skincare products or treatments in the last 10 days. On your wedding morning, I begin with skincare and primer. These steps help create a smooth base for your makeup.

2. How long will my bridal highlighter last through the ceremony and reception?

Wear time depends on your skin, the weather, and your activity level. I cannot promise a set number of hours. Instead, I use suitable skin preparation, product choices, and finishing techniques to help your glow last. Every bride also receives a complimentary touch-up kit. It includes lipstick, powder, and blotting sheets for quick refreshes throughout the day.

3. Can highlighter placement be adjusted for my skin tone and type?

Absolutely. I adjust the placement, amount, and finish to suit each bride. Your features, complexion, skin type, and preferences all guide my approach. Rather than using one fixed look, I tailor the glow to you. During your bridal trial, we can test products and refine the placement before your wedding day.

4. Should I wear highlighter if I have oily skin?

Yes, you can still enjoy a beautiful glow with oily skin. The key is choosing the right products and placement. I focus on high points, such as the cheekbones, where light naturally falls. Areas prone to excess shine receive a lighter touch. Your trial helps us assess the finish on your skin and in photographs.

5. What should I bring to my bridal makeup trial to plan my highlighter placement?

Bring photos of your dress and inspiration images showing your preferred glow. Details about your photographer and venue can also help. Please mention any skin sensitivities, past reactions, or recent treatments. These details help me plan the placement around your features and neckline. I can also consider how your makeup may appear in photographs and match your preferred finish.

Posted on

Flower Crowns vs. Veils: Choosing Your Bridal Hair Accessory

flower crowns vs veils

Few wedding-day decisions feel as personal as the one on top of your head. A flower crown feels soft and romantic. A veil feels classic and timeless. Both can look beautiful, and the right choice depends on your dress, your venue, and the way you want to feel when you walk down the aisle.

As a mobile bridal hair and makeup artist based in Orange County, I help brides make this choice every season. At Brittany Brown Beauty, I believe a great hairstyle is more than a hairstyle. It expresses your personality and style, and the accessory you pick is a big part of that.

This guide compares flower crowns and veils so you can decide with confidence. It also explains how each option works with Southern California coastal conditions such as humidity, sea air, and wind.

What a Flower Crown Offers

A flower crown brings softness, color, and a relaxed mood to your look. It suits brides who want their hair to feel natural and a little whimsical. It also pairs well with outdoor settings, such as gardens, bluff-top ceremonies, and backyard estates, where greenery and open air already set the scene.

Here is what a flower crown does well:

  • It adds personality: You can echo your bouquet, color palette, or wedding season in a single accessory.
  • It frames your face: A crown draws attention upward and gives your portraits a soft, romantic border.
  • It works with many hairstyles: You can pair one with loose waves, a half-up style, a braid, or a low updo. If you like the half-up idea, see these half-up, half-down bridal hairstyles.
  • It feels relaxed: Brides who want a laid-back, effortless look often love how a crown complements their overall style.

A flower crown also asks you to consider a few practical details. Fresh flowers respond to heat, sun, and moisture, so talk with your florist about which blooms hold their shape in warm weather.

Artificial or dried options give you another choice, and many brides prefer them for their appearance and practicality. Whichever you choose, bring the crown or a clear photo of it to your bridal trial. Your crown affects how I build your hairstyle, so I like to plan around it from the start.

Weight and size matter, too. A larger crown needs a hairstyle that supports it, while a delicate crown can sit comfortably in many styles. For more inspiration, browse these braided bridal hairstyles for boho and classic weddings.

Your natural hair texture also influences how a crown sits and how the hairstyle is shaped around it. If you have curls or textured hair, my guide to styling curly and textured hair for your wedding day offers ideas for working with your natural texture rather than fighting against it.

When I know what you plan to wear, I can shape your hair to complement the accessory instead of trying to fit everything together on the morning of your wedding.

What a Veil Offers

A veil brings a sense of ceremony. It marks the moment clearly and gives your photographs movement and drama. For many brides, putting on the veil is the moment the wedding starts to feel real.

Here is what a veil does well:

  • It feels classic: A veil carries a timeless look that suits traditional, formal, and modern weddings alike.
  • It adds movement: A veil catches light and air, creating beautiful moments in photographs, especially during your walk down the aisle and your portraits.
  • It comes in many lengths and styles: From short and delicate to long and cathedral length, you can choose an option that suits your dress and venue.
  • It can come off: Many brides remove their veil after the ceremony and formal photographs, giving them more freedom to move around and dance at the reception.

A veil also deserves a plan for wind. Coastal Orange County weddings often include breezes off the water, and a long veil can move more than you expect. That movement looks lovely in photographs, but it also means placement matters. Where the veil attaches to your hairstyle affects how it sits, how it moves, and how comfortable it feels.

My veil placement guide for every bridal hairstyle walks through the options. I plan your hairstyle so the veil has a secure place to sit, and I like to see the veil itself before your wedding day.

Your choice of hairstyle matters just as much. An updo can provide a stable base for a veil, while wearing your hair down creates a softer look that may need a different attachment approach. My guide to updo vs. down hairstyles for windy coastal venues can help you compare the options and decide which suits your venue and preferred style.

Your dress matters here as well. A detailed back or an elaborate neckline may call for a simpler veil, while a clean, minimal gown gives a more dramatic veil room to shine. Bring a photo of your dress to your trial so we can consider the full look together.

Head-to-Head: Formality, Photos, and Practicality

fashion island area weddings

Both accessories can look stunning, so the real question is which one fits your wedding and feels most like you. Here is how I compare them with my brides.

Formality: A veil usually reads as more traditional and formal. A flower crown usually feels more romantic and relaxed. If your wedding is a black-tie evening at an oceanfront resort, a veil may feel like a natural fit. If you are planning a garden ceremony with a soft, organic mood, a crown may suit you better. Neither choice is wrong, and some brides combine styles in ways that work beautifully.

Photos: A flower crown frames your face and looks lovely in close portraits. A veil creates movement and a sense of occasion, adding drama to wider shots and aisle photographs. Talk with your photographer about the images you want most, since that can help guide your decision. If you love the idea of dramatic movement shots, a veil gives your photographer plenty to work with. If you picture soft, close portraits, a crown can be an equally beautiful choice.

Practicality: A veil can come off when you are ready to celebrate. A flower crown typically stays on for much of the day, so comfort matters.

Wear your preferred accessory for a while during your trial, if possible, to see how it feels after more than a few minutes. Think about hugs, dancing, and car rides, too, since these can affect how an accessory sits and feels.

Coastal conditions: Humidity, sea air, and wind can affect both hair and accessories. Fresh blooms respond to heat and moisture, while a long veil responds to wind.I consider these conditions when choosing a hairstyle that provides a secure foundation for your accessory. Weather and activity can affect how long a style holds, so I cannot guarantee it will remain exactly the same for a set number of hours. Careful planning helps your hair and accessories work together as beautifully as possible.

Your personal style: At the end of the day, you should feel like yourself, but elevated. If you picture yourself in a crown and feel excited, pay attention to that reaction. If you imagine walking down the aisle in a veil and it feels right, that matters, too. Your accessory should complement your personality rather than make you feel like someone else.

Can You Wear Both?

Yes, and many brides do. Wearing both takes a little planning, but it can look beautiful when you build the look with care.

One popular approach is to wear a veil for the ceremony and formal photos, then remove it and add a flower crown for the reception. That gives you two distinct looks in one day. Another approach is to place a small floral piece or a few flowers in an updo and attach a veil beneath it. This creates a softer floral detail alongside the traditional veil.

A few things help when you combine accessories:

  • Keep one as the star: When both a crown and a veil are large or detailed, they can compete. Let one lead and the other support it.
  • Plan the placement: The veil needs a secure attachment point, and the crown or floral pieces need room, too. A well-planned hairstyle helps both accessories sit comfortably.
  • Think about removal: If you plan to take the veil off after the ceremony, your hairstyle should still look finished without it.
  • Test the full look: Bring both accessories to your trial so we can try them together and make adjustments.

Hair length can also affect how you create your preferred look. If you want fuller waves, a longer braid, or more volume beneath a crown, extensions may be worth discussing. My guide to hair extensions for brides: when and how to use them explains some of the considerations before deciding whether extensions are right for you.

The flow of your wedding morning matters as well. As a fully mobile artist, I come to the place where you are getting ready, whether that is a private home, a hotel suite, or another location that works for your day. I arrive with a complete professional kit, including studio-quality lighting and seating, and setup usually takes about 15 to 20 minutes. Because I come to you, you avoid a salon commute, your getting-ready party can stay together, and your morning can follow the schedule you have planned.

I also offer coordinated hair styling and makeup services for bridesmaids and mothers of the bride and groom, helping your group achieve a cohesive look. You can explore my bridal hair and makeup services to learn more about the options available for your wedding party.

For larger bridal parties, I can bring additional artists to help everyone get ready on schedule while allowing sufficient time for the bride’s application.

Why a Bridal Hair and Makeup Trial Matters

flower crowns vs veils

I strongly recommend a bridal trial. It gives us time to test your look, work through adjustments, and make sure you walk into your wedding day knowing what to expect.

A trial is also the best time to try your crown or veil with your chosen hairstyle. We can check how the accessory sits, whether it feels comfortable, and how the hairstyle looks with and without it. If you plan to change accessories between the ceremony and reception, we can discuss how to make that transition work with your chosen style.

Communication is important here. Save inspiration photos that show the hairstyle, accessory placement, and overall finish you like. It also helps to explain what you want to avoid, whether that means too much volume, a hairstyle that feels overly structured, or loose pieces around your face.

For more guidance, read my article on how to explain your vision to your makeup artist during a trial. Although the guide focuses on communicating your makeup preferences, the same preparation can help you explain your overall bridal beauty vision.

Your hair’s condition and shape are worth discussing during this appointment, too. If you are considering a trim before the wedding, my guide to how often you should get a haircut or trim before your wedding can help you plan ahead without leaving a major hair change until the last minute.

You can also browse my portfolio to see examples of the soft, natural bridal styles I love to create, and learn more about my background, including my 11+ years of experience in the beauty industry.

Spring and fall weekends in Orange County book out well in advance, so I encourage you to reach out as soon as your venue is confirmed. Your date is secured with a signed contract and a deposit.

Plan Your Bridal Hair Today

Choosing between a flower crown and a veil depends on your hairstyle, dress, and overall wedding style. Brittany can discuss your preferences, hair length and texture, and accessory placement to help you find a look that brings everything together.

With more than 11 years of experience in the beauty industry, Brittany takes a personalized approach to bridal hair and makeup, focusing on enhancing your natural features while reflecting your style. A bridal trial can also help you see how your chosen accessories work with your hairstyle before the wedding day.

Contact Brittany Brown Beauty to discuss your wedding date, venue, getting-ready location, and preferred style.

Frequently Asked Questions

1. How much time should I allow for my bridal hairstyle and accessories?

Timing depends on your hairstyle, hair type, accessories, and wedding party size. I plan everything with you in advance. Setup typically takes 15 to 20 minutes after I arrive. I usually allow 60 to 90 minutes for the bride and 45 to 60 minutes per bridesmaid. The exact timing depends on the services needed. A crown or veil can also affect your hairstyle. We account for these details during your trial and wedding-morning planning.

2. Will flower crowns and veils hold up in Southern California humidity?

Coastal humidity, sea air, and wind can affect your hair and accessories. I plan your hairstyle around the conditions at your venue. Fresh flowers can react to heat and moisture. Ask your florist about blooms suited to your wedding conditions. Artificial or dried flowers are other options. Wind can also move a veil, so secure placement matters. I design your hairstyle to support your accessory, but no style can be guaranteed to stay exactly the same for a set number of hours.

3. What other accessories pair well with flower crowns and veils?

A flower crown pairs beautifully with simple earrings and a clean neckline. This keeps the focus on the crown and your face. A veil works well with delicate earrings, a hairpin, or a decorative comb. The best choice depends on your hairstyle. If you want both a crown and a veil, let one take the lead. Keep the other relatively simple. Bring your planned accessories to your trial so we can test the complete look together.

4. Which is better for a beach or coastal wedding, a flower crown or a veil?

Both can suit a coastal wedding. A flower crown creates a relaxed, romantic look. A veil adds movement and a sense of occasion. Wind is an important factor when choosing a veil. Heat and moisture can also affect fresh flowers. Consider your personal style, hairstyle, and venue conditions before deciding. We can test your chosen accessory with your hairstyle during your trial.

5. Should I bring my accessory to my bridal trial?

Yes, bring your veil or flower crown if you already have one. If you have not purchased it yet, bring photos of the styles you are considering. A photo of your dress can also help. During your trial, I can assess the accessory’s placement and adjust your hairstyle as needed. This helps you see how the complete look will come together on your wedding day.

Posted on

Bridal Makeup for Morning Ceremonies vs. Evening Receptions

bridal makeup for morning ceremonies vs evening receptions

Bridal makeup for morning ceremonies vs. evening receptions deserves a plan that follows the light through your whole day. A look that glows in soft morning sun can read differently under warm ballroom lighting hours later.

At Brittany Brown Beauty, Brittany Brown draws on more than 11 years in the makeup industry and her “enhance, don’t mask” approach. Whatever time your day begins and ends, the goal stays the same: you look like yourself, but elevated. For brides planning a Newport Beach wedding, Brittany also offers bridal makeup services in Newport Beach.

This comparison shows what can change from morning to night and how to plan for both.

How Light Changes From Morning to Night

bridal beauty for corona del mar flower streets

Morning light can be soft and even. Midday sun can be strong and direct, especially at outdoor Southern California venues. By evening, light can shift to golden-hour warmth, then to indoor or candlelit settings that are warmer and lower.

Each stage can affect how makeup appears. Direct sunlight can emphasize shine, while warm evening lighting can change how colors look. Brittany builds each bridal look around your skin, your dress, and your venue instead of a fixed package look, so your timeline becomes part of the plan.

  • Know your ceremony time: Morning, midday, and sunset ceremonies each call for a slightly different plan.
  • Know where you will be photographed: Outdoor, indoor, and waterfront spaces change how makeup reads.
  • Know how long your day runs: Your makeup needs to work from the first photo to the last dance.
  • Consider your color palette: Your flowers, dress, and wedding colors all appear in photos, so share them with Brittany. Her guide to matching bridal makeup to your bouquet and color palette can help you think through the overall look.

Morning Ceremony Makeup Considerations

A morning ceremony often means makeup is applied early and photographed in natural light.

  • Keep the base balanced: Thin, even layers can look natural in daylight. Brittany’s no-makeup-makeup style centers on glowing skin and warm, bronzed contour instead of heavy coverage.
  • Choose soft definition: Gentle shadows and subtle highlights add dimension without looking overdone.
  • Plan for the sun: If your ceremony moves outdoors as the day warms, share that with Brittany so she can plan for the conditions.
  • Prep for sea air: Brittany uses professional products suited to coastal Southern California conditions, including heat, humidity, and sea air, and to your skin type.
  • Start the morning unhurried: Skincare, primer, and base preparation come first and are done without rushing.
  • Check your foundation shade: Your foundation should suit your skin and look consistent in natural light and photographs. These tips for choosing the right foundation shade for your wedding day can help you understand what to consider.

If you are planning an outdoor ceremony, weather should be part of your makeup discussion. Heat and humidity can affect how products wear, so these outdoor wedding makeup tips for heat and humidity offer additional ideas for preparing your look.

Evening Reception Adjustments

By the evening, you may be several hours into your day, and the lighting around you can change. Sharing your reception setting and timeline helps Brittany plan the look for the whole day.

  • Share your reception details: Tell Brittany where the reception will be and how long your day runs.
  • Plan for a refresh: Keep your touch-up kit close for a quick refresh during the evening.
  • Think about formality: Share how formal your reception will be so you can talk through how much definition feels right.
  • Talk through the lighting: Ask Brittany how your evening setting may affect the look.
  • Choose a finish that suits you: Some brides prefer a dewy complexion, while others prefer a matte finish. Comparing dewy and matte bridal makeup can help you decide what suits your skin and the overall style of your wedding.

Brides receive a complimentary touch-up kit with lipstick, powder, and blotting sheets, so a quick refresh is easier. A bridesmaid or your planner can hold it during portraits and the reception.

Should You Change Your Look Midday?

bridal makeup for morning ceremonies vs evening receptions

Whether you change your look is a personal choice. A well-planned look can carry from the ceremony to the reception, and a simple refresh may be all you need.

  • Refresh instead of redoing your makeup: The touch-up kit provides lipstick, powder, and blotting sheets for a quick refresh.
  • Ask about a second look: If you are curious about changing your makeup for the evening, ask Brittany whether it is practical for your timeline.
  • Plan early: Raise any idea for a second look when you book so you can talk through the schedule.
  • Test the plan at your trial: Brittany strongly recommends a bridal trial. She tests the look and product formulas directly on your skin, works through adjustments, and helps you understand what to expect on your wedding day.
  • Keep it feeling like you: Brides have described Brittany’s work as natural and “you but elevated.”

Your venue also matters. A waterfront reception or outdoor portrait session may expose you to wind, while an indoor evening reception may have very different conditions. These tips for bridal makeup at windy coastal ceremonies can help you discuss weather-related considerations with Brittany.

Careful prep, professional products suited to Southern California conditions, and final setting techniques can help your makeup wear well through the ceremony, photography, and reception, although no one can promise exactly how any look will perform after a full day. Tell Brittany about any skin sensitivities, reactions, or recent treatments at your trial.

Start a consistent skincare routine at least four weeks before the wedding, skip new skincare products or treatments in the final 10 days, and stay hydrated in the week leading up to the event, especially in summer. If you have concerns about redness, discoloration, or uneven skin tone, you can also discuss whether corrective makeup techniques are appropriate for your needs.

Because Brittany is fully mobile, she comes to your home, hotel suite, resort room, or estate with a complete professional kit, including studio-quality lighting and seating. Setup takes about 15 to 20 minutes. You skip the salon commute, and your getting-ready party stays together. Her general guidance is roughly 60 to 90 minutes for the bride and 45 to 60 minutes per bridesmaid. For larger bridal parties, she brings additional artists so everyone finishes on schedule without cutting corners on the bride’s application.

Brittany offers bridal hair and makeup services and trained at Empire Academy of Makeup in Orange County. You can see examples of her bridal work in the portfolio and read more about her background on the About page.

Plan Your Wedding-Day Makeup

Your wedding makeup should complement your features, suit the ceremony lighting, and transition well into the reception. Brittany can discuss your skin, preferred finish, dress, venue, and wedding-day schedule to help you plan your look. If you have concerns about mature skin or makeup settling into fine lines, explore this guide to bridal makeup for mature skin for additional tips.

Spring and fall wedding dates in Orange County can book quickly, so reach out once your venue is confirmed. A signed contract and deposit secure your date. Schedule a free consultation to discuss your wedding-day makeup and availability.

Frequently Asked Questions

1. What’s the best way to prep my skin for morning and evening bridal makeup?

Start a consistent skincare routine at least four weeks before your wedding. Avoid new skincare products or treatments during the final 10 days. Stay hydrated during the week leading up to the event, especially in summer. At your trial, tell Brittany about any skin sensitivities, reactions, or recent treatments. Share your ceremony and reception times so she can plan your look around the day’s schedule.

2. How long will bridal makeup last from the morning ceremony through the evening reception?

Wear time depends on your skin, the weather, and the length of your wedding day. Exact results cannot be guaranteed. However, careful preparation, professional products suited to the conditions, and proper setting techniques can help your makeup wear well through the ceremony, photography, and reception. A trial lets you test the approach on your own skin. A touch-up kit also helps you refresh your look throughout the day.

3. Should my bridal makeup be different for a morning ceremony and an evening reception?

Not necessarily. Your makeup can remain consistent throughout the day, with small adjustments or touch-ups as needed. The best approach depends on your personal style, the lighting at each venue, and the weather. Your artist can also consider how long you’ll be wearing the makeup when planning the look.

4. Is a dewy or matte finish better for a wedding that runs from day to night?

Neither finish is automatically better for every bride. Your skin type, preferred look, venue, lighting, and weather all influence the choice. Discuss your preferences during the trial. This gives you a chance to see how your complexion looks under different lighting conditions before the wedding.

5. Should I book a second makeup application for the evening reception?

A second application is a personal choice, not a requirement. Many brides keep their original look and refresh their makeup as needed. Others prefer a more defined style for the evening reception. Discuss the timing, budget, and available options with your artist before the wedding. This helps you create a plan that fits your schedule.

Posted on

Red Lip Bridal Makeup: Is It Right for Your Wedding?

red lip bridal makeup

Red lip bridal makeup is a classic choice that can look striking in person and in photos. It is also a bold decision, so it helps to think it through before the wedding day.

At Brittany Brown Beauty, Brittany Brown draws on more than 11 years in the makeup industry and her “enhance, don’t mask” approach. Whether you choose red or something softer, the goal stays the same: you look like yourself, but elevated.

This guide covers what to consider so you can decide with confidence.

Why Red Lips Are Making a Bridal Comeback

A red lip gives a bridal look a clear focal point. It can pair with simple skin and eye makeup, and for brides who already love color, it can be a way to express personal style.

Brittany sees makeup as an art form and a way to express individual style, so a statement lip can be a beautiful choice. When the skin looks fresh and the eyes stay soft, the lip becomes the feature that stands out. Her signature no-makeup-makeup look is built on glowing skin and warm, bronzed contour instead of heavy coverage.

Brittany builds each bridal look around your skin, your dress, and your venue instead of a fixed package look. A red lip becomes one more detail in that plan. You can explore her bridal makeup and hair services to learn more about the options available for your wedding.

What to Consider Before Choosing Red

red lip bridal makeup

Three areas shape whether red feels right for you. Brittany strongly recommends a bridal trial. She tests the look and product formulas directly on your skin, works through adjustments, and helps you understand what to expect on your wedding day. A trial is a good place to talk through red shades and see how the look feels.

Skin Tone and Undertone Matching

Red comes in many shades, and the best one depends on your skin and how you want the look to feel. Understanding how to match bridal makeup to your skin undertone can help you compare shades and identify colors to try.

  • Talk through more than one shade: A color that looks right in the tube can look different on your lips.
  • Share what you love: Reference photos of red lips you like give Brittany a clear starting point.
  • Check the look in different lighting: Natural light and indoor light can show color differently.
  • Plan the shade with Brittany: She builds the look around your features, so the plan is chosen for you.
  • Share your skin details: Tell Brittany about any skin sensitivities, reactions, or recent treatments so she can plan around them.
  • Check your foundation too: A balanced complexion helps the lip color work with the rest of your look. These tips for choosing the right foundation shade for your wedding day can help you consider how your base will appear in person and in photos.

Balancing the Rest of the Face

A red lip works best when the rest of the face supports it instead of competing with it.

  • Keep the skin glowing and light: Thin, even layers let your natural skin show through.
  • Keep the eyes soft: Soft shadows and subtle highlights add definition without pulling attention from the lip.
  • Think about your dress: Your neckline and fabric color shape how a red lip reads, so bring photos of your gown. You can also explore ideas for bridal makeup that complements different wedding dresses.
  • Consider your flowers and palette: Your bouquet and wedding colors appear in the same photos, so share them with Brittany.
  • Think about your hair: Brittany offers hair styling as part of her bridal services, so talk through your hair plan with her.
  • Consider your overall coloring: Your hair color and preferred style can also influence how bold lipstick looks. For inspiration, see these bridal makeup ideas for brunettes in Orange County.

Your skin finish matters, too. Some brides prefer a dewy complexion, while others feel more comfortable with a matte finish. Comparing dewy versus matte bridal makeup can help you decide what works best for your skin and the rest of your look.

Longevity Through Eating, Drinking, and Kissing

A wedding day includes toasts, dinner, and plenty of kisses, so it helps to have a plan for your lip color.

  • Start with careful prep: Brittany begins with unrushed skincare and base preparation and uses professional products suited to Southern California conditions and your skin type.
  • Finish with setting techniques: Final setting techniques help the look wear through the ceremony, photography, and reception, though no one can promise exactly how any lip color will perform after a full day.
  • Keep your touch-up kit close: Brides receive a complimentary touch-up kit with lipstick, powder, and blotting sheets, so a quick refresh is easier.
  • Pass the kit to a helper: A bridesmaid or your planner can hold it during portraits and the reception.
  • Plan refreshes around big moments: Decide in advance when you may want a quick refresh, such as after dinner.

Weather can affect makeup wear, too. If you are having a summer wedding, these tips for bridal makeup at humid summer weddings in Orange County offer additional considerations when planning your look.

Alternatives if Red Feels Like Too Much

red lip bridal makeup

If you love the idea of red but feel unsure, you have options.

  • Ask about a softer red: Talk through how much intensity feels right for you.
  • Ask about other lip colors: A rosy, berry, or soft pink tone can add color while feeling gentler.
  • Consider a nude lip: A softer shade keeps the focus on glowing skin and defined eyes.
  • Talk through your whole look: Brittany can plan the lip together with your skin, eyes, dress, and overall wedding style.
  • Discuss options at your trial: Talking through choices makes the decision easier.

Brides have described Brittany’s work as natural and “you but elevated,” which is a helpful guide whether you pick red or something softer.

Prepare your skin on schedule, too. Start a consistent skincare routine at least four weeks before the wedding, skip new skincare products or treatments in the final 10 days, and stay hydrated in the week leading up to the event, especially in summer. If you have specific concerns about fine lines, dryness, or how makeup settles on your skin, discuss them during your trial. Brittany also shares guidance on bridal makeup for mature skin.

Because Brittany is fully mobile, she comes to your home, hotel suite, resort room, or estate with a complete professional kit, including studio-quality lighting and seating. Setup takes about 15 to 20 minutes. You skip the salon commute, and your getting-ready party stays together.

Her general guidance is roughly 60 to 90 minutes for the bride and 45 to 60 minutes per bridesmaid. For larger bridal parties, she brings additional artists so everyone finishes on schedule without cutting corners on the bride’s application.

Brittany trained at Empire Academy of Makeup in Orange County. You can see examples of her bridal work in the portfolio and read more about her background on the About page.

Plan Your Red Lip Bridal Look

Choosing a red lip for your wedding comes down to finding a shade that complements your complexion, dress, and overall bridal style. Brittany can discuss your makeup preferences and wedding plans to help you explore the right look. If you’re comparing artists, review these questions to ask before hiring a bridal makeup artist to prepare for your consultation.

Spring and fall wedding dates in Orange County can book quickly, so reach out once your venue is confirmed. A signed contract and deposit secure your date. Schedule a free consultation to discuss your bridal makeup and availability.

Frequently Asked Questions

1. What’s the best way to prep my skin for red lip bridal makeup?

Start a consistent skincare routine at least four weeks before your wedding. Avoid new skincare products or treatments during the final 10 days. Stay hydrated during the week leading up to the event, especially in summer. At your trial, tell Brittany about any skin sensitivities, reactions, or recent treatments. This helps her plan your makeup accordingly.

2. How long will red lip bridal makeup last through the ceremony and reception?

Wear time depends on your skin, the weather, and how much you eat, drink, and kiss. Exact results cannot be guaranteed. Careful preparation, professional products suited to the conditions, and proper setting techniques can help your look last through the ceremony, photography, and reception. A trial lets you test the approach on your own skin. Brittany also provides a complimentary touch-up kit with lipstick for quick refreshes.

3. Can red lip bridal makeup be adjusted for my skin tone or type?

Yes. Brittany builds each look around your skin, dress, and venue. She also adjusts her techniques for different ages and skin types, including mature skin. Some formulas can settle into fine lines or create a heavy finish. Your trial is a good time to compare red shades and choose a look that feels like you.

4. Does red lipstick work with a natural bridal makeup look?

Yes. Red lipstick can be the main statement in an otherwise natural look. Soft eye makeup and a balanced complexion help keep the overall result polished. Choosing a shade you feel comfortable wearing also helps. This approach lets your lips stand out without making every feature compete for attention.

5. What should I bring to a bridal makeup trial if I am considering a red lip?

Bring reference photos of red lipstick shades and makeup looks you like. Photos of your dress and wedding color palette are also helpful. Tell Brittany about your usual makeup preferences and any skin sensitivities. Trying different shades during your trial lets you see how they look in various lighting conditions. You can then decide between a bold red and a softer alternative.