Posted on

Bridal Makeup for Acne Scarring and Uneven Texture

Some brides worry about how acne scarring and uneven skin texture will look on their wedding day, especially in close-up photographs. That concern is understandable, but it does not have to take over your planning. With more than 11 years of hands-on bridal experience in Orange County, I have worked with many skin types and complexion concerns, and I approach each look with technique rather than heavy coverage.

At Brittany Brown Beauty, I believe in enhancing your natural beauty rather than masking it, so you look like yourself, but elevated.

This guide explains how makeup techniques can soften the appearance of discoloration and uneven texture while creating a natural-looking finish. It focuses on appearance and comfort rather than treating skin conditions. If you have questions about your skin or are considering a treatment, consult your doctor or a qualified skincare professional.

Why Texture Changes How Foundation Should Be Applied

Acne scarring and uneven texture can affect how light moves across your face. Raised or indented areas may catch light or create small shadows, while foundation can settle into certain areas and make them more noticeable. Applying more coverage everywhere does not necessarily solve the problem.

I take a different approach. Instead of covering your entire face with thick layers of product, I build coverage gradually and place it where it helps most. Corrective beauty makeup is a technique I particularly enjoy because small, targeted adjustments can make a meaningful difference to the overall finish.

The goal is skin that still looks like skin, only more even and polished. This is the no-makeup-makeup approach at work.

Here is what I keep in mind:

  • Avoid unnecessary layers: Heavy coverage can emphasize texture rather than soften its appearance.
  • Be selective with shimmer: Strong shimmer and glitter can draw attention to uneven areas under certain lighting conditions.
  • Build coverage gradually: Thin, deliberate layers give me more control over the finish.
  • Prepare the skin carefully: The way makeup sits on the skin depends partly on the preparation underneath.
  • Adjust for each person: Every complexion is different, so I do not use one fixed approach for everyone.

I do not promise that makeup will make acne scars or uneven texture disappear. What I focus on is a carefully planned application that helps you feel confident in person and in photographs.

For more information about targeted coverage, read my guide to corrective makeup and who it is for. It explains how specific makeup techniques can help address the appearance of uneven tone and other complexion concerns without automatically applying heavy coverage everywhere.

Techniques That Help Create a More Even Finish
Schedule a Consultation

These three techniques form the core of how I approach uneven texture. Each helps me balance coverage and finish while keeping the makeup looking natural.

Priming for Smoother Application

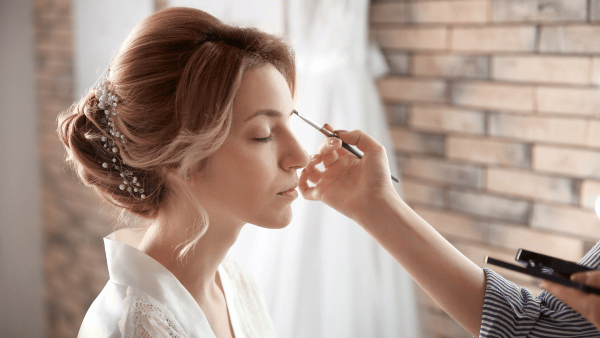
A polished base starts with preparation. On your wedding morning, I begin with skincare, primer, and base preparation, and I take that step slowly on purpose. A well-prepared surface can help foundation apply more evenly and reduce the appearance of patchiness.

You can start preparing your skin well before your wedding. My guide to the 90-day skin prep countdown before your wedding walks through a longer preparation timeline.

These basics are useful for many brides:

  • Maintain a consistent skincare routine in the weeks before your wedding.
  • Stick with products your skin already tolerates comfortably.
  • Stay hydrated, especially in the week leading up to the event.
  • Avoid introducing new skincare products or treatments during the final 10 days.
  • Avoid picking at scars or breakouts, which can irritate the skin.

I choose primers and foundations based on your skin, preferred finish, and wedding conditions, including Southern California heat, humidity, and sea air. I do not claim that any single product suits every skin type. Testing products on your skin and assessing the finish at your trial help us make more informed choices.

Color-Correcting Acne Scarring

Acne scarring can involve discoloration as well as changes in skin texture. Marks may appear red, pink, or darker than the surrounding skin, and uneven color can draw attention even when foundation is otherwise well blended.

Color correction can help neutralize the appearance of discoloration before foundation is applied.

Here is how I approach it:

  1. Assess the area: I look at where discoloration appears and how its color compares with the surrounding skin.
  2. Choose a suitable correcting shade: The appropriate color depends on the complexion and the discoloration being addressed.
  3. Apply sparingly: A small, precise application gives me more control than spreading a large amount of product across the area.
  4. Blend the edges: The corrector should blend into the surrounding skin without a visible line.
  5. Build the base gradually: Once the color looks more balanced, I use thin layers of foundation where additional coverage is helpful.

The shade and amount vary from bride to bride. I choose them based on the skin in front of me rather than following a universal formula.

If you have fair skin and want more guidance on choosing complementary shades, read my bridal makeup for fair skin: product and shade guide.

It is also important to distinguish between discoloration and physical texture. Color correction can soften the appearance of uneven color, but it cannot fill indentations or remove raised scars. My approach accounts for both concerns without promising that either will disappear completely.

Setting Without Emphasizing Texture

Setting products help makeup wear well, but excessive powder can create a dry finish or make uneven texture more noticeable. I prefer to set selectively rather than automatically covering the entire face with powder.

My approach looks like this:

  1. Focus on areas that need it: The T-zone and areas prone to creasing or excess shine may need more attention.
  2. Keep the high points soft: Cheekbones and other areas where light naturally falls can retain a gentle glow.
  3. Use a light hand: I apply only as much product as the finish requires.
  4. Finish thoughtfully: Appropriate setting techniques help support the makeup through the ceremony, photographs, and reception.

Your skin’s response to products and the conditions of your wedding day both influence the finished look. I do not promise that makeup will last for a specific number of hours, since skin, weather, and activity all play a part.

I do plan each application carefully, and every bride receives a complimentary touch-up kit containing lipstick, powder, and blotting sheets for a quick refresh when needed.

What to Discuss at Your Bridal Makeup Trial

Your trial is the best place to talk through your skin concerns and decide how much coverage feels right. I strongly recommend one because it lets me test products on your skin, make adjustments, and help you understand what to expect before the wedding day.

It also gives us an opportunity to assess the finished makeup in natural light and photographs, where uneven texture may appear different from how it looks in a mirror.

Please bring up the following:

  • Areas of your skin you would like softened and features you want to highlight.
  • Any skin sensitivities, previous reactions, or recent treatments.
  • Past experiences with makeup that felt heavy, cakey, or uncomfortable.
  • Your preferred level of coverage and finish.
  • Photos of your dress, hairstyle, and makeup looks you admire.
  • Any questions about products, techniques, or how the makeup may appear in photographs.

Honest feedback helps most. If something feels heavy or does not look like you, tell me so we can discuss adjustments. I would rather address a concern during your trial than leave you uncertain on your wedding morning.

If you are unsure how to explain the look you have in mind, my guide to what to explain to your makeup artist during a trial offers tips for communicating your preferences with reference photos and clear feedback.

You may also find my article on avoiding makeup that settles into fine lines useful. Although acne scarring and fine lines are different concerns, both illustrate why product placement, application technique, and the amount of coverage matter when creating a natural-looking finish.

After the trial, pay attention to how the makeup looks and feels. If you notice a concern, contact me so we can discuss adjustments before the wedding.

What to Expect on Your Wedding Morning
Schedule a Consultation

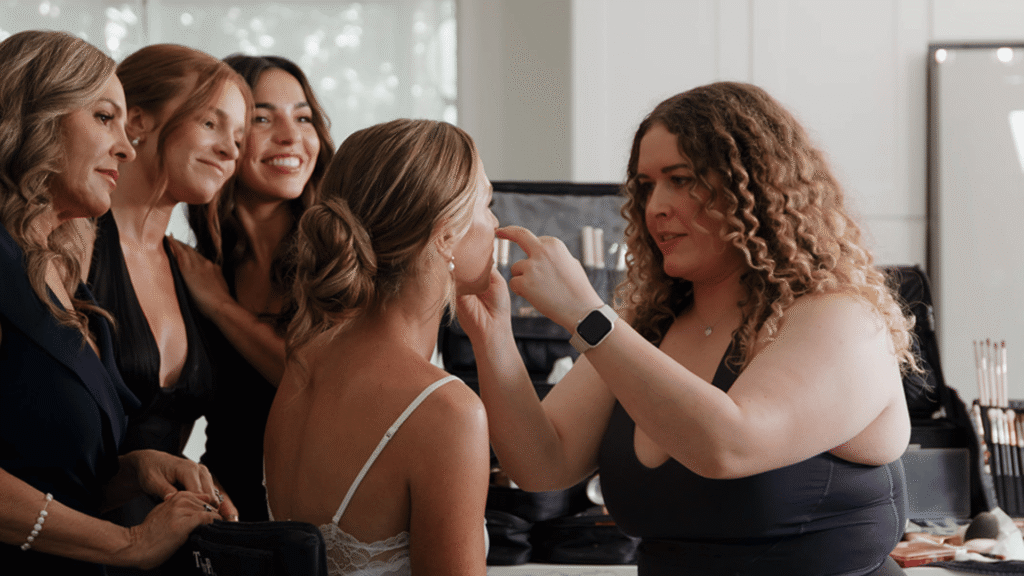
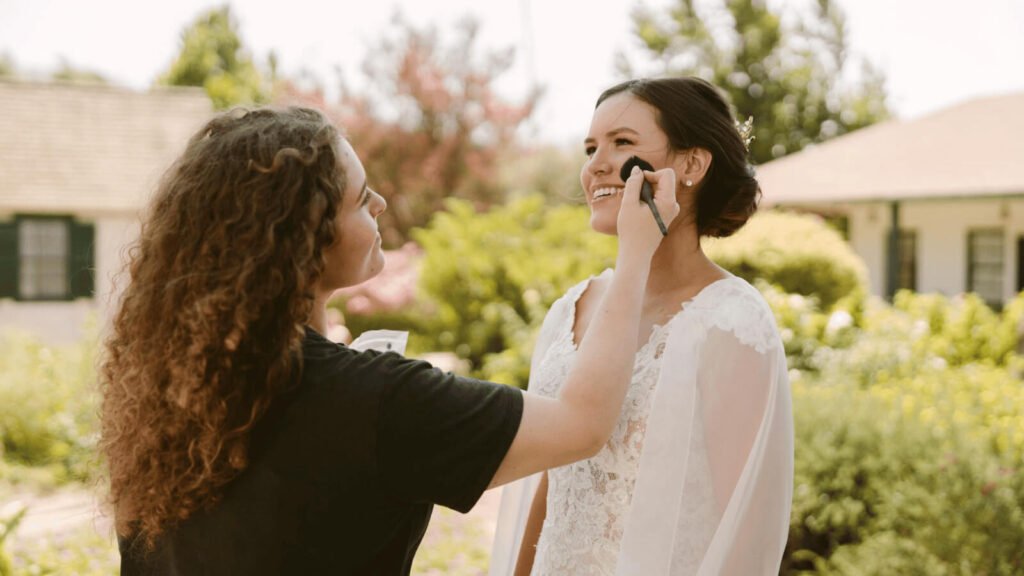
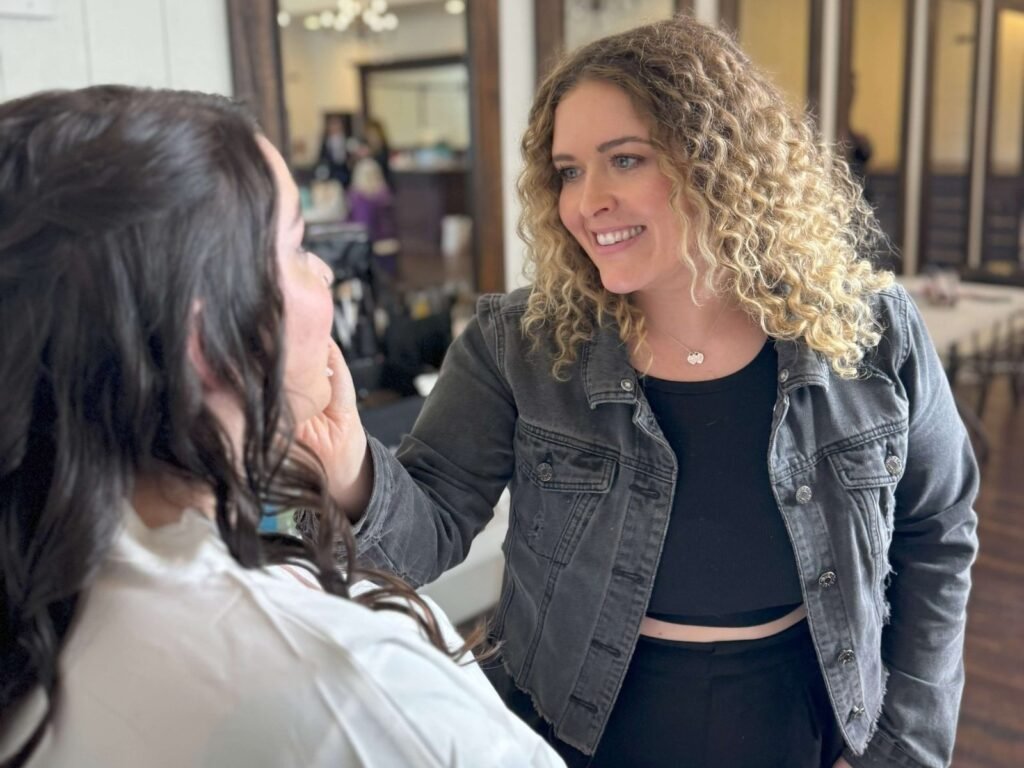
Because I am fully mobile, I come to you with a complete professional kit, including studio-quality lighting and seating. This allows me to assess your complexion clearly, even when the room’s lighting is not ideal.

You avoid the salon commute, your getting-ready party can stay together, and your morning can follow the schedule you have planned.

My process begins with skin and base preparation, followed by foundation, targeted coverage, and finishing techniques suited to your look. I adjust the application as needed rather than applying the same amount of product across every area of your face.

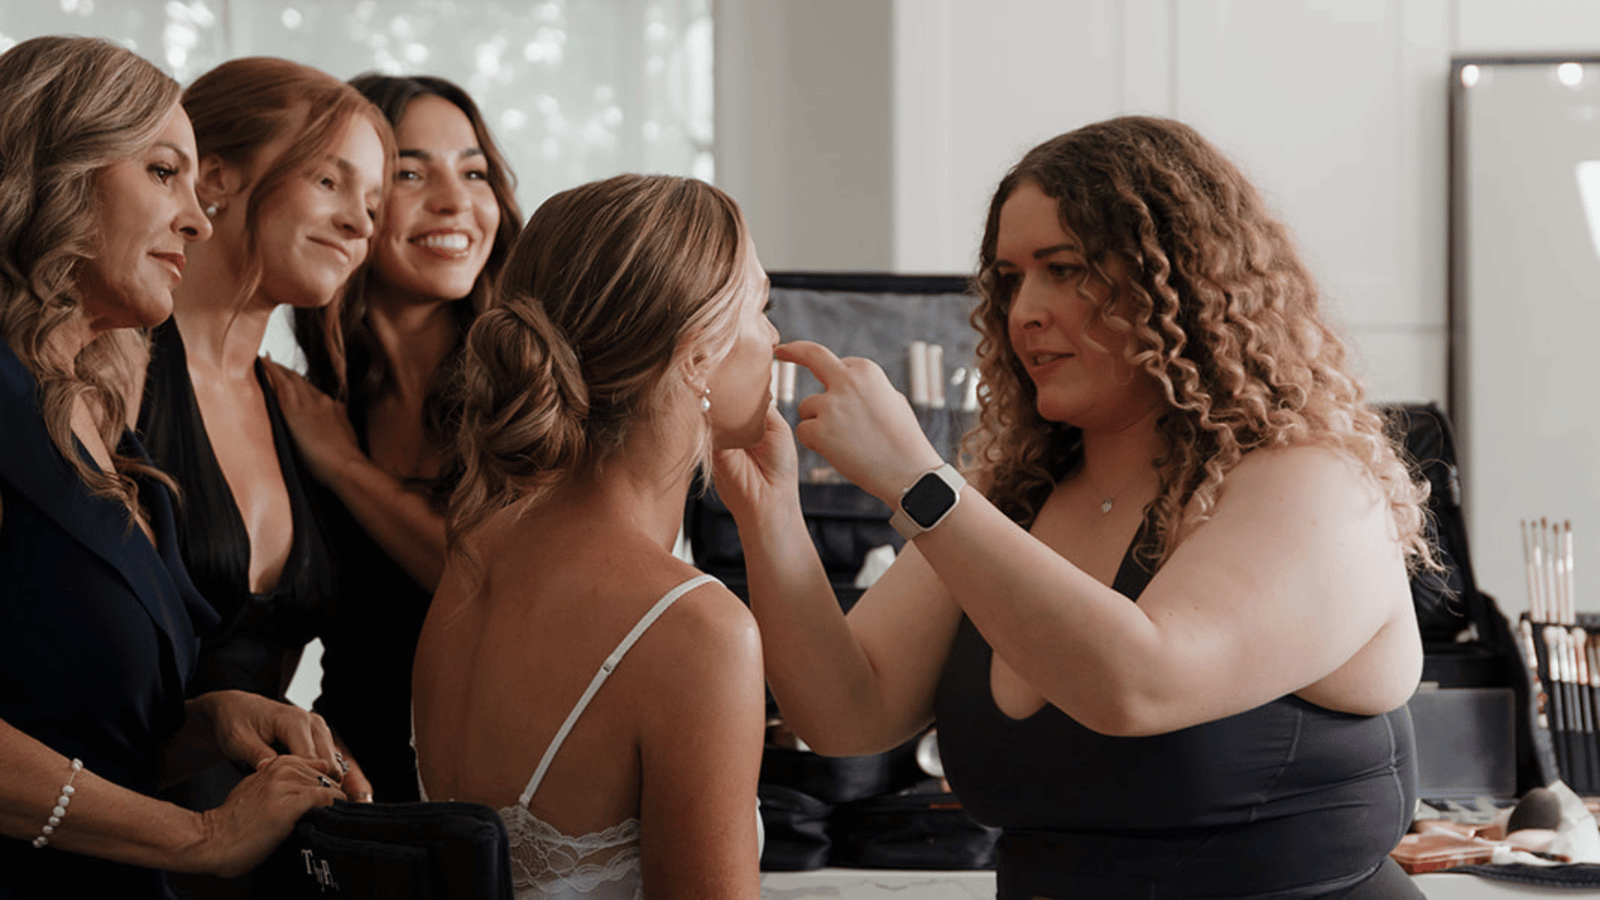
I generally plan around 60 to 90 minutes for the bride’s makeup and 45 to 60 minutes for each bridesmaid’s makeup, adjusting for the size of the group and the services required. For larger parties, I can bring additional artists so everyone is ready on schedule without cutting corners on the bride’s application.

I trained at Empire Academy of Makeup in Orange County, and my work has been featured in Voyage LA Magazine and SDVoyager. You can learn more about my background and see examples of my soft, natural style in the Brittany Brown Beauty portfolio.

Plan Your Bridal Makeup

Acne scarring and uneven texture do not mean you have to abandon the bridal makeup look you love. The goal is to find an approach that balances coverage, finish, and your personal preferences without adding unnecessary products.

During a consultation, we can discuss your skin concerns, the level of coverage you prefer, your wedding venue, and the look you want to achieve. We can also talk about whether a bridal trial would help you assess the makeup in person and in photographs before the big day.

If you are planning other wedding-day beauty services, you can explore my bridal hair and makeup services to learn more about the options available for your wedding party.

Spring and fall weekends in Orange County book out well in advance, so I encourage you to get in touch once your venue and date are confirmed. Your date is secured with a signed contract and a deposit. To discuss your wedding plans and availability, contact Brittany Brown Beauty.

Frequently Asked Questions

1. How should I prepare my skin before bridal makeup for acne scarring and uneven texture?

Maintain a consistent skincare routine in the weeks before your wedding and stick with products your skin already tolerates comfortably. Avoid introducing unfamiliar products and treatments during the final 10 days. On your wedding morning, I begin with skincare, primer, and base preparation to help create a more even-looking surface for makeup.

2. How long will bridal makeup for acne scarring and uneven texture last through the ceremony and reception?

Wear time depends on your skin, the weather, and how active your day is, so I do not promise a set number of hours. I plan carefully with appropriate preparation, product choices, and finishing techniques to support the overall look. Every bride also receives a complimentary touch-up kit with lipstick, powder, and blotting sheets for a quick refresh.

3. Can the makeup be adjusted for my skin tone and type?

Yes. I adjust the amount of coverage, correcting shades, and finishing techniques according to your complexion, skin, and preferences. I do not use one fixed look for everyone. Your bridal trial lets me assess how the makeup looks on your skin and make adjustments before the wedding day.

4. Will my acne scars show in wedding photographs?

Makeup can soften the appearance of discoloration and help create a more even-looking complexion, but it cannot guarantee that physical texture will disappear. I use targeted color correction, thin layers, and selective setting to create a natural-looking finish. Reviewing the makeup in photographs during your trial helps you understand what to expect.

5. Should I get a skin treatment before my wedding to improve texture?

That is a question for your doctor or a qualified skincare professional, since I do not provide medical advice or treatment recommendations. Avoid experimenting with unfamiliar skincare products or treatments during the final 10 days before your wedding. If you have had a recent treatment, tell me during your trial so I can plan your makeup carefully.
Posted on

Highlighter Placement Tips for Camera-Ready Bridal Skin

highlighter placement tips for camera-ready bridal skin

Glowing skin is one of the most requested looks in bridal makeup, and highlighter is a big part of how it happens. Placed well, it makes your skin look fresh, lit from within, and soft on camera. Placed poorly, it can look shiny, patchy, or distracting in photos. With more than 11 years of hands-on experience as a bridal makeup artist in Orange County, I have seen both outcomes, and the difference often comes down to where the product goes and how it is applied.

At Brittany Brown Beauty, I believe in enhancing your natural beauty rather than masking it, and highlighter is one of my favorite ways to do that.

This guide walks you through where the highlighter belongs, why placement matters in front of a camera, and how to avoid common problems that show up in photographs.

Why Highlighter Placement Matters More on Camera

Highlighters work by catching light. In person, that can look like a soft glow. In a photograph, especially with flash, bright sunlight, or a high-resolution camera, the same product can appear much stronger than it does in the mirror. A little too much product, or too much in the wrong place, can turn a glow into shine. If you want to understand why this happens, read why bridal makeup looks different in photos and how to get it right.

That is why I think about the camera from the very first conversation. Camera-ready skin means a look that holds up in the way your photographer will capture it, not only in the bathroom mirror on your wedding morning. Your day will include portraits, candid moments, and photographs in different lighting conditions, from shaded getting-ready rooms to open outdoor spaces.

The venue matters, too. Harbor-reflected light, direct sunlight, and studio lighting can affect how your skin and makeup appear. My guide to Balboa Island wedding makeup and preparing for harbor light explores how coastal light can influence a bridal look. For a more technical look at color accuracy under controlled lighting, you can also read pigment control: keeping makeup colors true under studio lighting.

Placement also shapes your face. Highlighter draws the eye to the area where it sits, so I use it to emphasize the features I want to bring forward. Used with care, it supports the no-makeup-makeup look, where your skin looks like skin, only polished. Many brides tell me they want to feel like themselves on their wedding day, and I always keep that in mind. The goal is a glow that looks like you, but elevated.

Here is a quick checklist of what good highlighter placement should achieve:

  • Look soft and blended, with no visible edges.
  • Sit on the high points of your face where light naturally falls.
  • Support your natural features instead of covering them.
  • Suit your skin, your dress, and your venue lighting.
  • Photograph as a glow, not as shine.

Where to Place Highlighter

balboa island wedding makeup

Every face is different, so I adjust placement for each bride. Still, a few areas work well for many looks. Treat the following as a guide for the conversation we will have at your bridal trial, where I can test the products and techniques directly on your skin.

Highlighter is only one part of a balanced base. If you have specific concerns such as redness, discoloration, or uneven skin tone, my guide to corrective makeup and who it is for explains how targeted techniques can help create a more even-looking complexion without applying unnecessary coverage everywhere.

Cheekbones and Brow Bone

The tops of the cheekbones are the classic spot for highlighter because this is where light naturally lands. I place it on the high point, just above where a warm, soft contour sits, and blend outward so there is no hard line. Warm, bronzed contour paired with a soft glow on the cheekbones gives your face dimension without heaviness.

The brow bone is a smaller area and deserves a lighter touch. A subtle amount just beneath the arch of the brow can open up the eye area and add polish. I use less here than many people expect because the brow bone sits close to the eye and can look shiny very quickly under bright light.

Here is what to keep in mind for both areas:

  • Apply highlighter to the high points only, not across the whole cheek.
  • Blend the edges until they disappear into the skin.
  • Use less product on the brow bone than on the cheekbones.
  • Check the look in natural light before deciding it is finished.

If your skin tends to get oily, especially across the forehead, I pay extra attention to where the glow sits. A glow on the cheekbones can look beautiful while excess shine across the forehead may be distracting in photos. I place each product with that difference in mind.

Your skin tone and undertone also influence how the finished look comes together. I consider those details when choosing complementary blush, contour, and highlight shades so the result looks balanced rather than overly warm, cool, or metallic.

Cupid’s Bow and Inner Eye Corner

These are small areas that can make a visible difference. A touch of highlighter on the cupid’s bow, the dip at the center of the upper lip, adds subtle dimension and helps define the lips in photographs. A small amount at the inner corner of the eye can brighten the eye area and make you look more rested.

Both spots need a light hand. The inner eye corner is delicate, and too much product can look stark in a close-up photograph. The cupid’s bow works best with a tiny amount that blends into the surrounding skin.

A few points to remember:

  • Use a small amount and build only if needed.
  • Use a small, precise brush or a fingertip for control.
  • Blend until the highlight looks like a natural reflection of light.
  • Skip the area entirely if it feels like too much for you. Your look should feel comfortable.

These subtle adjustments can make a difference without requiring a dramatic amount of product. I do not add them to every bride’s look. I decide based on your features, preferences, and the overall finish we build together.

Collarbone for Off-Shoulder Dresses

If your dress shows your collarbones, shoulders, or neckline, your highlighter plan may extend below your face. A soft glow on the collarbones can bring your face and skin tone together so everything looks cohesive in photographs. Without it, your face can look luminous while your neckline appears comparatively flat.

I use a light touch here, too. The skin on your neck and chest has a different texture from your face, and too much product can become noticeable quickly. I blend carefully and match the finish to what is happening on your face.

When your dress has an off-the-shoulder or open neckline, remember these points:

  • Bring a photo of your dress to your trial so we can plan your neckline and face together.
  • Match the glow on your collarbones to the finish on your face.
  • Keep the effect soft rather than glittery.
  • Consider how your necklace, veil, or hair will sit against the area.

Your bouquet and wedding color palette can also influence the overall makeup look. The goal is not to match every shade exactly, but to choose complementary tones that work with your complexion and wedding colors. For more guidance, read how to match your bridal makeup to your bouquet and color palette.

Avoiding Flashback in Photography

Flashback is the pale, white, or overly bright patch that can appear in photographs taken with flash. It can happen when certain products reflect light back toward the camera more strongly than the surrounding skin. Highlighter is one product that can contribute to an overly reflective finish, which is why I treat photography as part of the planning process from the start.

Here is how I approach it. I prepare your skin carefully, choose products and finishes suited to your skin and wedding setting, and apply highlighter with restraint. I then check the look in different kinds of light because a glow that looks perfect in one room can appear different in another.

For more guidance on light and makeup, see how wedding lighting affects your bridal makeup.

This is also where your photographer can help. If you tell me about your photographer’s style, portrait schedule, and whether flash will be part of the day, I can plan your glow around those details.

Here is a checklist to help reduce the risk of an overly reflective finish in photographs:

  • Ask your photographer whether they plan to use flash, and share the answer with me.
  • Bring inspiration photos that show the glow you love.
  • Take test photos at your trial, with and without flash, and review the results together.
  • Use less product in areas that reflect the most light.
  • Tell me about any concerns you have with shine in past photographs.

Studio lighting deserves attention, too. Different light sources can change how makeup colors appear, and a shade that looks balanced in one setting may read differently under another. My guide to pigment control and keeping makeup colors true under studio lighting covers the relationship between lighting, pigment, and the final image.

Your trial is the best way to reduce surprises. I strongly recommend one because it lets me test products on your skin, work through adjustments, and make sure you walk into your wedding day knowing what to expect.

It also gives you a chance to tell me about skin sensitivities, previous reactions, or recent treatments so I can plan around them. I do not make blanket claims about how every product will work on every skin type. Testing your actual skin and reviewing the finish under appropriate lighting help us determine what works best for you.

Prepare Your Skin Before the Wedding

Skin preparation supports everything above. I suggest starting a consistent skincare routine at least four weeks before your wedding, staying hydrated in the week before, and avoiding new skincare products or treatments during the final 10 days.

My guide on how to prep your skin 30 days before your wedding lays out the full timeline.

On the morning of your wedding, I begin with skincare, primer, and base preparation, and I take that step slowly on purpose. A prepared surface can help highlighter sit more smoothly and create a more natural-looking finish.

The products and techniques I choose depend on your skin, the makeup look you want, and the conditions you will encounter. If you have concerns about texture, uneven tone, or areas that need additional coverage, we can discuss those during your trial and adjust the application accordingly.

What to Expect From Your Bridal Makeup Artist

highlighter placement tips for camera-ready bridal skin

Because I am a fully mobile artist, I come to you. I arrive with a complete professional kit, including studio-quality lighting and seating, so I do not have to rely entirely on the room’s natural light. This setup lets me assess your skin clearly and place every product with care.

You also avoid a salon commute, your getting-ready party can stay together, and your timeline can follow the schedule you have planned. Setup typically takes about 15 to 20 minutes before we begin.

For a closer look at the available services, visit my bridal hair and makeup services page.

After your makeup is complete, I use setting techniques intended to help your look wear well throughout the day. Every bride also receives a complimentary touch-up kit with lipstick, powder, and blotting sheets, so a quick refresh is simple when needed.

The goal is to give you a look that photographs beautifully while still feeling comfortable and natural in person. I consider the details together, from your skin preparation and highlighter placement to the light at your venue and your photographer’s plans.

Plan Your Bridal Makeup Today

Your wedding makeup should look beautiful both in person and in photographs. Brittany can discuss your preferred finish, skin concerns, venue, and photography plans to help you plan a look that suits your style.

A bridal trial gives you an opportunity to test your makeup and make adjustments before the wedding day. If you’re traveling to Orange County or San Diego, read this guide to booking a bridal trial as an out-of-town bride. You can also learn how to explain your vision to your makeup artist during a trial to help communicate your preferences.

Browse Brittany’s bridal makeup portfolio for inspiration or learn more about her background and training. Spring and fall weekends in Orange County can book quickly, so reach out once your venue is confirmed. Contact Brittany Brown Beauty to discuss your wedding plans and availability.

Frequently Asked Questions

1. How should I prepare my skin for camera-ready bridal makeup?

Start a consistent skincare routine at least four weeks before your wedding. Stay hydrated, especially during the final week. Avoid trying new skincare products or treatments in the last 10 days. On your wedding morning, I begin with skincare and primer. These steps help create a smooth base for your makeup.

2. How long will my bridal highlighter last through the ceremony and reception?

Wear time depends on your skin, the weather, and your activity level. I cannot promise a set number of hours. Instead, I use suitable skin preparation, product choices, and finishing techniques to help your glow last. Every bride also receives a complimentary touch-up kit. It includes lipstick, powder, and blotting sheets for quick refreshes throughout the day.

3. Can highlighter placement be adjusted for my skin tone and type?

Absolutely. I adjust the placement, amount, and finish to suit each bride. Your features, complexion, skin type, and preferences all guide my approach. Rather than using one fixed look, I tailor the glow to you. During your bridal trial, we can test products and refine the placement before your wedding day.

4. Should I wear highlighter if I have oily skin?

Yes, you can still enjoy a beautiful glow with oily skin. The key is choosing the right products and placement. I focus on high points, such as the cheekbones, where light naturally falls. Areas prone to excess shine receive a lighter touch. Your trial helps us assess the finish on your skin and in photographs.

5. What should I bring to my bridal makeup trial to plan my highlighter placement?

Bring photos of your dress and inspiration images showing your preferred glow. Details about your photographer and venue can also help. Please mention any skin sensitivities, past reactions, or recent treatments. These details help me plan the placement around your features and neckline. I can also consider how your makeup may appear in photographs and match your preferred finish.

Posted on

Red Lip Bridal Makeup: Is It Right for Your Wedding?

red lip bridal makeup

Red lip bridal makeup is a classic choice that can look striking in person and in photos. It is also a bold decision, so it helps to think it through before the wedding day.

At Brittany Brown Beauty, Brittany Brown draws on more than 11 years in the makeup industry and her “enhance, don’t mask” approach. Whether you choose red or something softer, the goal stays the same: you look like yourself, but elevated.

This guide covers what to consider so you can decide with confidence.

Why Red Lips Are Making a Bridal Comeback

A red lip gives a bridal look a clear focal point. It can pair with simple skin and eye makeup, and for brides who already love color, it can be a way to express personal style.

Brittany sees makeup as an art form and a way to express individual style, so a statement lip can be a beautiful choice. When the skin looks fresh and the eyes stay soft, the lip becomes the feature that stands out. Her signature no-makeup-makeup look is built on glowing skin and warm, bronzed contour instead of heavy coverage.

Brittany builds each bridal look around your skin, your dress, and your venue instead of a fixed package look. A red lip becomes one more detail in that plan. You can explore her bridal makeup and hair services to learn more about the options available for your wedding.

What to Consider Before Choosing Red

red lip bridal makeup

Three areas shape whether red feels right for you. Brittany strongly recommends a bridal trial. She tests the look and product formulas directly on your skin, works through adjustments, and helps you understand what to expect on your wedding day. A trial is a good place to talk through red shades and see how the look feels.

Skin Tone and Undertone Matching

Red comes in many shades, and the best one depends on your skin and how you want the look to feel. Understanding how to match bridal makeup to your skin undertone can help you compare shades and identify colors to try.

  • Talk through more than one shade: A color that looks right in the tube can look different on your lips.
  • Share what you love: Reference photos of red lips you like give Brittany a clear starting point.
  • Check the look in different lighting: Natural light and indoor light can show color differently.
  • Plan the shade with Brittany: She builds the look around your features, so the plan is chosen for you.
  • Share your skin details: Tell Brittany about any skin sensitivities, reactions, or recent treatments so she can plan around them.
  • Check your foundation too: A balanced complexion helps the lip color work with the rest of your look. These tips for choosing the right foundation shade for your wedding day can help you consider how your base will appear in person and in photos.

Balancing the Rest of the Face

A red lip works best when the rest of the face supports it instead of competing with it.

  • Keep the skin glowing and light: Thin, even layers let your natural skin show through.
  • Keep the eyes soft: Soft shadows and subtle highlights add definition without pulling attention from the lip.
  • Think about your dress: Your neckline and fabric color shape how a red lip reads, so bring photos of your gown. You can also explore ideas for bridal makeup that complements different wedding dresses.
  • Consider your flowers and palette: Your bouquet and wedding colors appear in the same photos, so share them with Brittany.
  • Think about your hair: Brittany offers hair styling as part of her bridal services, so talk through your hair plan with her.
  • Consider your overall coloring: Your hair color and preferred style can also influence how bold lipstick looks. For inspiration, see these bridal makeup ideas for brunettes in Orange County.

Your skin finish matters, too. Some brides prefer a dewy complexion, while others feel more comfortable with a matte finish. Comparing dewy versus matte bridal makeup can help you decide what works best for your skin and the rest of your look.

Longevity Through Eating, Drinking, and Kissing

A wedding day includes toasts, dinner, and plenty of kisses, so it helps to have a plan for your lip color.

  • Start with careful prep: Brittany begins with unrushed skincare and base preparation and uses professional products suited to Southern California conditions and your skin type.
  • Finish with setting techniques: Final setting techniques help the look wear through the ceremony, photography, and reception, though no one can promise exactly how any lip color will perform after a full day.
  • Keep your touch-up kit close: Brides receive a complimentary touch-up kit with lipstick, powder, and blotting sheets, so a quick refresh is easier.
  • Pass the kit to a helper: A bridesmaid or your planner can hold it during portraits and the reception.
  • Plan refreshes around big moments: Decide in advance when you may want a quick refresh, such as after dinner.

Weather can affect makeup wear, too. If you are having a summer wedding, these tips for bridal makeup at humid summer weddings in Orange County offer additional considerations when planning your look.

Alternatives if Red Feels Like Too Much

red lip bridal makeup

If you love the idea of red but feel unsure, you have options.

  • Ask about a softer red: Talk through how much intensity feels right for you.
  • Ask about other lip colors: A rosy, berry, or soft pink tone can add color while feeling gentler.
  • Consider a nude lip: A softer shade keeps the focus on glowing skin and defined eyes.
  • Talk through your whole look: Brittany can plan the lip together with your skin, eyes, dress, and overall wedding style.
  • Discuss options at your trial: Talking through choices makes the decision easier.

Brides have described Brittany’s work as natural and “you but elevated,” which is a helpful guide whether you pick red or something softer.

Prepare your skin on schedule, too. Start a consistent skincare routine at least four weeks before the wedding, skip new skincare products or treatments in the final 10 days, and stay hydrated in the week leading up to the event, especially in summer. If you have specific concerns about fine lines, dryness, or how makeup settles on your skin, discuss them during your trial. Brittany also shares guidance on bridal makeup for mature skin.

Because Brittany is fully mobile, she comes to your home, hotel suite, resort room, or estate with a complete professional kit, including studio-quality lighting and seating. Setup takes about 15 to 20 minutes. You skip the salon commute, and your getting-ready party stays together.

Her general guidance is roughly 60 to 90 minutes for the bride and 45 to 60 minutes per bridesmaid. For larger bridal parties, she brings additional artists so everyone finishes on schedule without cutting corners on the bride’s application.

Brittany trained at Empire Academy of Makeup in Orange County. You can see examples of her bridal work in the portfolio and read more about her background on the About page.

Plan Your Red Lip Bridal Look

Choosing a red lip for your wedding comes down to finding a shade that complements your complexion, dress, and overall bridal style. Brittany can discuss your makeup preferences and wedding plans to help you explore the right look. If you’re comparing artists, review these questions to ask before hiring a bridal makeup artist to prepare for your consultation.

Spring and fall wedding dates in Orange County can book quickly, so reach out once your venue is confirmed. A signed contract and deposit secure your date. Schedule a free consultation to discuss your bridal makeup and availability.

Frequently Asked Questions

1. What’s the best way to prep my skin for red lip bridal makeup?

Start a consistent skincare routine at least four weeks before your wedding. Avoid new skincare products or treatments during the final 10 days. Stay hydrated during the week leading up to the event, especially in summer. At your trial, tell Brittany about any skin sensitivities, reactions, or recent treatments. This helps her plan your makeup accordingly.

2. How long will red lip bridal makeup last through the ceremony and reception?

Wear time depends on your skin, the weather, and how much you eat, drink, and kiss. Exact results cannot be guaranteed. Careful preparation, professional products suited to the conditions, and proper setting techniques can help your look last through the ceremony, photography, and reception. A trial lets you test the approach on your own skin. Brittany also provides a complimentary touch-up kit with lipstick for quick refreshes.

3. Can red lip bridal makeup be adjusted for my skin tone or type?

Yes. Brittany builds each look around your skin, dress, and venue. She also adjusts her techniques for different ages and skin types, including mature skin. Some formulas can settle into fine lines or create a heavy finish. Your trial is a good time to compare red shades and choose a look that feels like you.

4. Does red lipstick work with a natural bridal makeup look?

Yes. Red lipstick can be the main statement in an otherwise natural look. Soft eye makeup and a balanced complexion help keep the overall result polished. Choosing a shade you feel comfortable wearing also helps. This approach lets your lips stand out without making every feature compete for attention.

5. What should I bring to a bridal makeup trial if I am considering a red lip?

Bring reference photos of red lipstick shades and makeup looks you like. Photos of your dress and wedding color palette are also helpful. Tell Brittany about your usual makeup preferences and any skin sensitivities. Trying different shades during your trial lets you see how they look in various lighting conditions. You can then decide between a bold red and a softer alternative.

Posted on

Smokey Eye Bridal Makeup: When It Works and When to Skip It

smokey eye bridal makeup

Smokey eye bridal makeup can look stunning, but it is not the right fit for every bride or every wedding. The choice depends on your features, your dress, your venue, and how you want to feel.

At Brittany Brown Beauty, Brittany Brown draws on more than 11 years in the makeup industry and her “enhance, don’t mask” approach. As a bridal makeup artist in Orange County, she creates looks that bring out each bride’s natural features instead of hiding them. Whatever style you choose, the goal stays the same: you look like yourself, but elevated.

Use this checklist to decide whether a smokey eye belongs in your wedding-day look.

What Makes a Smokey Eye Bridal-Appropriate

smokey eye bridal makeup

A bridal smokey eye can be softer than a dramatic night-out version. It focuses on soft blending and dimension instead of harsh edges or heavy darkness. Brittany specializes in enhancing natural features through soft shadows and subtle highlights, which fits a polished, wearable approach.

  • Soft blending: Edges look diffused, not sharp.
  • Dimension over darkness: Depth comes from layered shadow, not a single heavy shade.
  • Balance with the rest of the face: Glowing skin and a softer lip can keep the eyes from feeling heavy. Brittany’s no-makeup-makeup style centers on radiant skin and warm, bronzed contour instead of heavy coverage.
  • A finish that suits you: The overall look should still feel like you. Your preferred skin finish matters, too. Comparing dewy and matte bridal makeup can help you decide how you want your complexion to look alongside a more defined eye.

When a Smokey Eye Works Well

  • You wear dramatic eye makeup often: If a defined eye feels natural to you, it may feel comfortable on your wedding day.
  • Your dress and style are formal or evening-focused: A deeper eye can suit a black-tie or evening celebration. Consider the gown’s neckline and details, too, especially if you are wearing a strapless or off-the-shoulder dress.
  • You want a statement feature: Brittany sees makeup as an art form and a way to express your individual style, so a bolder eye can be a beautiful choice.
  • Your features suit it: Brittany shapes the look around your features, rather than using the same approach for every bride. For example, brides with darker hair can explore different ways to coordinate their eye makeup with their overall look in these bridal makeup ideas for brunettes.
  • You love it at your trial: Brittany strongly recommends a bridal trial. She tests the look and product formulas directly on your skin, works through adjustments, and makes sure you know what to expect on your wedding day.

When to Consider a Softer Alternative

  • You prefer a very natural look: If you rarely wear eye makeup, a softer approach may feel more like you.
  • Your venue has bright, direct light: Talk through how much depth suits an outdoor setting with Brittany. Weather matters, too, particularly for summer events. These bridal makeup tips for humid summer weddings in Orange County cover conditions worth considering when planning your look.
  • You expect many happy tears: One San Diego bride shared that her makeup stayed flawless all day, even through happy tears, but no one can promise how any look will wear.
  • Your dress is detailed or delicate: A softer eye can let the gown take center stage, especially when you want a balanced look with a strapless or off-the-shoulder neckline.
  • You wear glasses: Mention it to Brittany so she can plan the look with your frames in mind.
  • You want a timeless feel: A softer eye can suit brides who prefer a natural look.

A softer alternative can still add depth. Warm, blended shadows and subtle highlights give definition without the intensity of a full smokey eye. Some brides choose a softer middle ground between the two.

How to Test It at Your Trial

smokey eye bridal makeup
  • Bring reference photos: Images of smokey looks you love, and ones you do not, give Brittany a clear starting point.
  • Bring photos of your dress and venue: Your gown and setting shape how much depth works. If you’re considering a particular neckline, you can also review these ideas for bridal makeup with strapless and off-the-shoulder dresses.
  • Check the look in different lighting: Natural light and indoor light can show eye makeup differently.
  • Ask about wear: Careful prep, professional products suited to Southern California conditions and your skin type, and final setting techniques can help the look hold through the ceremony, photography, and reception, though no one can promise exactly how any makeup will wear after a full day.
  • Share your skin details: Tell Brittany about any skin sensitivities, reactions, or recent treatments. If you have specific concerns about redness, discoloration, or uneven skin tone, ask whether corrective makeup techniques may be appropriate for your needs.
  • Speak up about comfort: Adjustments are easiest at the trial, so say so if anything feels too heavy.
  • Check your foundation: The eye look is only one part of the final result. Finding a base that suits your skin and photographs naturally is also important, so review how to choose the right foundation shade for your wedding day.
  • Prepare your skin on schedule: Start a consistent skincare routine at least four weeks before the wedding, skip new skincare products or treatments in the final 10 days, and stay hydrated in the week leading up to the event, especially in summer.

If you are still deciding whether a dramatic eye suits you, a trial gives you space to compare a softer version with a more defined look. Read more about what happens during a bridal makeup trial and what to expect before your appointment. It can also help to prepare a few questions to ask before hiring a bridal makeup artist so you understand the artist’s process and approach.

Because Brittany is fully mobile, she comes to your home, hotel suite, resort room, or estate with a complete professional kit, including studio-quality lighting and seating. Setup takes about 15 to 20 minutes. You skip the salon commute, and your getting-ready party stays together.

Her general guidance is roughly 60 to 90 minutes for the bride and 45 to 60 minutes per bridesmaid. For larger bridal parties, she brings additional artists so everyone finishes on schedule without cutting corners on the bride’s application. Brides also receive a complimentary touch-up kit with lipstick, powder, and blotting sheets.

Brittany trained at Empire Academy of Makeup in Orange County. You can see examples of her bridal work in the portfolio and read more about her background on the About page.

Plan Your Wedding-Day Makeup

Choosing between a smokey eye and a softer bridal look depends on your personal style, features, and wedding setting. Brittany can discuss your makeup preferences, dress, and wedding plans to help you find a look that suits you. Spring and fall wedding dates in Orange County can book quickly, so reach out once your venue is confirmed. A signed contract and deposit secure your date. Schedule a free consultation to discuss your preferred look and availability.

Frequently Asked Questions

1. What’s the best way to prep my skin for smokey eye bridal makeup?

Start a consistent skincare routine at least four weeks before your wedding. Avoid new skincare products or treatments during the final 10 days. Stay hydrated during the week leading up to the event, especially in summer. At your trial, tell Brittany about any skin sensitivities, reactions, or recent treatments. This helps her plan your makeup accordingly.

2. How long will smokey eye bridal makeup last through the ceremony and reception?

Wear time depends on your skin, the weather, and how much time you spend outdoors. Exact results cannot be guaranteed. However, careful skin prep, professional products suited to the conditions, and proper setting techniques can help your look last through the ceremony, photography, and reception. A trial lets you test the approach on your own skin. Brittany also provides a complimentary touch-up kit for quick refreshes.

3. Can smokey eye bridal makeup be adjusted for my specific skin tone or type?

Yes. Brittany builds each look around your skin, dress, and venue. She adjusts her techniques for different ages and skin types, including mature skin. Some formulas can settle into fine lines or create a heavy finish. Your trial is the ideal time to test different shades and decide how soft or dramatic you want your look to be. This helps ensure the final result still feels like you.

4. Can I wear a smokey eye for an outdoor or daytime wedding?

Yes. A smokey eye can suit an outdoor or daytime wedding when the depth and blending complement your setting and personal style. A softer, more diffused look can feel more balanced in bright natural light. Your trial gives you time to compare options before choosing your final look.

5. Is a smokey eye suitable for mature skin?

Yes. The key is choosing shades, textures, and blending techniques that suit your skin and preferences. Heavy layers are not always necessary. Discuss your skin concerns with Brittany during your trial. Together, you can find a comfortable look that enhances your features.

Posted on

Bold Bridal Makeup vs Soft Glam: Choosing Your Style

bold bridal makeup vs soft glam

Choosing between bold bridal makeup vs soft glam is a common style decision once the dress and venue are set. Both can look beautiful, and the right one depends on your features, your wedding, and how you want to feel.

At Brittany Brown Beauty, Brittany Brown draws on 11+ years in the makeup industry and her “enhance, don’t mask” approach. Every look she builds aims for the same result: you look like yourself, but elevated.

This guide compares both styles so you can walk into your trial with a clear idea of what you want.

What Defines Bold Bridal Makeup

Bold bridal makeup puts definition first. It usually means stronger color or contrast on the lips, eyes, or both, with a more noticeable finish. Think of a deep lip, a dramatic eye, or sharper contour that stays visible in photos and from across the room.

Bold does not have to mean heavy. Brittany sees makeup as an art form and a way to express your individual style, so a bolder look can still work with your features instead of covering them. A bold lip with soft, glowing skin, for example, keeps the focus on one feature and leaves the rest natural.

Brittany builds each bridal look around your skin, your dress, and your venue instead of a fixed package look. If you love a bolder style, tell her at your trial so you can test how much color and definition feels right.

What Defines Soft Glam

Soft Glam Makeup

Soft glam sits between natural and dramatic. It looks polished and photo-ready, with defined eyes, flattering color, and glowing skin, but nothing feels heavy or harsh. Brittany’s approach centers on enhancing natural features through soft shadows and subtle highlights, and her signature no-makeup-makeup look focuses on glowing skin and warm, bronzed contour instead of heavy coverage.

Soft glam suits brides who want to feel dressed up without feeling like they are wearing a lot of makeup. Brides have described Brittany’s work as natural and “you but elevated,” and that phrase captures what soft glam aims for. If you are also considering a more understated finish, comparing soft glam vs. natural bridal makeup and what actually photographs better can help you decide how much definition you prefer.

Head-to-Head: Photos, Durability, and Personality Fit

Bold bridal makeup is defined and statement-making. The focus is strong color or contrast on the lips or eyes, and it stands out in portraits and group shots. Soft glam is polished, glowing, and natural. The focus is skin, soft shadows, and subtle highlights, and it looks refined both up close and from a distance.

For personality fit, bold suits brides who love color and a dramatic moment. Soft glam suits brides who want to look like themselves, but elevated. At your trial, a bold look is a chance to test how much color feels right, and a soft glam look is a chance to test how much definition feels right.

Both styles hold up best with careful prep. Brittany starts with unrushed skincare and base preparation, applies professional products suited to Southern California conditions and your skin type, and finishes with setting techniques. If dryness or flaky patches are a concern, addressing them before the wedding can help your foundation sit more evenly. These tips on skin prep for dry or flaky patches before your wedding offer additional guidance.

No one can promise how any look will wear after a full day, which is why a trial matters for both styles.

Which One Is Right for You

Best Bridal Makeup for Oily, Dry, and Acne-Prone Skin

The best choice comes from a few simple questions:

  • How do you usually wear makeup? If you wear bold lips or dramatic eyes often, a bold bridal look may feel natural. If you prefer a lighter routine, soft glam is likely to feel more familiar.
  • What does your dress look like? A simple silhouette can carry a bold lip well, while a detailed gown may pair better with softer makeup. Consider the fabric, embellishments, and overall silhouette when choosing your finish. This guide to bridal makeup for different wedding dresses can help you coordinate your look with your gown. If you are wearing a strapless or off-shoulder design, the neckline also affects how your shoulders and collarbone frame the finished look, as explained in this guide to bridal makeup for strapless and off-shoulder necklines.
  • Where is your venue? Outdoor and coastal settings bring sunlight, humidity, and wind, so the plan should suit the setting. A ceremony in bright sunshine may call for different adjustments from one held under gray skies. For the latter, these tips on bridal makeup for rainy or overcast wedding days explain how softer light can affect your makeup choices. For coastal celebrations, working with a bridal makeup artist in Laguna Beach, CA can also help you plan around the local setting.
  • How do you want to feel? Pick the look that makes you feel confident and relaxed.
  • How do you want your photos to look years from now? Think about whether you want a timeless soft finish or a statement look.

The size and style of your celebration can also influence your getting-ready plans. Brides organizing a destination wedding with hair and makeup in Southern California may need to coordinate services with travel and venue logistics, while couples planning a smaller celebration can explore elopement hair and makeup in Orange County.

If you cannot decide, a trial helps. Brittany strongly recommends a bridal trial. She tests the look and product formulas directly on your skin, works through adjustments, and makes sure you know what to expect on your wedding day. Some brides choose a middle ground, such as a soft glam base with one bolder feature. Bring reference photos and tell Brittany about any skin sensitivities, reactions, or recent treatments.

Brittany is fully mobile, so she comes to your home, hotel suite, resort room, or estate with a complete professional kit, including studio-quality lighting and seating. Setup takes about 15 to 20 minutes. You skip the salon commute, your getting-ready party stays together, and the timeline stays intact. Her general guidance is roughly 60 to 90 minutes for the bride and 45 to 60 minutes per bridesmaid. For larger parties, she brings additional artists so everyone finishes on schedule without cutting corners on the bride’s application. Brides also receive a complimentary touch-up kit with lipstick, powder, and blotting sheets.

Book Your Bridal Makeup Consultation

Brittany offers mobile bridal makeup throughout Orange County, with each look tailored to your preferences and wedding style. Browse her bridal makeup portfolio for inspiration and learn more about Brittany and her approach to makeup. For more details, visit the bridal makeup artist in Orange County, CA service page.

Ready to choose between bold bridal makeup and soft glam? Schedule a consultation to discuss your preferred look, wedding details, and availability.

Frequently Asked Questions

1. What’s the best way to prep my skin for bold bridal makeup vs soft glam?

Both styles start the same way. Begin a consistent skincare routine at least four weeks before your wedding, skip new skincare products or treatments in the final 10 days, and stay hydrated in the week leading up to the event, especially in summer. At your trial, tell Brittany about any skin sensitivities, reactions, or recent treatments so she can plan around them.

2. How long will bold bridal makeup vs soft glam last through the ceremony and reception?

Wear time depends on your skin, the weather, and how much time you spend outdoors, so no one can promise an exact result. Careful prep, professional products suited to the conditions, and final setting techniques all help either style hold through the ceremony, photography, and reception. A trial lets you test the plan on your own skin. Brittany also gives brides a complimentary touch-up kit for quick refreshes.

3. Can bold bridal makeup vs soft glam be adjusted for my specific skin tone or type?

Brittany builds each look around your skin, your dress, and your venue, so the plan changes from bride to bride. She also adjusts technique for different ages and skin types, including mature skin, where some formulas can settle into fine lines or look heavy. Your trial is the best place to test products and confirm the look feels like you.

4. Can I combine bold bridal makeup with soft glam?

Yes. You can combine elements of both styles to create a look that suits your personality. For example, you might choose soft, glowing skin and subtle contour with a more dramatic eye or a deeper lip color. Discuss your preferred features during the trial so Brittany can balance the look without making it feel too heavy.

5. Does bold bridal makeup look better than soft glam in outdoor wedding photos?

Neither style is automatically better. Bold makeup can create stronger definition in portraits, while soft glam offers a more understated finish. The result depends on your features, the lighting, your skin, and the overall look you want. Testing your preferred style during a trial helps you see how it appears in different lighting before the wedding day.

Posted on

Bridal Makeup for Fair Skin: Product and Shade Guide

Bridal Makeup for Fair Skin

Fair skin has a reputation for being “easy” to work with, but it’s actually one of the more precise tones to get right. Small shade mismatches show up fast. Warmth that’s slightly off reads as orange. Coolness that’s slightly off reads as gray or ashy. And because fair skin often shows undertones more visibly than deeper tones, there’s less room for a product to be “close enough.”

That precision matters even more on a wedding day, where photography, lighting changes throughout the day, and hours of wear all put makeup to the test. A shade that looks right in the mirror during a quick trial swatch can behave differently once it’s been on for six hours under a mix of natural and flash photography.

Brittany Brown has spent more than 11 years building bridal looks for a wide range of skin tones, including fair skin, and has seen firsthand how often shade-matching gets treated as an afterthought when it should be one of the first decisions made. Brittany’s approach stays the same regardless of skin tone: enhance, don’t mask. Here’s how that philosophy translates specifically for fair-skinned brides.

Why Fair Skin Needs a Specific Approach

Fair skin tends to show undertones more visibly than deeper skin tones, which means the difference between a great shade match and a slightly-off one is often more noticeable. A foundation with too much yellow or gold in it can look artificially warm. One with too much pink or blue can look washed out or cool in a way that doesn’t match the rest of the skin.

Fair skin can also be more prone to visible redness, whether from sun exposure, rosacea-prone skin, or simple flushing on wedding-day nerves. That means color-correcting and base work often matter more here than they would on a tone where redness is less visible to begin with.

None of this means fair skin is harder to work with in a bad way. It just means the margin for error is smaller, which makes shade-matching and undertone identification worth getting right from the very first trial.

Building the Base

Foundation and Concealer Shade-Matching

Getting the right shade starts with identifying undertone, not just depth. Two brides can have the exact same fairness of skin but need completely different foundation formulas if one leans pink and the other leans golden.

Testing shades along the jawline, in natural light, is still one of the most reliable ways to catch a mismatch before it becomes a wedding-day problem. This is exactly the kind of detail a trial is built to catch. Seeing a shade in the mirror under trial lighting and seeing it days or weeks later on skin that may have changed slightly with the season are two different things, which is part of why testing everything ahead of time matters.

Avoiding Ashy or Overly Warm Tones

Ashy and overly warm are the two most common shade-matching mistakes on fair skin, and they tend to happen for different reasons. Ashiness often comes from a foundation with too much cool or gray undertone, or from translucent powder that oxidizes strangely against fair skin. Overly warm tones usually come from a foundation that reads fine in the bottle but skews more golden than the actual skin once it’s blended and set.

Avoiding both comes down to testing in the right conditions. A shade that looks accurate under warm indoor lighting can look completely different under daylight or flash photography, which is why testing outdoors or near a window, not just under a bathroom light, tends to catch problems before they show up in wedding photos.

Setting Without Looking Cakey

Fair skin can be more prone to showing texture through a heavy or overly powdered finish, especially in photos. A setting approach that’s too heavy-handed can flatten the skin and make it look more matte and dense than it actually is in person.

A lighter, more targeted approach to setting, focusing on areas that need more control rather than applying an even heavy layer everywhere, tends to hold up better and look more natural through the day. This is another detail worth testing during a trial, since how skin responds to setting products can vary quite a bit from one bride to the next.

Blush, Bronzer, and Lip Shades That Work

Fair skin tends to pair well with softer, more rosy or peachy blush tones rather than deep or heavily pigmented shades, which can look harsh or overly stark against lighter skin. A light hand goes a long way here, building color gradually rather than applying it heavily from the start.

Bronzer is worth using carefully on fair skin. A shade that’s too warm or too dark relative to the natural skin tone can look muddy or create an obvious line of demarcation, especially in photos. A bronzer close to the skin’s natural depth, used mainly for warmth rather than dramatic contouring, tends to look more cohesive.

Lip color has a lot of range on fair skin, from soft rosy nudes to deeper berries, depending on the rest of the look and personal preference. What matters most is testing the actual shade against the skin in person, since lip colors can look different in a tube than they do once applied and blended.

Through all of it, the goal stays consistent: a look that still feels like the bride, just elevated. That’s the outcome most brides describe once their shade-matching and base work come together correctly, and it’s worth treating as the standard rather than the exception.

For examples of how this looks in practice, the portfolio includes bridal looks built for a range of skin tones, including fair skin. Brides ready to talk through their own coloring and vision can find the easiest next step by reaching out directly.

Frequently Asked Questions

1. What’s the best way to prep my skin for bridal makeup on fair skin?

A consistent skincare routine with moisturizer and SPF in the weeks before the wedding helps foundation apply smoothly and evenly. Brides should avoid major skincare changes close to the wedding date, since new products can affect how the skin looks and behaves. A trial gives the bride and artist the best opportunity to confirm that the skin responds well to the products they plan to use.

2. How long will bridal makeup for fair skin last through the ceremony and reception?

With the right prep, shade-matching, and setting technique, a well-built look can hold through a full day of ceremony, photos, and reception. Wear time can vary based on skin type and how prone the skin is to oil or dryness, which is exactly why testing products during a trial matters before the wedding day.

3. Can bridal makeup for fair skin be adjusted for my specific undertone or skin type?

Yes. Every recommendation here is a starting point, not a fixed formula. Undertone, coverage needs, and finish are all assessed and adjusted during the trial, so the final look fits the individual bride rather than a generic approach to fair skin.

Posted on

How to Choose Bridal Makeup That Matches Your Dress Neckline

Choose Bridal Makeup That Matches Your Dress Neckline

The dress usually gets chosen first. The shoes, the veil, the jewelry, all of it tends to build around that one decision. Makeup should follow the same logic, but it’s often the part that gets planned last, sometimes based on a single inspiration photo that has nothing to do with the dress itself.

That disconnect is worth avoiding. A neckline changes how much skin is visible, where the eye naturally lands, and how much visual “space” the face has to work with. A look that’s perfect for a strapless ballgown can feel unbalanced on a high-neck illusion gown, not because either look is wrong, but because they’re solving for different proportions.

Brittany Brown has spent more than 11 years building bridal looks around dresses of every silhouette, and the neckline is one of the first things she considers before a single product goes on the skin. Her approach comes back to the same idea regardless of dress style: enhance, don’t mask. Here’s how that plays out across different necklines, so the makeup and the dress work together instead of competing.

Why Neckline Should Inform Your Makeup Choices

A neckline determines how much skin is on display and, by extension, how much visual weight the face carries in the overall look. A strapless dress puts shoulders, collarbone, and neck fully on display, which spreads the eye across a wider area. A high collar removes all of that, which concentrates attention almost entirely on the face.

Neither is better than the other, but they call for different decisions. More exposed skin can support a bolder, more dramatic makeup moment, since there’s more of the body sharing visual focus. Less exposed skin means the face has to carry more of the look on its own, which usually calls for more intentional, but not necessarily heavier, choices near the eyes and lips.

This is part of why a single “bridal makeup look” doesn’t really exist as a universal formula. What works is understanding the dress first, then building the makeup to complement it.

Matching Makeup to Neckline Type

Strapless and Off-Shoulder

With shoulders, collarbone, and upper chest all visible, strapless and off-shoulder dresses give a look more room to breathe. This is where a slightly bolder lip or a more defined eye tends to feel balanced rather than overdone, since there’s more exposed skin elsewhere to offset it.

Bronzed, glowing skin often works especially well with this silhouette, since the shoulders and chest are part of the overall picture in photos. A cohesive glow from face to shoulders tends to photograph more seamlessly than makeup that stops abruptly at the jawline.

High-Neck and Illusion

High necklines cover the collarbone and often part of the neck, which shifts nearly all the visual focus to the face. Every choice near it, from brow shape to lip color, carries more weight than it would with a more open neckline.

This calls for a bit more intention in the details: a defined eye paired with a softer, luminous base, or an elevated lip shade with more depth than a barely-there nude. Soft glam tends to balance well against the formality of a structured collar or lace neckline, keeping the look polished without competing with all the detail already happening near the face.

Sweetheart and V-Neck

Sweetheart and V-neck styles sit in between the two extremes, showing some skin at the chest while still keeping the shoulders and neck relatively open. This middle ground gives some flexibility, supporting either a soft, romantic look or something with a bit more definition, depending on the rest of the dress and overall styling.

Because these necklines are so common, they’re also where personal preference tends to matter most. There’s rarely a single “correct” answer here, more a range of options that all work, with the final decision coming down to what feels most like the bride herself.

Bringing It Together With Your Dress and Venue

Neckline is one piece of the puzzle, but it doesn’t stand alone. Fabric texture, lace detailing, venue lighting, and even the time of day all factor into a finished look. A lace high-neck dress at an outdoor evening wedding calls for different considerations than a sleek strapless gown at a bright daytime venue, even though both might fall into similar makeup categories on paper.

This is exactly why a trial matters. It’s the opportunity to see how a look actually translates once it’s on, next to the real dress, under lighting similar to the wedding day. Skin can respond differently than expected, colors can read differently in person than in photos, and small adjustments made during a trial often make the biggest difference on the actual day.

The goal through all of it stays the same regardless of neckline: a bride who looks like herself, just elevated. That’s the outcome most brides describe after their makeup comes together the way it’s supposed to, and it’s the standard every look is built around.

For a closer look at how different necklines and silhouettes influence the finished look,explore Brittany Brown Beauty or browse the portfolio. If you’d like personalized guidance on choosing makeup that complements your wedding dress, contact to discuss your vision and wedding day plans.

Frequently Asked Questions

1. What’s the best way to prep my skin before choosing bridal makeup for my dress neckline?

A consistent routine with moisturizer and SPF in the weeks leading up to the wedding gives foundation a smooth, even base to work with, regardless of neckline style. Bigger skincare changes are best avoided close to the wedding date. A trial is the best time to confirm the skin is ready and responding well to the products being used.

2. How long will bridal makeup matched to my neckline last through the ceremony and reception?

With the right prep and setting technique, a well-built look can hold through a full day of ceremony, photos, and reception, regardless of dress style. Wear time can vary based on skin type, venue, and weather, which is part of why testing everything during a trial is worth the time before the wedding day arrives.

3. Can this be adjusted for my specific skin tone or type?

Yes. Every neckline recommendation here serves as a starting point, not a fixed formula. During the trial, the artist selects eye intensity, lip shade, and finish based on the individual bride so the final look complements her coloring and skin needs instead of following a generic template.